Best Chocolate Cake Recipe
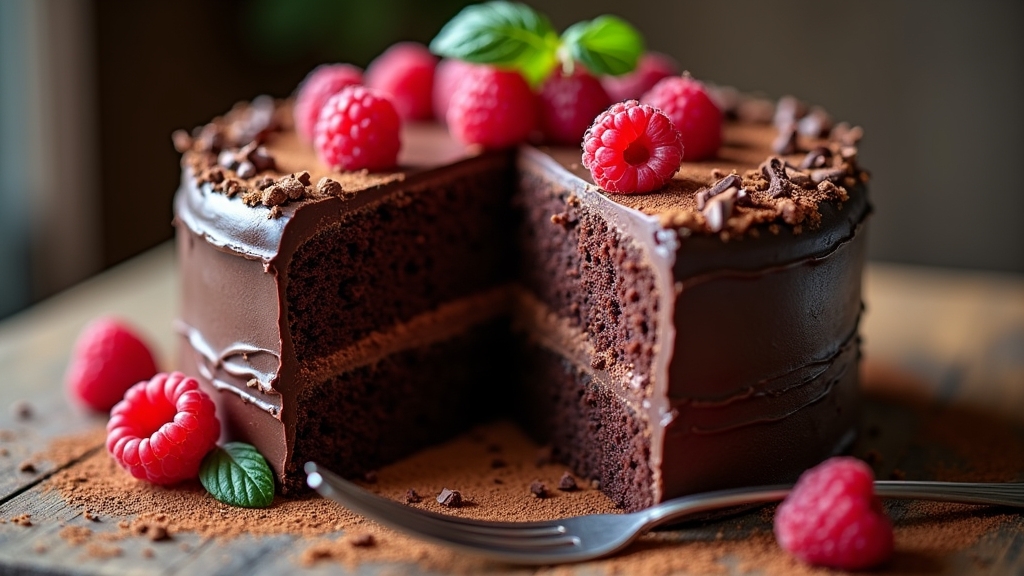
When I think of the best chocolate cake recipe, I imagine rich flavors and perfect textures that transform any occasion into a celebration. This moist cake combines simple ingredients like unsweetened cocoa, eggs, and boiling water, creating a decadent treat. The balance of flavors is key, and I love experimenting with different frostings and enhancements, like a hint of coffee or cinnamon. Stick around, and I’ll share more tips and variations to make your chocolate cake truly unforgettable!
Contents
History
When I plunge into the history of chocolate cake, I’m always fascinated by how this beloved dessert evolved from its humble beginnings. The chocolate origins trace back to ancient Mesoamerica, where cacao was revered and used in drinks long before it ever graced a cake. As the baking evolution unfolded, chocolate found its way into the kitchens of Europe in the 17th century, transforming desserts forever. Early cakes were often dense, but innovations in baking techniques and ingredients led to lighter, fluffier creations. It’s incredible to think that what started as a simple mixture has now blossomed into countless variations, each one more delicious than the last. This journey of chocolate cake reflects not just culinary creativity, but also our enduring love for chocolate.
Recipe
Chocolate cake is a classic dessert that brings joy to any occasion, whether it’s a birthday celebration, a family gathering, or just a sweet treat to indulge in. Rich, moist, and decadent, this cake can be easily made at home with simple ingredients. The key to a perfect chocolate cake lies in the balance of flavors and the technique used during mixing and baking.
This recipe will guide you through creating a delicious chocolate cake from scratch, ensuring that you achieve that perfect texture and taste. Whether you’re a novice baker or an experienced one, this recipe will yield a cake that is sure to impress your family and friends. Prepare your baking tools and let’s get started on this delightful chocolate creation!
Ingredients:
- 1 ¾ cups all-purpose flour
- ¾ cup unsweetened cocoa powder
- 2 cups granulated sugar
- 1 ½ teaspoons baking powder
- 1 ½ teaspoons baking soda
- 1 teaspoon salt
- 2 large eggs
- 1 cup whole milk
- ½ cup vegetable oil
- 2 teaspoons vanilla extract
- 1 cup boiling water
Cooking Instructions:
Preheat your oven to 350°F (175°C). Grease and flour two 9-inch round cake pans. In a large mixing bowl, combine the flour, cocoa powder, sugar, baking powder, baking soda, and salt. Whisk these dry ingredients together until well blended. Next, add in the eggs, milk, vegetable oil, and vanilla extract. Mix on medium speed for about 2 minutes until the batter is smooth and well combined. Carefully stir in the boiling water until the batter is thin. Pour the batter evenly into the prepared pans and bake for 30-35 minutes or until a toothpick inserted in the center comes out clean. Let the cakes cool in the pans for 10 minutes before transferring them to a wire rack to cool completely.
Extra Tips:
For an even more indulgent chocolate cake, consider adding chocolate chips to the batter or frosting the cake with a rich chocolate ganache or buttercream. Make sure to let the cakes cool completely before frosting to prevent melting. If you want to enhance the flavor, you can also add a splash of coffee to the batter, as it complements the chocolate beautifully. Finally, always check your cakes a few minutes before the recommended baking time to avoid overbaking, which can lead to a dry cake. Enjoy your baking!
Cooking Steps
Let’s get started on making that delicious chocolate cake! First, I’ll preheat the oven to create the perfect baking environment, then I’ll mix the dry ingredients together to build a solid foundation. Once that’s done, I’ll add the wet ingredients gradually, ensuring a rich and smooth batter.
Step 1. Preheat the Oven
Preheating the oven is an essential step that shouldn’t be overlooked. It sets the stage for a perfectly baked chocolate cake. I crank up the oven to 350°F (175°C)—the ideal oven temperature for our decadent treat. While the oven warms up, I can gather my ingredients and mentally prepare for the deliciousness ahead. This initial heat is vital; it guarantees that the cake rises evenly and has that delightful, airy texture. If I skip this step or don’t wait for the right temperature, I risk altering the baking time and potentially ending up with a dense, undercooked cake. So, I always make certain the oven’s ready before diving into mixing my ingredients. Trust me, it’s worth the wait!
Step 2. Mix Dry Ingredients Together
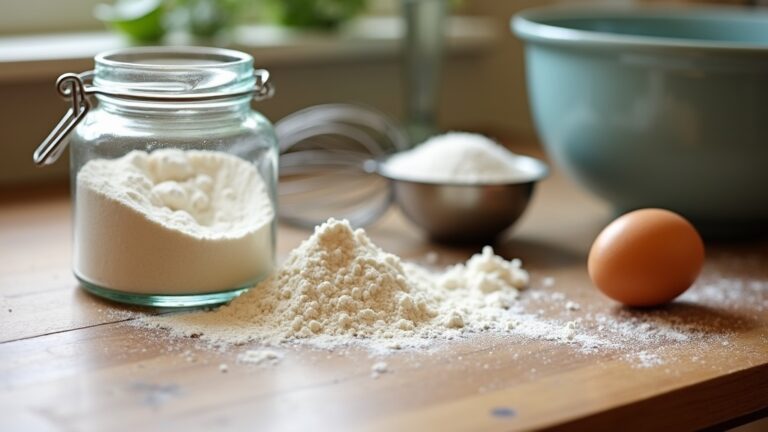
Before I plunge into mixing the wet ingredients, I focus on the dry components that form the backbone of our chocolate cake. I start by sifting together flour, cocoa powder, baking powder, baking soda, and salt. This mixing technique not only aerates the ingredients but also guarantees an even distribution of flavors. I pay close attention to the ingredient ratios, as they’re essential for achieving that perfect texture. For a rich, moist cake, I balance the cocoa with the flour, making sure neither overpowers the other. As I whisk them together, I can feel the excitement building—this blend is where the magic begins, setting the stage for a decadent chocolate experience that’s sure to impress.
Step 3. Add Wet Ingredients Gradually
With the dry ingredients perfectly mixed, it’s time to bring the cake to life by adding the wet components. I always start by pouring in the eggs and vanilla extract, letting them swirl into the dry mix. Next, I slowly drizzle in the milk and oil, allowing for gradual incorporation. This method guarantees the wet ingredient ratios are just right, creating a velvety batter that’s full of flavor. I mix gently, avoiding overworking the batter to maintain that light, fluffy texture we all crave. As the ingredients meld together, I can almost taste the rich chocolatey goodness waiting to emerge from the oven. Trust me, this step is essential for achieving that decadent cake you dream of!
Step 4. Fold in Chocolate Chips
Now comes the fun part—folding in those luscious chocolate chips! I take my time here, choosing a mix of semi-sweet and dark chocolate types to create a depth of flavor that’s simply irresistible. As I gently fold them into the batter, I can already envision the gooey pockets of chocolate melting into each slice. If you’re feeling adventurous, consider adding some white chocolate chips or even a sprinkle of sea salt to heighten the taste experience. This step is where cake variations start to shine; you could even swap in mint chocolate chips for a revitalizing twist! Every fold brings excitement, ensuring each bite bursts with rich, chocolaty goodness. Trust me, your cake will thank you!
Step 5. Bake for 30 Minutes
Once you’ve folded in those chocolate chips, it’s time to transfer the batter into your prepared cake pan and pop it in the oven. As the cake bakes, I find it fascinating how different baking techniques can affect the final product.
Here’s what to keep in mind for those magical 30 minutes:
- Temperature Check: Confirm your oven is preheated to the right temperature for even baking.
- Cake Texture: The aroma filling your kitchen signals that you’re on the right track to achieving that perfect, moist texture.
- Toothpick Test: About five minutes before the timer goes off, I like to check for doneness with a toothpick.
With patience, you’ll soon have a decadent chocolate cake to savor!
Nutritional Guide
When diving into the delightful world of chocolate cake, it’s essential to reflect on its nutritional aspects. Understanding the caloric content and ingredient benefits can elevate your baking experience. Here’s a quick guide to help you make informed choices:
| Ingredient | Nutritional Benefit |
|---|---|
| Dark Chocolate | Rich in antioxidants |
| Whole Wheat Flour | Higher fiber content |
| Eggs | Source of protein |
| Greek Yogurt | Adds moisture, lowers fat |
| Coconut Oil | Heart-healthy fats |
Final Thoughts
After exploring the nutritional benefits of chocolate cake ingredients, it’s clear that this treat can be part of a balanced diet when made thoughtfully. My final thoughts on this delightful dessert emphasize its versatility and potential for innovation.
Chocolate cake can be a balanced indulgence, showcasing its versatility and endless possibilities for creative baking.
You can experiment with numerous cake variations, ensuring everyone finds a favorite. Here are a few ideas to inspire your baking:
- Gluten-Free Options: Use almond or coconut flour for a delicious alternative.
- Healthier Frostings: Consider avocado chocolate frosting for a creamy twist.
- Flavor Infusions: Incorporate spices like cinnamon or chili for a unique kick.
Frequently Asked Questions
Can I Use Cocoa Powder Instead of Chocolate Bars?
Absolutely, I often use cocoa powder instead of chocolate bars. It’s rich, versatile, and enhances flavor beautifully. Plus, it’s a healthier alternative, offering cocoa powder benefits without compromising taste. Experimenting with it’s always rewarding!
What Can I Substitute for Eggs in the Recipe?
Finding egg alternatives feels like discovering hidden treasures in a sea of ingredients. I’ve had great success with flaxseed meal or applesauce as vegan options—both keep your recipe moist and delicious, just like eggs would!
How Long Does the Cake Stay Fresh?
I find that my cake stays fresh for about three to four days when stored properly. For ideal freshness, I recommend wrapping it tightly and keeping it in an airtight container. Enjoy those delicious slices longer!
Can I Freeze the Chocolate Cake?
Absolutely, I freeze my cakes! For freezing, I wrap it tightly in plastic and foil. When I thaw, I let it sit in the fridge overnight. This keeps it moist and delicious. Give it a try!
What Toppings Pair Well With Chocolate Cake?
When I think about toppings for chocolate cake, I envision rich chocolate ganache, airy whipped cream, and fresh berries. Each adds a unique flair, enhancing the cake’s decadence while transforming every bite into a delightful experience.
Conclusion
As I take my last bite of this decadent chocolate cake, I can’t help but feel like I’ve just uncovered a hidden treasure in a vintage cookbook. Each rich layer tells a story, transporting me back to cozy kitchens filled with laughter and the sweet aroma of baking. Whether you’re celebrating a special occasion or simply indulging yourself, this recipe is bound to create sweet memories. So, grab your apron and let the chocolate magic begin!
