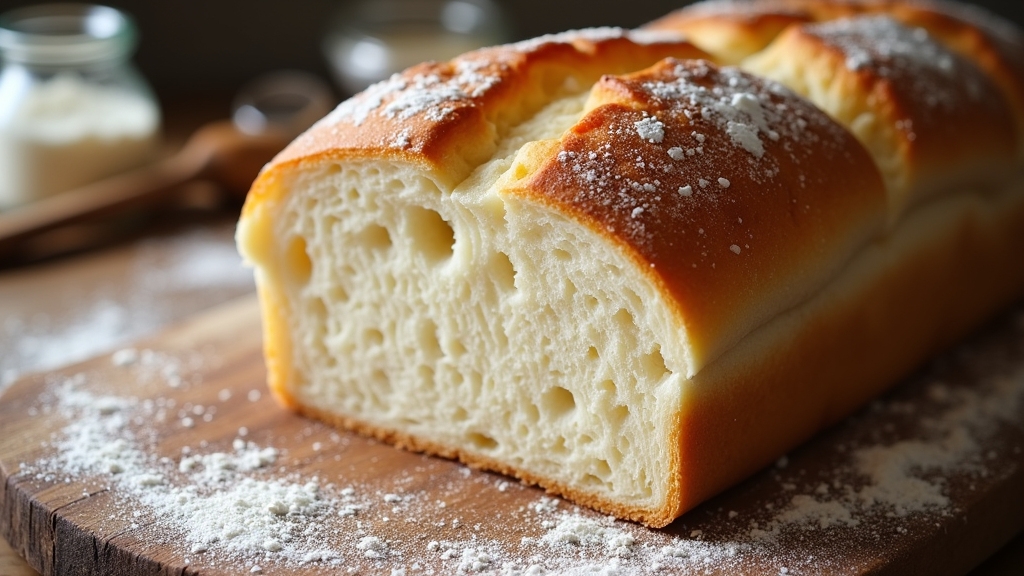
White Bread Recipe Homemade
If you’re looking to make homemade white bread, I’ve got a fantastic recipe to share! You’ll need all-purpose flour, sugar, yeast, warm water, salt, and butter. First, activate that yeast, then knead your dough until it’s smooth and elastic. Let it rise in a warm spot until doubled in size, shape it into a loaf, and bake it at 375°F. The aroma alone will fill your kitchen with warmth and joy. Stick around for more tips and techniques!
Contents
History
When I plunge into the history of white bread, I can’t help but marvel at its evolution from ancient grains to the soft loaves we enjoy today. Initially, bread symbolized sustenance and community, a basic staple for civilizations like the Egyptians and Romans who relied on durum wheat and barley. Over centuries, milling techniques advanced, allowing finer flour to emerge, leading to the white bread we recognize now. By the Middle Ages, this transformation reflected social status, with white bread becoming a luxury for the wealthy. Today, as we innovate with recipes and ingredients, I appreciate how this simple loaf carries the weight of history, embodying both nourishment and the enduring symbolism of togetherness in our shared meals.
Recipe
Baking homemade white bread is a rewarding experience that fills your kitchen with the comforting aroma of freshly baked goods. This simple recipe is perfect for both novice bakers and seasoned pros alike. With just a handful of ingredients, you can create a loaf that is soft, fluffy, and perfect for sandwiches or toast. The best part? You can customize it with your favorite add-ins, such as herbs, seeds, or even cheese, to make it your own.
To get started, verify you have all your ingredients measured and ready. This recipe uses basic pantry staples, and the process requires some time for rising, but the hands-on preparation is relatively quick. The key to a successful loaf lies in the kneading and the rise times, which allow the dough to develop its gluten structure, resulting in a light and airy texture.
Ingredients:
- 4 cups all-purpose flour
- 2 tablespoons sugar
- 1 tablespoon salt
- 1 packet (2 1/4 teaspoons) active dry yeast
- 1 1/2 cups warm water (about 110°F)
- 2 tablespoons unsalted butter, melted
In a large mixing bowl, combine the warm water and sugar, then sprinkle the yeast on top. Let it sit for about 5-10 minutes until it becomes frothy. Next, add the melted butter, salt, and gradually add the flour, mixing until a dough forms. Transfer the dough to a floured surface and knead for about 10 minutes until it is smooth and elastic. Place the dough in a greased bowl, cover it with a clean cloth, and let it rise in a warm place for about 1 to 2 hours or until it doubles in size. Once risen, punch down the dough, shape it into a loaf, and place it in a greased loaf pan. Cover and let it rise again for about 30-45 minutes. Preheat your oven to 375°F (190°C) and bake the loaf for 25-30 minutes until golden brown and sounds hollow when tapped. Let it cool on a wire rack before slicing.
For the best results, make certain your yeast is fresh and active before starting. If you prefer a richer flavor, consider using milk instead of water or adding a tablespoon of honey for sweetness. Experiment with different types of flour, such as bread flour for a chewier texture, or whole wheat flour for a healthier option. Additionally, storing the bread properly in an airtight container or bag will help maintain its freshness for several days. Enjoy your homemade bread warm, or toasted with butter for a delightful treat!
Cooking Steps
Now that we’ve gathered all our ingredients, let’s get our hands a little messy with the cooking steps. First, I’ll show you how to activate the yeast mixture, setting the foundation for that delightful rise. Once we knead the dough thoroughly, I promise you’ll be amazed at how satisfying the process can be!
Step 1. Activate Yeast Mixture
How do you know your yeast is ready to create that perfect loaf of bread? The key lies in the yeast activation process. I start by combining warm water—ideally between 100°F and 110°F—with a touch of sugar. This mixture temperature is essential, as too hot or too cold can hinder yeast growth. After stirring in the yeast, I wait patiently for about 5 to 10 minutes. During this time, I watch for bubbles and froth forming on the surface, a sure sign that my yeast is alive and thriving. This bubbling mixture signals that I can confidently move forward, knowing I’ve got a vibrant yeast ready to transform my ingredients into a delicious, airy loaf.
Step 2. Knead Dough Thoroughly
With the yeast mixture bubbling and ready, it’s time to knead the dough thoroughly. I pour the mixture into a large bowl, adding flour gradually until I achieve the perfect dough consistency—soft but not sticky. Now, I immerse myself, using my palms to push the dough away and then fold it over. This classic kneading technique helps develop the gluten, giving the bread that delightful chew. I find that a rhythmic motion works best, allowing me to feel the dough transform. After about 8 to 10 minutes, it becomes smooth and elastic. I’m always amazed at how this simple act of kneading can elevate my bread-making game, setting the stage for the perfect loaf ahead.
Step 3. Let Dough Rise Properly
After kneading the dough to perfection, I place it in a lightly oiled bowl, covering it with a damp cloth. This is where the magic begins. I let the dough rise in a warm, draft-free spot, ideally maintaining a dough temperature around 75°F to 80°F. This warmth encourages the yeast to flourish, resulting in a beautifully risen dough. I usually aim for a proofing time of about one to two hours, but I keep a close eye on it. Watching it double in size is a thrilling moment! If you’re feeling adventurous, try experimenting with longer fermentation times for deeper flavors. Patience is key here; the perfect rise will set the stage for a delicious loaf ahead.
Step 4. Shape the Dough Into Loaf
Gently deflate the risen dough by pressing down on it with your palms, releasing any trapped air. Now, it’s time for dough shaping! Transfer the dough onto a lightly floured surface and knead it briefly to bring it back together. With a rolling pin, flatten the dough into a rectangle, about 1 inch thick. From the shorter end, roll it up tightly, tucking in the edges as you go. This is essential for proper loaf formation, ensuring it rises evenly. Pinch the seam to seal it, then place the rolled dough into a greased loaf pan. Give it a gentle pat to encourage a smooth surface. You’re one step closer to that golden, homemade white bread!
Step 5. Preheat Oven to 375°F
Once the dough is shaped and nestled into the loaf pan, it’s time to get the oven ready. I turn the dial and set the oven temperature to 375°F, a magic number for achieving that perfect golden crust. While the oven preheats, I can almost smell the future aroma of fresh bread filling my kitchen. This baking technique guarantees the heat envelops the dough evenly, promoting a beautiful rise. I take this moment to gather my other ingredients, preparing for the next steps. With the oven warmed and ready, the anticipation builds—this is where the real transformation happens. Soon, my loaf will emerge, crusty on the outside and soft on the inside, showcasing the beauty of homemade bread.
Nutritional Guide
Understanding the nutritional aspects of homemade white bread can be both enlightening and empowering. When I analyze the ingredients, I find that each component contributes unique health benefits. Here’s a quick ingredient analysis to help you grasp the essentials:
| Ingredient | Nutritional Value | Health Benefits |
|---|---|---|
| All-Purpose Flour | 364 calories per cup | Energy source, B vitamins |
| Yeast | 21 calories per tsp | Aids digestion, boosts metabolism |
| Salt | 0 calories per tsp | Regulates hydration, enhances flavor |
Final Thoughts
Creating homemade white bread is not just about the final product; it’s a journey that brings together the simplicity of ingredients and the joy of baking. As I reflect on this process, I encourage you to embrace it fully. Here are some baking tips to elevate your experience:
Homemade white bread is a joyous journey, blending simple ingredients with the art of baking. Embrace the experience fully!
- Experiment with flavor variations by adding herbs or spices.
- Don’t rush the rising time; patience is key to a perfect loaf.
- Use fresh, high-quality ingredients for the best results.
Each loaf is an opportunity to refine your skills and express your creativity. Whether you stick to the classic recipe or innovate with new flavors, the warmth of homemade bread will always bring joy to your kitchen. Enjoy every moment of this delicious adventure!
Frequently Asked Questions
Can I Use Whole Wheat Flour Instead of All-Purpose Flour?
I’ve swapped whole wheat flour for all-purpose flour before. It adds amazing whole wheat benefits, boosting nutrition. Just remember, the flour texture changes, so adjust your liquids for a perfect rise and delicious outcome!
How Do I Store Homemade White Bread?
To store homemade bread, I wrap it tightly in plastic or a cloth. This keeps moisture control perfect, preventing staleness. For longer storage, I freeze slices, ensuring delightful freshness whenever I crave a taste.
Can I Freeze White Bread?
Imagine biting into soft, fresh bread. Yes, I can freeze it! I use smart freezing techniques, wrapping slices tightly. For thawing methods, I let it sit at room temperature or pop it in the toaster.
What Can I Add to Enhance the Flavor?
To enhance flavor, I love adding herbs and spices like rosemary or garlic powder. You can also experiment with cheese options like cheddar or feta for a delicious twist. It transforms the bread into something extraordinary!
How Long Does Homemade Bread Typically Last?
Homemade bread typically lasts about three to five days at room temperature, depending on its ingredients. To guarantee bread freshness, I recommend storing it in a cool, dry place, or freezing it for longer shelf life.
Conclusion
As I pull that golden loaf from the oven, the aroma envelops me like a warm hug, reminiscent of simpler times in Grandma’s kitchen. Baking homemade white bread isn’t just about the ingredients; it’s a journey that connects us to our roots and nourishes our souls. So, why not commence on this delightful adventure? With each slice, you’ll savor not just the flavor, but also the memories and love baked right in. Enjoy every crumb!
