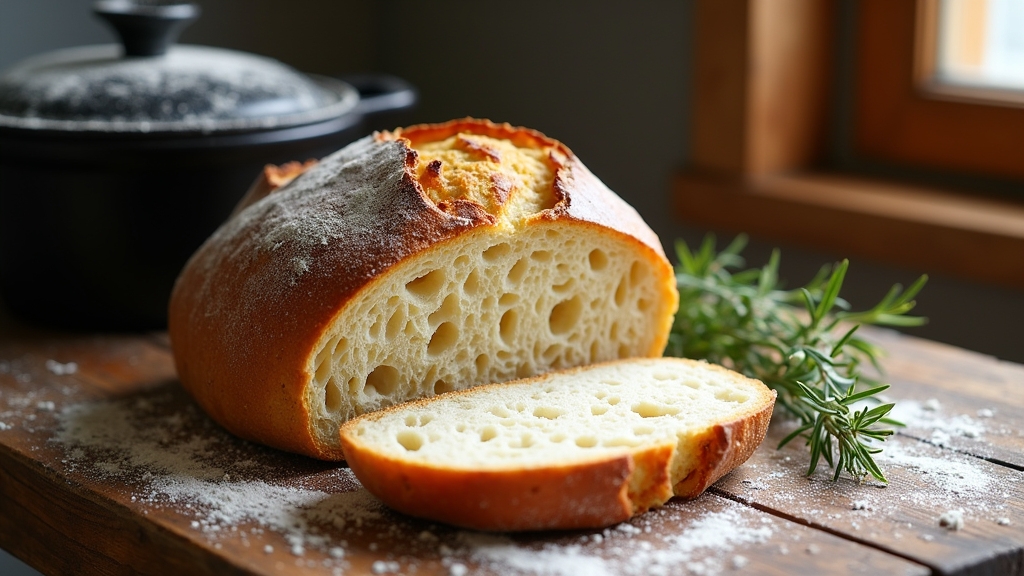
Simple Sourdough Bread Recipe
If you’re enthusiastic to make a simple sourdough bread, you just need 500g of flour, 350g of water, 100g of active starter, and 10g of salt. Start by mixing the starter and water, then combine with flour for a fantastic dough. After kneading and allowing it to rise, shape it and let it rest before baking. The result? A tangy, crusty loaf that’s both delicious and healthy. Stick around, and I’ll guide you through every step!
Contents
History
When I think about sourdough bread, I can’t help but marvel at its rich history that stretches back thousands of years. The sourdough origins trace back to ancient civilizations, where bakers discovered the magic of wild yeast and lactic acid bacteria in their dough. Imagine ancient grains, like spelt and emmer, being mixed with water and left to ferment, creating a leavening agent that transformed flatbreads into something extraordinary. This natural fermentation process not only made bread rise but also contributed to its unique flavor profile, a delicious reflection of time. As we embrace innovation in baking today, it’s exciting to think about how these ancient methods can inspire modern techniques, keeping the spirit of sourdough alive while inviting creativity in the kitchen.
Recipe
Sourdough bread is a timeless staple that offers a unique tangy flavor and a delightful crust, making it a favorite for many home bakers. Unlike conventional bread, sourdough relies on natural fermentation, which not only enhances the flavor but also improves digestibility. The process may take a bit longer, but the results are well worth the effort. With just a few ingredients and some patience, you can create a loaf that’s perfect for sandwiches, toasting, or simply enjoying with butter.
To begin your sourdough journey, you’ll need a healthy sourdough starter. If you don’t have one already, you can create your own by mixing flour and water and allowing it to ferment over several days. Once your starter is active and bubbly, you’re ready to mix your dough. The key to a great sourdough loaf is the development of gluten through gentle kneading and folding, along with the long fermentation that allows the flavors to deepen. With practice, you’ll master the art of sourdough baking and wow your friends and family with delicious homemade bread.
Ingredients:
- 500g all-purpose flour
- 350g water (room temperature)
- 100g active sourdough starter
- 10g salt
Cooking Instructions:
In a large mixing bowl, combine the flour and water, stirring until no dry flour remains. Let this mixture rest for about 30 minutes (this is called autolyse). After the rest period, add the sourdough starter and salt, mixing until fully incorporated. Knead the dough on a lightly floured surface for about 10 minutes until it becomes smooth and elastic. Place the dough in a lightly greased bowl, cover it, and let it rise at room temperature for 4-6 hours, or until it has doubled in size. After the first rise, gently shape the dough into a ball and let it rest for another 30 minutes. Shape it again and transfer to a floured proofing basket, cover it, and refrigerate for 12-18 hours. When ready to bake, preheat your oven to 450°F (230°C) with a Dutch oven inside. Once preheated, carefully transfer the dough into the hot pot, score the top with a sharp knife, and cover with the lid. Bake for 30 minutes, then remove the lid and bake for an additional 15 minutes until golden brown. Let the bread cool on a wire rack before slicing.
Extra Tips:
For the best results, make certain your sourdough starter is active and bubbly before using it in the recipe. Consider using a kitchen scale for precise measurements, as this can greatly affect the outcome of your bread. If you prefer a more sour flavor, allow the dough to ferment longer during the first rise. Experiment with different flours; adding whole wheat or rye flour can enhance flavor and nutrition. Finally, patience is key—allow your bread to cool completely before slicing to guarantee a better texture and crumb. Enjoy your homemade sourdough bread!
Cooking Steps
Now that we have our ingredients ready, let’s get started with the cooking steps that bring our sourdough to life. I’ll guide you through mixing the starter and water, followed by the essential autolyse process with flour. Each step builds on the last, creating that perfect loaf we all crave.
Step 1. Mix Starter and Water
As I prepare to mix the starter and water, I can already imagine the rich aroma of freshly baked sourdough wafting through my kitchen. I start by measuring my starter, aiming for a balanced starter ratio that suits my hydration levels. Typically, I like to use a 1:1:1 ratio of starter, flour, and water for ideal fermentation. After ensuring my starter is bubbly and active, I gently combine it with the water in a large mixing bowl. The water should be at room temperature to maintain the yeast’s importance. I use my hands to blend everything until it’s smooth and cohesive. This step is essential, as it lays the foundation for the complex flavors that will develop throughout the process.
Step 2. Autolyse Flour and Water
Once I’ve combined the starter and water, I let the mixture rest for about 30 minutes to an hour in a process called autolyse. This step is essential as it allows the flour to fully hydrate, enhancing gluten development. I love watching how the dough transforms; it becomes smoother and more elastic. The autolyse benefits are remarkable—this simple resting period helps me achieve a lighter, airier loaf. During this time, enzymes break down the flour’s starches, creating a richer flavor profile. Plus, it reduces the kneading time later on, making the whole process feel more effortless. By prioritizing flour hydration now, I’m setting the stage for a beautifully textured sourdough that will impress everyone at the table.
Step 3. Knead Dough Thoroughly
After the autolyse has worked its magic, it’s time to knead the dough thoroughly. I start by turning the dough onto a lightly floured surface, and I use a mix of kneading techniques—like the stretch and fold method—to develop that perfect gluten structure. As I work the dough, I pay close attention to its consistency; it should be elastic and slightly tacky but not sticky. If it feels too wet, I sprinkle in a bit more flour. I knead for about 10 to 15 minutes, allowing the dough to transform under my hands. With each fold and push, I can feel it becoming smoother and more resilient, setting the stage for that delightful sourdough texture we all crave.
Step 4. Bulk Ferment the Dough
To achieve that beautifully airy crumb in your sourdough, I let the dough undergo bulk fermentation, which is an essential step in developing flavor and structure. During this phase, I cover the dough and let it rest for about 4 to 6 hours at room temperature, allowing the wild yeast to work its magic. The bulk fermentation benefits are remarkable; it enhances flavor complexity and strengthens gluten, resulting in a more elastic dough. I keep an eye on it, looking for that perfect puffiness that indicates prime fermentation time. You’ll notice the dough rising and developing tiny bubbles, signaling that it’s ready for the next step. This patience pays off, leading to a loaf that’s truly exceptional.
Step 5. Shape the Dough
Now that your dough has beautifully fermented, it’s time to shape it, which is essential for achieving that perfect loaf. I start by lightly flouring my work surface, then gently turn the dough out, preserving its airy structure. With a delicate touch, I stretch and fold the dough, focusing on creating surface tension. This is where the magic of dough shaping happens! I form it into a round or oval shape, depending on the baking vessel I’m using. The aesthetics of the bread begin to shine through as the dough transforms into a taut ball. After a brief rest, I tuck the edges under for a final shape, ensuring it’s ready to rise again. This step not only enhances its appearance but also its texture.
Nutritional Guide
Although I love the delightful tang and chewy texture of sourdough bread, it’s also important to take into account its nutritional profile. This bread isn’t just delicious; it offers various health benefits thanks to its fermentation process. The ingredient breakdown reveals essential nutrients that can boost your well-being.
| Nutrient | Amount per Slice |
|---|---|
| Calories | 80 |
| Protein | 3g |
| Fiber | 1g |
Sourdough is lower in gluten and contains beneficial bacteria that aid digestion. Plus, the fermentation process enhances the bioavailability of minerals. So, when you indulge in a slice, you’re not just treating your taste buds but also nourishing your body!
Final Thoughts
When you savor a slice of sourdough bread, you’re not just enjoying a delightful treat; you’re also embracing a rich tradition steeped in flavor and health benefits. This journey into sourdough baking has been a rewarding experience, filled with exploration and creativity. I’ve discovered that with a few essential baking tips and the right kitchen essentials, anyone can master this art. The process of nurturing a starter, kneading dough, and watching it rise is incredibly satisfying. Plus, the aroma that fills your kitchen is simply irresistible! So, whether you’re a seasoned baker or just starting, I encourage you to experiment and make this recipe your own. Happy baking, and may your sourdough adventures be as fulfilling as mine!
Frequently Asked Questions
Can I Use Whole Wheat Flour Instead of All-Purpose Flour?
I’ve tried whole wheat flour as a substitution, and I loved the nutty flavor it adds. Plus, the whole wheat benefits like increased fiber make it a healthier choice. Just adjust hydration for best results!
How Do I Store Leftover Sourdough Bread?
I store leftover sourdough bread by wrapping it tightly in plastic wrap or aluminum foil. For longer storage, I freeze bread slices, making it easy to enjoy later without sacrificing flavor or texture.
What Should I Do if My Dough Is Too Sticky?
If my dough’s too sticky, I adjust by adding flour gradually, considering hydration levels. I often experiment with different flour types, like whole wheat or bread flour, to achieve that perfect balance for my sourdough.
How Can I Tell if My Sourdough Starter Is Ready?
Is my sourdough starter ready? I look for bubbles dancing on the surface, a sign of life. After following a consistent feeding schedule, it should double in size, promising delicious bread awaits. Exciting, right?
Can I Add Ingredients Like Herbs or Cheese to the Dough?
I love experimenting with herb combinations like rosemary and thyme or adding cheese types like cheddar and feta. Just mix them in gently, and you’ll elevate your bread to a whole new level of flavor!
Conclusion
As I pull the golden loaf from the oven, the warm aroma envelops me like a comforting hug. Each slice reveals a tender crumb, with a crust that crackles like a joyful serenade. Baking sourdough isn’t just about the bread; it’s a delicious journey that connects us to the art of creation. So, roll up your sleeves and embrace the magic of fermentation—your kitchen will soon be filled with the sweet symphony of baking bliss!
