Recipe for Banana Bread
If you’ve got some overripe bananas, I’ve got the perfect recipe for banana bread! Just mash three ripe bananas and stir in melted butter, baking soda, salt, sugar, and a beaten egg. Fold in flour and any mix-ins you like, then pour the batter into a greased loaf pan. Bake at 350°F for about 60-65 minutes. The result? A moist, delicious bread that’s perfect for breakfast or dessert. Stick around, and I’ll share more tips and variations!
Contents
History
When I think about the history of banana bread, I can’t help but smile at how this simple recipe has evolved over time. It all started with the banana’s origins in Southeast Asia, where its sweet, creamy flesh was cherished long before it made its way to kitchens worldwide. Fast forward to the 1930s, and we see the bread evolution kick into high gear, thanks to the rise of baking soda and the need to use overripe bananas. This innovative twist transformed leftover bananas into a delightful treat, making it a staple in American households. As we embrace new flavors and techniques today, banana bread continues to inspire creativity, remaining a delicious canvas for culinary experimentation.
Recipe
Banana bread is a beloved treat that combines the sweet, natural flavors of ripe bananas with a moist, tender crumb. It’s the perfect solution for using up overripe bananas that might otherwise go to waste. Whether enjoyed as a breakfast item, a snack, or a dessert, this delightful bread is easy to make and can be customized with your favorite add-ins, such as nuts or chocolate chips.
This recipe is straightforward, making it an ideal choice for bakers of all levels. With just a few staple ingredients and minimal preparation time, you’ll be able to whip up a delicious loaf that fills your kitchen with the irresistible aroma of baking bananas. Get ready to impress your family and friends with this homemade banana bread that is certain to become a staple in your recipe collection.
Ingredients:
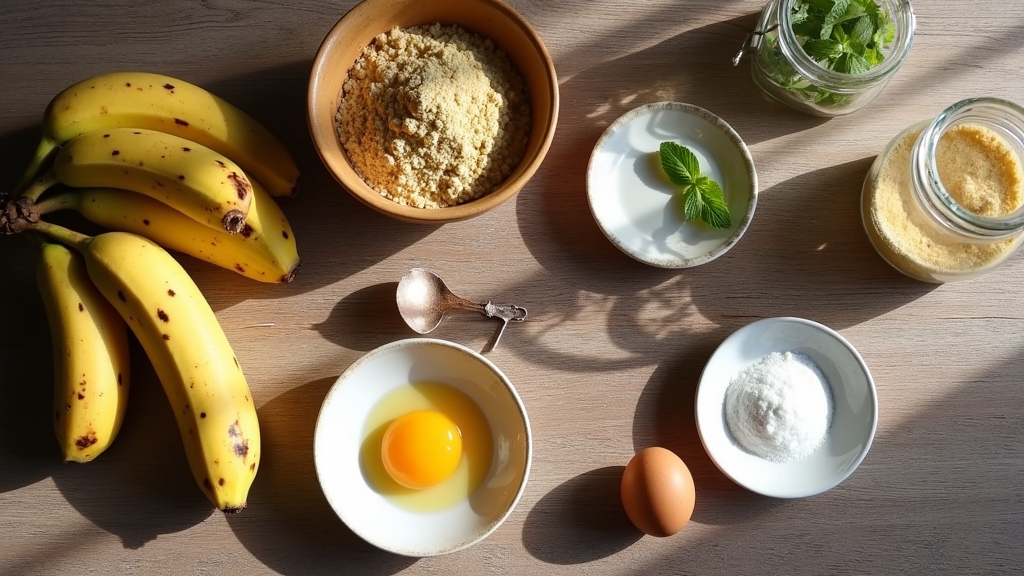
- 3 ripe bananas, mashed
- 1/3 cup melted butter
- 1 teaspoon baking soda
- Pinch of salt
- 3/4 cup sugar
- 1 large egg, beaten
- 1 teaspoon vanilla extract
- 1 cup all-purpose flour
To make your banana bread, start by preheating your oven to 350°F (175°C) and greasing a 4×8 inch loaf pan. In a mixing bowl, mash the ripe bananas with a fork until smooth. Stir in the melted butter, followed by the baking soda and salt. Mix in the sugar, beaten egg, and vanilla extract until well combined. Finally, add the flour and stir until just incorporated. Pour the batter into the prepared loaf pan and bake for 60-65 minutes, or until a toothpick inserted into the center comes out clean. Allow the banana bread to cool in the pan for a few minutes before transferring it to a wire rack to cool completely.
When making banana bread, make certain that your bananas are very ripe for maximum sweetness and flavor—blackened bananas work best! For added texture, consider folding in a handful of chopped nuts, chocolate chips, or dried fruit before baking. If you’d like to enhance the flavor further, try adding a teaspoon of cinnamon or nutmeg to the batter. Remember, banana bread freezes well, so you can enjoy a slice any time by simply wrapping it tightly and storing it in the freezer.
Cooking Steps
Let’s get started on creating that delicious banana bread! First, I preheat the oven to 350°F to guarantee it’s nice and warm for baking. Then, I’ll show you how to mash those ripe bananas and blend in the other ingredients for a delightful treat.
Step 1. Preheat the Oven to 350°F
Preheating the oven to 350°F is an essential step in creating the perfect banana bread. This oven temperature is ideal for achieving that golden-brown crust while keeping the inside moist and flavorful. As I set the oven, I can already feel the excitement building for the delicious aroma that’ll soon fill my kitchen. Proper baking techniques start with this vital step; it guarantees that my batter cooks evenly and rises beautifully. I love how the heat envelops the loaf, transforming simple ingredients into a warm, comforting treat. So, while the oven warms up, I gather my ingredients, ready to plunge into the next steps. Trust me, this initial moment sets the stage for a delightful banana bread experience!
Step 2. Mash the Ripe Bananas
With a fork in hand, I plunge into the process of mashing the ripe bananas. There’s something satisfying about this step; it’s where the magic begins. Ripe bananas, bursting with natural sweetness, offer numerous benefits, like enhanced flavor and moisture. As I mash, I focus on achieving the right consistency—smooth yet slightly chunky, allowing for a delightful texture in the final bread.
Here are some mashing techniques I find helpful:
- Use a fork for quick and easy mashing—perfect for small batches.
- Try a potato masher for a more thorough mash, especially with multiple bananas.
- Blend with a hand mixer for a silky-smooth puree, ideal for those who prefer a finer texture.
Mashing is where the flavors truly blend!
Step 3. Add Sugar and Eggs
As I gather my ingredients, I can’t help but feel a rush of excitement knowing that adding sugar and eggs is an essential step in transforming my mashed bananas into a delightful loaf. I reach for my sugar types—brown for that rich, caramel flavor, and granulated for sweetness. Mixing them together creates a luscious base that enhances the bananas’ natural taste. Next, I crack in a couple of eggs, their golden yolks promising moisture and structure. If I’m feeling experimental, I might consider egg alternatives like flaxseed or applesauce, perfect for a vegan twist. As I whisk everything together, the blend of flavors and textures begins to dance, setting the stage for a truly innovative banana bread experience.
Step 4. Mix in Flour and Nuts
Now, I carefully fold in the flour and nuts, watching as the mixture transforms into a thick, inviting batter. I love experimenting with different flour types, often opting for a blend of all-purpose and whole wheat for added depth. As I incorporate the ingredients, I can already imagine the delightful texture they’ll provide. Choosing nut varieties is equally critical; I usually go for walnuts for their rich flavor, but pecans or even hazelnuts can elevate the dish beautifully.
- Experiment with almond flour for a gluten-free option.
- Try adding toasted coconut for an unexpected twist.
- Swap in macadamia nuts for a tropical flair.
Each choice is a step toward creating a uniquely delicious banana bread that’s sure to impress!
Step 5. Pour Into a Loaf Pan
Once I’ve mixed the batter to perfection, I grab my trusty loaf pan, making sure it’s greased and ready for action. I prefer using a non-stick metal loaf pan because it promotes even baking, but glass or silicone pans can work wonders too. Selecting the right loaf pan size is essential; a standard 9×5-inch pan is my go-to for that classic banana bread shape, while mini loaf pans can yield delightful individual servings. I pour the luscious batter into the pan, filling it about two-thirds full to allow for rising. The anticipation builds as I smooth the top, ensuring it’s evenly distributed. With the pan prepped, I’m one step closer to enjoying that irresistible aroma wafting through my kitchen!
Nutritional Guide
While enjoying a slice of warm, homemade banana bread, it’s easy to overlook the nutritional benefits packed within. This delightful treat isn’t just about taste; it also offers impressive health benefits. One medium banana adds natural sweetness while providing essential vitamins and minerals. Plus, you’ll find that the caloric content can fit nicely into a balanced diet.
Here’s a quick look at the nutritional profile:
| Nutrient | Amount per Slice |
|---|---|
| Calories | 150 |
| Carbohydrates | 30g |
| Protein | 3g |
| Fiber | 2g |
| Sugars | 8g |
Incorporating banana bread into your meals can be a delicious way to enjoy nourishment without sacrificing flavor!
Final Thoughts
Banana bread isn’t just a delicious indulgence; it’s a versatile addition to our diets that can fit seamlessly into various meal occasions. Whether you’re enjoying it for breakfast, as a snack, or even dessert, this baked good offers endless possibilities.
Banana bread is a delightful treat that effortlessly complements any meal, perfect for breakfast, snacks, or dessert.
To elevate your banana bread experience, consider these baking tips and flavor variations:
- Incorporate nuts or chocolate chips for an extra crunch or sweetness.
- Experiment with spices like cinnamon or nutmeg to add depth.
- Substitute ingredients like almond flour or coconut sugar for a unique twist.
Frequently Asked Questions
Can I Use Frozen Bananas for Banana Bread?
I’ve used frozen bananas in my banana bread, and they work wonders. Their ripeness enhances flavor and moisture, making the bread incredibly delicious. Just thaw them first, and you’re good to go!
How Do I Store Leftover Banana Bread?
How do I keep my leftover banana bread fresh? The best storage method’s wrapping it tightly in plastic wrap or placing it in an airtight container—this way, it stays moist and delicious for days!
Can I Substitute Flour for a Gluten-Free Option?
I’ve experimented with gluten-free flours like almond and coconut, and they work beautifully as baking substitutes. Just keep in mind, the texture might change a bit, but the flavor remains delightful. Enjoy your baking!
What Are Some Common Banana Bread Variations?
When I bake banana bread, I love adding nutty additions like walnuts, tossing in chocolate chips for sweetness, experimenting with fruit variations like blueberries, and blending spices for a warm, aromatic twist. The possibilities are endless!
How Can I Tell if My Banana Bread Is Done Baking?
I know you might worry about overbaking, but trust those doneness indicators! I stick a toothpick in the center; if it comes out clean, my banana bread’s ready. Use these baking tips for perfect results every time!
Conclusion
In the end, baking banana bread is truly a piece of cake. The warm, sweet aroma that fills your kitchen is enough to make anyone’s mouth water. I hope you enjoy the process as much as the delicious result. Whether you slice it for breakfast or snack on it throughout the day, this treat is bound to bring a smile to your face. So, roll up your sleeves and get ready to whip up something wonderful!
