Peanut Butter Cake Recipe
When I crave something delicious, I whip up a peanut butter cake that’s simply irresistible. With creamy peanut butter, granulated sugar, eggs, vanilla, and just the right amount of flour, this cake comes together easily. I bake it until it’s golden and let it cool, then I enjoy it plain or with chocolate frosting. Each bite is filled with rich flavor and nostalgia, making it perfect for any occasion. Stick around, and I’ll share some tasty enhancements!
Contents
History
When I think about the history of peanut butter cake, I can’t help but feel a sense of nostalgia for the cozy kitchens where this delightful dessert first emerged. The origins of peanuts trace back to South America, where they were cherished for their nutritional value and versatility. As they spread globally, different cultures embraced them, leading to the cake’s cultural significance in various regions. Historical recipes reveal how families adapted traditional methods, incorporating peanut butter into their baked goods, creating unique regional variations. Each bite of peanut butter cake tells a story of innovation and adaptation, reflecting the rich tapestry of culinary history. It’s a celebration of flavors that connects us to the past while inspiring new creations today.
Recipe
Peanut butter cake is a delightful treat that combines the rich, creamy flavor of peanut butter with the moist texture of cake, making it a perfect dessert for any occasion. Whether you’re celebrating a birthday, hosting a gathering, or simply treating yourself, this cake is sure to impress. The natural sweetness of peanut butter pairs beautifully with chocolate frosting or a simple dusting of powdered sugar, creating a dessert that is both indulgent and satisfying.
This easy-to-follow recipe will guide you through the steps to create a delicious peanut butter cake that is sure to become a favorite in your baking repertoire. With just a handful of ingredients and a bit of time, you can whip up this delightful cake that everyone will love. So, roll up your sleeves and get ready to bake a cake that is not only simple to make but also incredibly delicious!
Ingredients:
- 1 cup creamy peanut butter
- 1 cup granulated sugar
- 2 large eggs
- 1 teaspoon vanilla extract
- 1 cup all-purpose flour
- 1 teaspoon baking powder
- 1/2 teaspoon baking soda
- 1/4 teaspoon salt
- 1/2 cup milk
Instructions:
Preheat your oven to 350°F (175°C) and grease a 9-inch round cake pan. In a large mixing bowl, combine the peanut butter and sugar, mixing until smooth and creamy. Add the eggs one at a time, followed by the vanilla extract, and beat until well combined. In a separate bowl, whisk together the flour, baking powder, baking soda, and salt. Gradually add the dry ingredients to the wet mixture, alternating with the milk, and mix until everything is just combined. Pour the batter into the prepared cake pan and bake for 25-30 minutes, or until a toothpick inserted into the center comes out clean. Allow the cake to cool in the pan for 10 minutes before transferring it to a wire rack to cool completely.
Extra Tips:
To enhance the flavor of your peanut butter cake, consider adding chocolate chips to the batter for a delicious twist, or serve it with a layer of chocolate ganache for an indulgent finish. If you’re looking for a gluten-free option, you can substitute the all-purpose flour with a gluten-free flour blend. Additionally, this cake can be stored in an airtight container at room temperature for up to three days or in the refrigerator for up to a week, making it a great make-ahead dessert. Enjoy your baking!
Cooking Steps
Let’s get started on making that delicious peanut butter cake! First, I’ll preheat the oven to 350°F, so it’s nice and ready for our batter. Then, I’ll mix together the peanut butter and sugar to create that rich, creamy base.
Step 1. Preheat Oven to 350°F
Before diving into the delicious world of peanut butter cake, I always make certain to preheat my oven to 350°F. This essential step sets the perfect oven temperature for achieving that ideal balance of moistness and fluffiness in the cake. I find it helpful to turn on the oven first, allowing it to reach the desired heat while I gather my ingredients. This way, I save time and guarantee even baking. One of my favorite baking tips is to use an oven thermometer, just to double-check the accuracy of my oven. A preheated oven ensures that my cake rises beautifully, creating a scrumptious treat that’s hard to resist. Trust me, you won’t want to skip this critical step!
Step 2. Mix Peanut Butter and Sugar
Next, I grab a mixing bowl and scoop in that creamy peanut butter, ready to transform it with sugar. As I blend the two together, I can already smell the nutty goodness. Peanut butter isn’t just delicious; it’s packed with protein and healthy fats, offering a satisfying boost to my dessert. I’m always on the lookout for healthier options, so I often swap regular sugar for alternatives like coconut sugar or agave syrup. These substitutes add sweetness without the guilt, making my cake a little lighter. I mix until the texture is smooth and velvety, ensuring every bite will be a delightful fusion of flavors. This step sets the foundation for a cake that’s both innovative and indulgent!
Step 3. Add Eggs and Vanilla
With the peanut butter and sugar perfectly blended, I crack in the eggs, one at a time, allowing their golden richness to meld with the mixture. I often use large eggs for their ideal balance, but feel free to experiment with medium or extra-large eggs if that’s what you have. As I whisk, I can feel the texture transforming—smooth and creamy. Then, I reach for my favorite vanilla extract, pouring in a generous splash. The aroma is intoxicating! The warm notes of vanilla complement the nutty peanut butter, adding depth to the flavor profile. I make sure to mix everything thoroughly, creating a luscious batter that promises a delightful cake. It’s a simple step that elevates my baking game!
Step 4. Fold in Flour Mixture
Gently folding in the flour mixture is an essential step that transforms the batter into something truly special. This action not only blends the ingredients but also guarantees a light and airy cake texture. Here are a few tips to make the most of this process:
- Choose the right flour types—cake flour yields a softer texture, while all-purpose flour adds structure.
- Use a spatula to lift and fold, rather than stir, to avoid deflating the batter.
- Incorporate the flour mixture in batches; this helps achieve an even consistency without overmixing.
Step 5. Bake for 25-30 Minutes
After preparing your batter, it’s time to bake it to perfection. Preheat your oven to 350°F (175°C) and pour the batter into a greased cake pan, ensuring even distribution. With a gentle nudge, slide it into the oven, using precise baking techniques to create that ideal cake texture. I set my timer for 25-30 minutes, but keep an eye on it! You’ll know it’s ready when the edges pull away slightly from the pan and a toothpick inserted in the center comes out clean. The aroma wafting through your kitchen will be irresistible! Once done, let it cool in the pan for a few moments before transferring it to a wire rack, allowing for a delightful finish to your masterpiece.
Nutritional Guide
When I whip up a scrumptious peanut butter cake, I often think about its nutritional content to guarantee it’s not just a treat but also a satisfying choice. Peanut butter, the star ingredient, brings a wealth of nutritional benefits, including protein and healthy fats. It’s a great way to indulge without the guilt!
Here’s a quick glance at the nutritional value:
| Nutrient | Amount per Slice |
|---|---|
| Calories | 350 |
| Protein | 8g |
| Fat | 18g |
| Carbohydrates | 40g |
Understanding the calorie count helps me enjoy every bite while maintaining balance. So, feel free to savor this delicious cake, knowing it’s packed with goodness!
Final Thoughts
As I reflect on this peanut butter cake, I can’t help but appreciate how it beautifully balances indulgence and nutrition. This cake isn’t just a treat; it’s a canvas for creativity. Here are a few baking tips and flavor variations to elevate your experience:
This peanut butter cake perfectly balances indulgence and nutrition, serving as a canvas for your creative baking adventures.
- Add Chocolate: Swirl in melted chocolate for a decadent twist.
- Incorporate Spices: A hint of cinnamon or nutmeg can enhance the flavor profile.
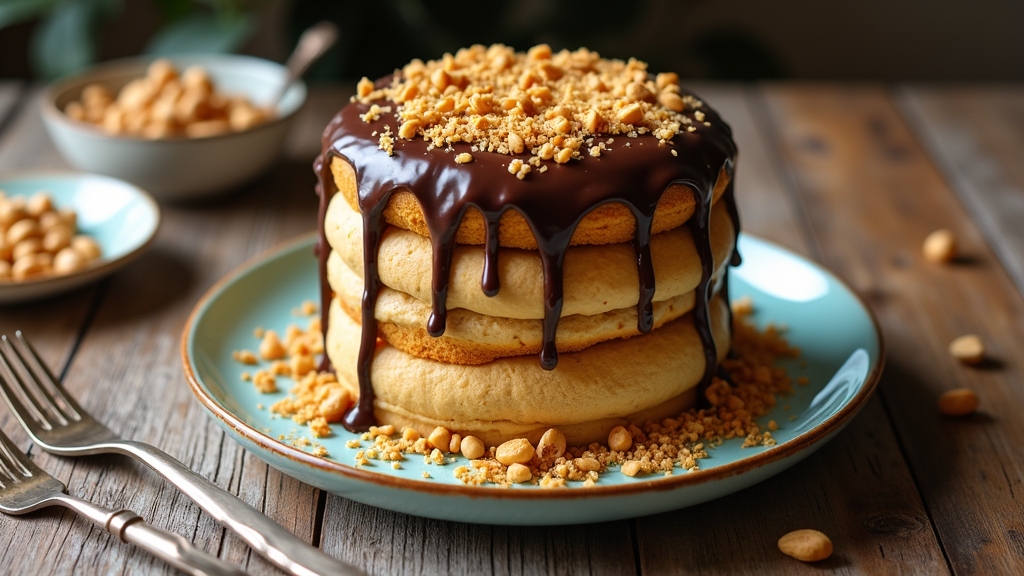
- Experiment with Toppings: Top with crushed peanuts or a drizzle of honey for added texture.
Don’t hesitate to innovate! Each bite is a celebration of rich peanut butter flavor, and the possibilities are endless. I hope you enjoy creating and sharing this delightful cake as much as I do!
Frequently Asked Questions
Can I Use Crunchy Peanut Butter Instead of Creamy?
Absolutely, I love using crunchy peanut butter for its texture differences! It adds delightful crunch and interesting flavor variations. Just remember, it may slightly alter the consistency, so adjust your baking tips accordingly for best results.
How Do I Store Leftover Peanut Butter Cake?
I love storing leftover cake! For freshness, wrap it tightly in plastic wrap and refrigerate. If you want to keep it longer, try freezing it in airtight containers using innovative methods—just thaw before enjoying!
Can I Substitute Gluten-Free Flour in This Recipe?
I’ve experimented with gluten-free alternatives, and while the flour texture changes slightly, the results can be delicious. Just remember to adjust liquid ingredients for the best consistency. Enjoy your innovative baking journey!
What Toppings Pair Well With Peanut Butter Cake?
Did you know 70% of people love chocolate paired with peanut butter? I adore topping my cake with rich chocolate ganache, caramel drizzle, whipped cream, and a sprinkle of sea salt. Banana slices and chopped nuts add delightful crunch!
How Long Does It Take to Bake the Cake?
When I bake, I usually find the baking time to be around 25 to 30 minutes. I always check for doneness by cake testing with a toothpick—if it comes out clean, it’s ready to enjoy!
Conclusion
As I take a bite of this decadent peanut butter cake, I can’t help but think about how this recipe has stood the test of time—just like a classic vinyl record that never goes out of style. The rich, nutty flavor and moist texture make it a timeless treat, perfect for any occasion. So, grab your apron and whip up this delightful cake; it’s sure to become a favorite in your kitchen, just like it has in mine!
