Easy Chocolate Cake Recipe
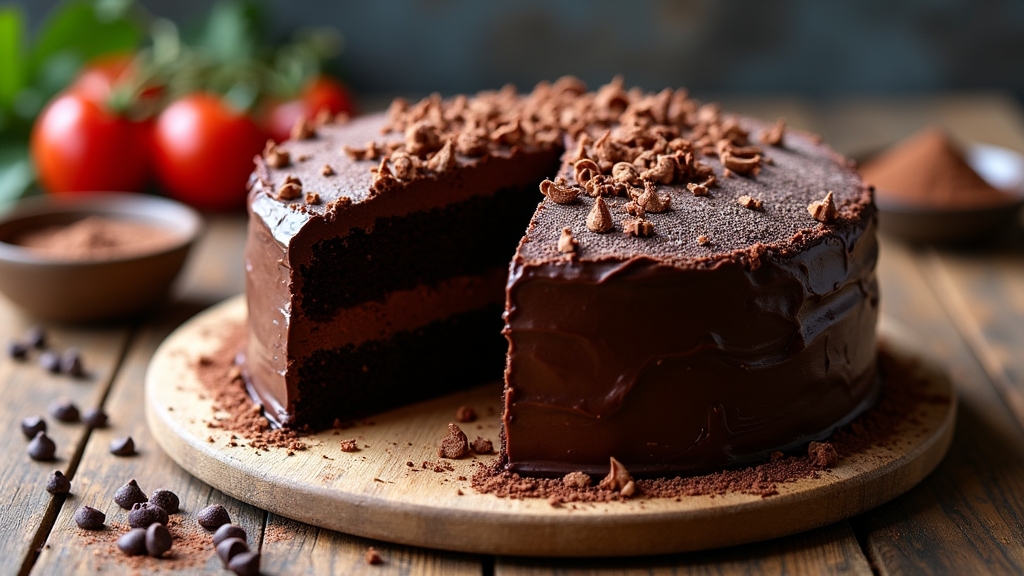
I’ve perfected an easy chocolate cake recipe that’s ideal for any occasion. With just a few pantry staples, you can whip up a cake with rich chocolate flavor and a moist texture. Start by preheating your oven and mixing simple ingredients like flour, cocoa powder, and sugar. Bake it to perfection, and you’ll have a delightful treat your family will love. Stick around, and you’ll discover tips for creative variations and delicious frosting options to elevate your cake!
Contents
History
When I think about the history of chocolate cake, I can’t help but marvel at how this beloved dessert evolved over centuries. Its roots trace back to the ancient civilizations of Mesoamerica, where cacao was cherished for its rich flavor and invigorating properties. As chocolate spread through Europe in the 17th century, bakers began experimenting, leading to the cake evolution we cherish today. The first chocolate cakes emerged in the 19th century, thanks to advancements in cocoa processing. With each innovation, from the use of baking powder to modern frostings, chocolate cake has transformed into an iconic treat. It’s fascinating to see how chocolate’s origins intertwined with culinary creativity, resulting in a dessert that’s not just delicious but also steeped in history.
Recipe
This Easy Chocolate Cake is perfect for any occasion, whether you’re celebrating a birthday, hosting a gathering, or simply indulging in a sweet treat. With its rich chocolate flavor and moist texture, this cake is sure to impress your family and friends. The best part is that it requires minimal effort and uses basic ingredients you likely already have in your pantry.
To start, gather your ingredients and preheat your oven. This cake is incredibly versatile; you can enjoy it plain, dusted with powdered sugar, or topped with your favorite frosting. It’s a delightful dessert that can easily become a family favorite. Let’s explore the recipe so you can whip up this delicious treat in no time!
Ingredients:
- 1 ¾ cups all-purpose flour
- 1 ¾ cups granulated sugar
- ¾ cup unsweetened cocoa powder
- 1 ½ teaspoons baking powder
- 1 ½ teaspoons baking soda
- 1 teaspoon salt
- 2 large eggs
- 1 cup whole milk
- ½ cup vegetable oil
- 2 teaspoons vanilla extract
- 1 cup boiling water
Instructions:
In a large mixing bowl, combine the flour, sugar, cocoa powder, baking powder, baking soda, and salt. Mix well until all dry ingredients are thoroughly combined. Next, add the eggs, milk, vegetable oil, and vanilla extract to the dry mixture. Beat the mixture on medium speed for about 2 minutes until well blended. Finally, stir in the boiling water until the batter is smooth (the batter will be thin). Pour the batter evenly into two greased and floured round cake pans. Bake in a preheated oven at 350°F (175°C) for 30-35 minutes or until a toothpick inserted in the center comes out clean. Allow the cakes to cool for 10 minutes before removing them from the pans and transferring them to a wire rack to cool completely.
Extra Tips:
For an extra decadent touch, consider adding chocolate chips to the batter before baking or layering the cake with your favorite frosting once cooled. If you want to make the cake even richer, you can substitute buttermilk for the whole milk. Remember to check your oven for accuracy, as baking times may vary. Finally, for a fun twist, try adding a splash of espresso to enhance the chocolate flavor even more! Enjoy your baking adventure!
Cooking Steps
Now that we have our ingredients ready, let’s get started on the cooking steps. I always begin by preheating my oven to 350°F, which sets the perfect stage for baking. Once that’s done, we’ll mix our dry ingredients together before gradually adding the wet ones—trust me, this makes all the difference!
Step 1. Preheat Oven to 350°F
Preheating the oven to 350°F is an important step that sets the stage for baking a delicious chocolate cake. I always make certain to turn it on first, allowing it to reach the perfect oven temperature while I prepare my ingredients. This simple yet vital action guarantees that my cake bakes evenly, yielding that moist, tender crumb we all crave. One of my favorite baking tips is to trust your oven’s thermostat; an accurate temperature makes all the difference. If you have an oven thermometer, it’s worth using to double-check! As the heat builds, I can already envision the rich aroma filling my kitchen, making the anticipation even sweeter. Now, let’s get ready to mix those ingredients!
Step 2. Mix Dry Ingredients Together
Once the oven is preheated and ready to go, it’s time to focus on mixing the dry ingredients together. This step is fundamental for achieving that perfect chocolate cake texture, so let’s get it right! I like to sift the ingredients for an even blend, and here are some baking tips I swear by:
- All-purpose flour: It’s a staple, but you can substitute with almond flour for a gluten-free option.
- Cocoa powder: Use Dutch-processed for a richer flavor, or try carob powder for a unique twist.
- Baking soda and salt: These are essential, but feel free to experiment with baking powder for a fluffier rise.
Mix these ingredients thoroughly, and you’ll set the foundation for a delicious cake. Happy baking!
Step 3. Add Wet Ingredients Gradually
As you shift from the dry ingredients, adding the wet ingredients gradually is essential for achieving a smooth batter. I like to start by pouring in a small portion of the mixture—perhaps a third of it—while I gently stir. This gradual mixing helps the flavors meld beautifully, ensuring that the wet ingredient ratios are just right. It also prevents clumps from forming, which can ruin the cake’s texture. I can feel the batter come together, becoming velvety and rich. Each addition of liquid brings a new level of excitement, transforming the dry mix into something extraordinary. So take your time; this step is where the magic happens, and I promise it’ll pay off in the end!
Step 4. Pour Batter Into Pan
With the batter now perfectly combined, it’s time to release it into the prepared pan. I take a deep breath, excited to see the magic unfold. Pouring the batter is all about technique; I want that beautiful, smooth cake consistency. Here’s how I do it:
- Use a spatula to scrape down the sides of the bowl, ensuring no batter is wasted.
- Gently pour the batter into the center of the pan, letting it spread naturally to the edges for even baking.
- Tap the pan lightly on the counter to eliminate any air bubbles, ensuring a perfect rise.
These simple baking techniques not only enhance the texture but also set the stage for a delightful chocolate cake experience.
Step 5. Bake for 30 Minutes
Now that the batter is in the pan, it’s time to bring it to life in the oven. Preheat your oven to 350°F (175°C) and slide the pan in gently. Set a timer for 30 minutes, but don’t walk away just yet! Keep an eye on it; the aroma of melting chocolate will be irresistible. A great baking tip is to rotate the pan halfway through to guarantee even cooking, which enhances the cake texture. When the timer goes off, use a toothpick to check for doneness—insert it into the center, and it should come out clean. This careful baking process is essential for achieving that moist, decadent cake we all crave. Enjoy the anticipation!
Nutritional Guide
While indulging in a slice of chocolate cake can feel like a guilty pleasure, it’s important to understand the nutritional aspects that come with it. By making smart ingredient substitutions, you can enhance the cake’s nutritional benefits without sacrificing flavor. For instance, swapping traditional flour for almond flour or using applesauce instead of butter can make a significant difference.
| Ingredient | Calories | Nutritional Benefits |
|---|---|---|
| Almond Flour | 160 | High in protein and fiber |
| Unsweetened Cocoa | 50 | Rich in antioxidants |
| Applesauce | 100 | Low in fat, adds moisture |
With these adjustments, your chocolate cake can be a delightful treat that aligns better with your health goals.
Final Thoughts
As you savor each bite of your homemade chocolate cake, it’s easy to appreciate not just the delicious flavor but also the thoughtful choices you made along the way. You’ve embraced the art of baking and transformed simple ingredients into a delightful masterpiece. Remember, there’s always room for creativity. Consider these baking tips and cake variations:
- Experiment with different flours, like almond or coconut, for a unique texture.
- Try adding spices like cinnamon or espresso powder to elevate the chocolate flavor.
- Top with various frostings, such as cream cheese or ganache, for a personalized touch.
Frequently Asked Questions
Can I Use Cocoa Powder Instead of Chocolate Bars?
Absolutely, I’ve often used cocoa powder as a chocolate bar alternative. It’s convenient and boasts benefits like lower fat content. Just adjust the sugar in your recipe, and you’ll achieve a rich, chocolatey flavor!
How Can I Make This Cake Gluten-Free?
To make this cake gluten-free, I swap regular flour with gluten-free flour blends. I’ve found that using almond flour or coconut flour as baking substitutes can enhance the flavor while keeping it moist and delicious!
What Are Some Good Frosting Options for This Cake?
When choosing frosting, I love Buttercream Frosting for its smoothness, Cream Cheese Frosting for a tangy twist, Ganache Topping for rich decadence, and Whipped Cream for a light, airy finish. Each adds its own magic!
Can I Add Fruit to the Cake Batter?
Absolutely, I love adding fruit to cake batter! Combinations like raspberries or cherries enhance the cake’s texture and flavor, creating a delightful surprise. Just remember, too much fruit can make it dense, so balance is key!
How Should I Store Leftover Chocolate Cake?
You’d think leftover cake would disappear, right? To store it, I recommend wrapping slices tightly in plastic wrap and refrigerating. For longer storage, freeze them—just remember to use airtight containers for freshness!
Conclusion
As I take the final bite of this rich chocolate cake, I’m reminded of how simple ingredients can weave together like a warm embrace on a chilly day. This recipe isn’t just about baking; it’s about creating sweet memories that linger long after the last crumb is gone. So, whether it’s a cozy family gathering or a spontaneous treat, I hope you immerse yourself and savor every delicious moment. Happy baking!
