Easy Dump Cake Recipe
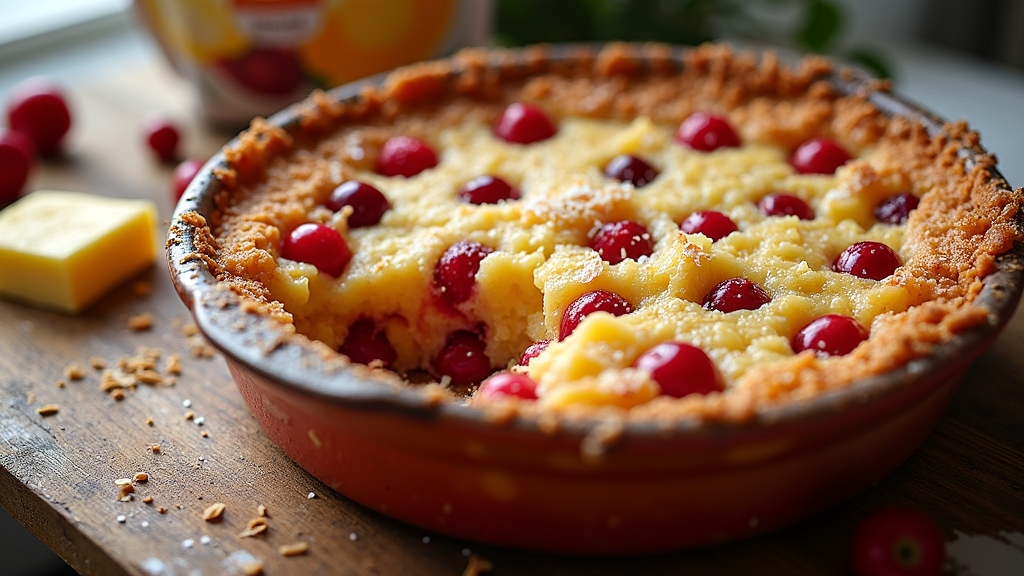
When I want a quick and delicious dessert, I turn to an easy dump cake recipe. I just combine a can of fruit pie filling with a box of cake mix, melt some butter, and pour it all together. It’s as simple as that! In about 45-50 minutes, I have a warm, bubbly treat that’s perfect for sharing. If you’re curious about different variations and tips for perfecting your dump cake, there’s so much more to explore!
Contents
History
When I think about the history of dump cake, I can’t help but appreciate how this simple dessert has evolved over the years. Its origins trace back to the mid-20th century, when home bakers sought effortless ways to create something delicious. The concept of dumping ingredients together revolutionized dessert-making, allowing creativity to flourish. This innovation played a significant role in the dessert evolution narrative, paving the way for diverse flavors and combinations. Initially, dump cakes often featured canned fruit and cake mix, but they’ve grown beyond those boundaries. Today, we’re inspired to experiment with unique ingredients, embracing seasonal fruits and gourmet flavors. Each bite tells a story, connecting us to the past while inviting us to explore new culinary horizons.
Recipe
Dump cakes are a delightful and effortless dessert that anyone can whip up in no time. The beauty of a dump cake lies in its simplicity—just combine your ingredients in a baking dish, pop it in the oven, and let the magic happen! This recipe takes advantage of a cake mix, which means you don’t need to spend time measuring and mixing dry ingredients. Instead, you’ll focus on layering flavors and textures for a satisfying sweet treat.
Dump cakes are simple, delicious desserts that require minimal effort—just combine ingredients, bake, and enjoy the magic!
This easy dump cake recipe is perfect for potlucks, family gatherings, or a cozy night in. With minimal prep and cook time, you’ll have a delicious dessert that everyone will love. Feel free to customize your dump cake by using different fruits or cake mixes, so you can create a variety of flavors that suit your taste preferences.
Ingredients:
- 1 can (21 oz) fruit pie filling (e.g., cherry, peach, or blueberry)
- 1 box (15.25 oz) cake mix (e.g., yellow or white)
- 1/2 cup (1 stick) unsalted butter, melted
- 1/2 cup chopped nuts (optional)
- 1 teaspoon cinnamon (optional)
Cooking Instructions:
Preheat your oven to 350°F (175°C). In a 9×13-inch baking dish, evenly spread the fruit pie filling on the bottom. Next, sprinkle the dry cake mix over the fruit filling, guaranteeing an even layer. Drizzle the melted butter over the cake mix, making sure to cover as much of the dry mix as possible. If desired, sprinkle chopped nuts and cinnamon on top for added texture and flavor. Bake in the preheated oven for 45-50 minutes, or until the top is golden brown and bubbly. Allow the dump cake to cool slightly before serving.
Extra Tips:
For an added touch of flavor, consider using flavored cake mixes or adding spices like nutmeg or vanilla extract. You can also pair your dump cake with a scoop of vanilla ice cream or whipped cream for a delightful dessert experience. If you’re feeling adventurous, try mixing different fruit fillings together for a unique flavor combination. Don’t forget to keep an eye on the baking time, as ovens can vary, and you want to make sure your dump cake is perfectly baked without being overdone!
Cooking Steps
Let’s get started on the cooking steps that will transform your ingredients into a delicious dump cake! First, I’ll preheat the oven to 350°F to guarantee everything bakes evenly. Then, I’ll mix the cake ingredients thoroughly, setting the stage for that perfect blend of flavors.
Step 1. Preheat Oven to 350°F
Preheating the oven to 350°F is an essential step in ensuring your dump cake turns out perfectly baked and delicious. Setting the right oven temperature is vital for achieving that golden, bubbly top we all crave. I always find it helpful to preheat my oven while I gather my ingredients, so I’m ready to go once it’s warmed up. This not only saves time but also helps the cake rise evenly. A common baking tip I swear by is to use an oven thermometer to double-check the accuracy of your oven’s temperature settings—it’s a game changer! With the oven heated and ready, I can confidently move on to mixing those scrumptious ingredients for my dump cake masterpiece.
Step 2. Mix Cake Ingredients Thoroughly
Once the oven is preheated, it’s time to plunge into mixing the cake ingredients thoroughly. I gather my flour, sugar, baking powder, and any flavorings, ensuring I’ve got the right ingredient ratios for that perfect balance. Using a whisk, I incorporate the dry ingredients first, creating a fluffy base while avoiding clumps. Then, I add in eggs and oil, mixing with a hand mixer for about two minutes. This is where the magic happens—watching the batter transform into a velvety consistency. Remember, it’s all about the mixing techniques; over-mixing can lead to a dense cake, while under-mixing leaves lumps. I aim for a smooth, silky batter that promises a delightful rise in the oven.
Step 3. Add Fruit Filling Evenly
Now, I carefully open the cans of fruit filling, letting the sweet aroma waft through the kitchen. I love experimenting with different fruit combinations, like peach and blueberry or cherry and pineapple, to create a unique flavor profile. Using a spatula, I gently spoon the filling over the cake mix, ensuring it’s evenly distributed. The vibrant colors of the filling types pop against the dry mix, making it visually appealing. I take my time to spread the filling, avoiding clumps that might not bake evenly. This step is essential; it allows the flavors to meld beautifully while baking, transforming the fruit into a juicy layer that complements the cake. Trust me, this is where the magic begins!
Step 4. Sprinkle Topping Evenly
With the fruit filling perfectly spread, it’s time to add the final touch that will elevate this dump cake to a whole new level: the topping. I reach for a box of cake mix, which I’ll sprinkle evenly over the fruit, ensuring every inch is covered. This simple topping technique not only adds sweetness but creates a delightful texture. For a twist, I sometimes toss in crushed nuts or chocolate chips, experimenting with dessert variations that surprise my guests. As I drizzle melted butter over the mix, I can already envision the golden crust forming. This step is essential—it’s where all the flavors meld together, promising a decadent slice that’s hard to resist.
Step 5. Bake for 45 Minutes
After sprinkling the cake mix and drizzling the melted butter, it’s time to pop the dish into the oven for 45 minutes. As I close the oven door, I can already imagine how those baking techniques will transform this simple combination into a delicious dessert. The heat will work its magic, allowing the cake to rise and create those delightful golden edges. I love experimenting with cake variations, like adding fruit or nuts, which can really elevate the flavors. While it bakes, the aroma fills my kitchen, making the wait almost unbearable. Just remember to check for a golden top and a toothpick inserted in the center comes out clean. Trust me, it’ll be worth every moment!
Nutritional Guide
Although dessert often feels like a guilty pleasure, I find that understanding the nutritional aspects of a dump cake can help make more informed choices without sacrificing flavor. By exploring ingredient alternatives, I can manage the caloric content without losing that comforting taste.
Here’s a simple nutritional guide for your dump cake:
| Ingredient | Standard Option | Alternative Option |
|---|---|---|
| Cake Mix | 160 calories per slice | Sugar-free mix (80 calories) |
| Fruit (e.g., peaches) | 70 calories per serving | Fresh fruit (50 calories) |
| Topping (e.g., butter) | 100 calories per tbsp | Coconut oil (90 calories) |
Choosing these alternatives can make a delightful difference while satisfying my sweet tooth!
Final Thoughts
As I reflect on the joy of making a dump cake, I realize that this simple dessert brings together the comfort of home baking with the ease of quick preparation. It’s incredibly versatile; with easy variations like swapping fruits or adding spices, you can create endless flavors. I love experimenting with different cake mixes and fillings – the possibilities are truly exciting! When it comes to storage, I’ve found that keeping leftovers in an airtight container in the fridge is best; it stays delicious for a few days. If you want to enjoy it later, freezing portions works wonders too. Embrace the creativity this dessert offers and let your kitchen become a canvas for delightful flavors. Happy baking!
Frequently Asked Questions
Can I Use Gluten-Free Cake Mix for This Recipe?
I’ve used gluten-free options with cake mix in my recipes, and they turn out delicious. Just make sure the mix is labeled gluten-free, and you’ll create something everyone can enjoy. Trust me, it’s worth it!
How Long Can I Store Leftover Dump Cake?
Ah, the eternal question of leftover dessert—like keeping a pet rock! I’d say you can store it in the fridge up to four days. For ideal shelf life, cover it well. Storing tips, folks, always matter!
Can I Freeze Dump Cake for Later Use?
Absolutely, I can freeze dump cake for later use! I use proper freezing techniques, wrapping it tightly to prevent freezer burn. When I’m ready, I simply thaw it for delightful cake storage convenience. Enjoy every bite!
What Toppings Can I Add to Dump Cake?
Imagine a canvas waiting for your masterpiece! I love experimenting with topping ideas like whipped cream, fresh berries, or caramel drizzle. Flavor combinations, like chocolate and raspberry, elevate it to new heights. Get creative!
Is There a Substitute for Canned Fruit in This Recipe?
I love experimenting with fruit alternatives. Fresh fruit like berries or peaches can add vibrant flavors. You can also try frozen fruit for convenience, ensuring a delicious twist on classic recipes. Explore your options!
Conclusion
As I pulled the warm, golden dump cake from the oven, the sweet aroma danced through my kitchen, wrapping me in comfort. Each spoonful, a delightful blend of juicy fruit and tender cake, reminded me of cozy family gatherings and laughter-filled afternoons. It’s amazing how something so simple can bring such joy. So, whether you’re hosting friends or enjoying a quiet night in, this easy dump cake recipe is sure to create delicious memories that linger long after the last bite.


