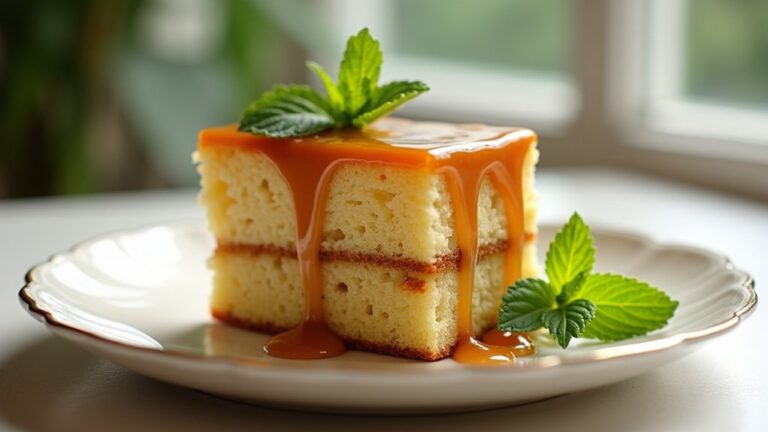
Cake Balls Recipe
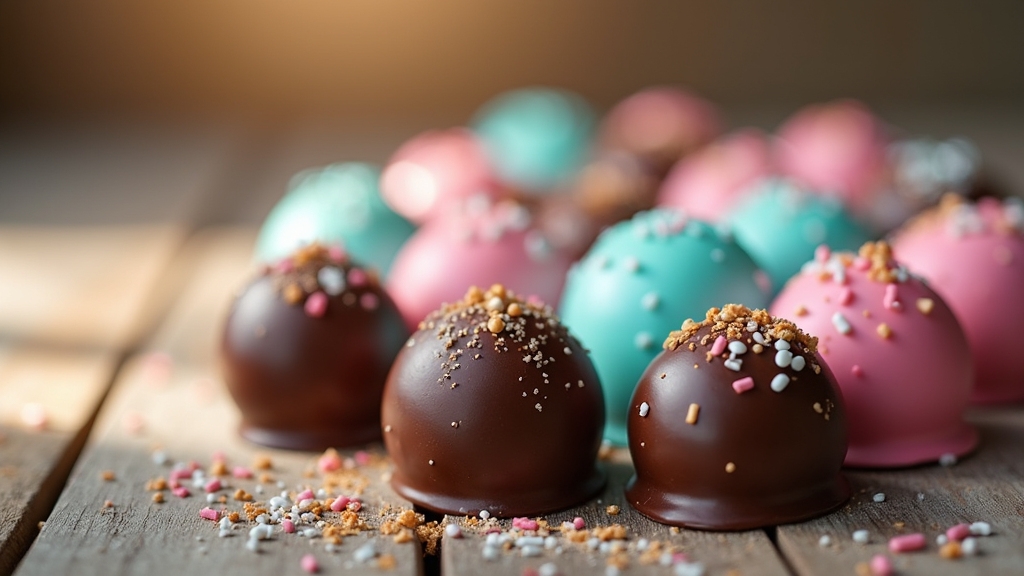
I absolutely love making cake balls, and it’s so easy! Simply mix your favorite cake with frosting for that perfect sticky consistency, chill the mixture for about 30 minutes, then roll it into bite-sized balls. Once you’ve shaped them, dip each ball in melted chocolate or candy melts, and let them set. You can even add sprinkles for a fun touch. It’s a delightful way to repurpose cake scraps, and there’s so much more to discover about this sweet treat!
Contents
History
When I explore the history of cake balls, I can’t help but marvel at how a simple dessert has evolved over time. Originating from the cake scraps we used to repurpose, these delightful treats reflect the cake evolution that’s intertwined with our culinary creativity. As dessert trends shifted towards bite-sized indulgences, cake balls emerged as a playful, innovative solution. They captivated our taste buds with their endless flavor combinations and vibrant coatings. From traditional chocolate to exotic spices, the possibilities are truly limitless. I find it fascinating how this seemingly humble dessert has become a staple at celebrations, embodying both nostalgia and modern flair. Cake balls not only represent our love for sweets but also our desire for innovation in the kitchen.
Recipe
Cake balls are a delightful treat that combines the fun of cake with the ease of bite-sized snacks. They are perfect for parties, celebrations, or simply as a sweet indulgence at home. The beauty of cake balls lies in their versatility; you can use any flavor of cake and frosting you like, making them a customizable dessert that can suit any occasion. Whether you prefer chocolate, vanilla, or red velvet, cake balls are sure to satisfy your sweet tooth.
To make cake balls, you’ll need to bake a cake first, then crumble it and mix it with frosting to form a dough. This mixture is then rolled into small balls and can be coated in chocolate or candy melts for an extra layer of flavor and texture. These treats are not only delicious but also visually appealing, as you can decorate them with sprinkles, nuts, or edible glitter to make them even more festive. Let’s explore the ingredients and steps needed to create these scrumptious cake balls!
Ingredients:
- 1 box of cake mix (any flavor)
- 1 cup of frosting (matching flavor)
- 12 oz. of chocolate or candy melts (for coating)
- Sprinkles or decorations (optional)
Instructions:
Begin by baking the cake according to the package instructions and allow it to cool completely. Once cooled, crumble the cake into a large bowl until fine crumbs form. Add the frosting to the crumbled cake and mix until fully combined. Using your hands, roll the mixture into 1-inch balls and place them on a baking sheet lined with parchment paper. Once all the mixture is rolled, freeze the cake balls for about 30 minutes to firm them up. Meanwhile, melt the chocolate or candy melts in a microwave-safe bowl. Once melted, dip each cake ball into the coating, allowing the excess to drip off, and return them to the parchment paper. Let them set until the coating hardens.
Extra Tips:
For best results, verify your cake is completely cooled before crumbling to prevent the mixture from becoming too soggy. If you find the dough is too sticky, you can refrigerate it for a short time to make rolling easier. Feel free to experiment with different combinations of cake and frosting flavors, and don’t hesitate to get creative with the toppings! For a fun presentation, consider using colored chocolate melts or adding a drizzle of contrasting chocolate on top of the coated cake balls. Enjoy your sweet creations!
Cooking Steps
Let’s get started on making these delicious cake balls! First, I always preheat my oven to set the stage for perfect treats. Then, I mix cake crumbs with frosting to create a sweet, indulgent mixture that I can’t resist.
Step 1. Preheat the Oven
Preheating the oven is an important step in creating perfect cake balls. I start by setting my oven temperature to 350°F (175°C). This temperature guarantees that the cake balls bake evenly, allowing them to develop that delightful golden exterior while keeping the inside moist. It’s vital to let the oven reach the right temperature before popping in the cake balls, as this influences their texture and flavor. I usually give it about 10-15 minutes to preheat, which is the perfect baking duration to prepare my baking sheet and get my ingredients ready. Once the oven’s hot, I can confidently proceed, knowing that my cake balls will come out just right—tender, flavorful, and utterly irresistible.
Step 2. Mix Cake Crumbs and Frosting
Crushing the cake into fine crumbs is the first step in creating the perfect mixture for my cake balls. I usually opt for a moist vanilla or rich chocolate cake, depending on my desired cake flavor. Once the cake’s been crumbled, I grab my favorite frosting type—cream cheese or buttercream works wonders. I add just enough frosting to bind the crumbs, mixing with my hands until the consistency feels right; it should be sticky but not overly wet. This is where creativity shines! You can experiment with different frosting flavors to elevate your cake balls. Think about using strawberry frosting for a fruity twist or even a mocha frosting for an indulgent surprise. The possibilities are endless!
Step 3. Chill Mixture for 30 Minutes
After mixing the cake crumbs and frosting to achieve that perfect sticky consistency, I place the mixture in the fridge for about 30 minutes. This chilling step isn’t just a waiting game; it’s essential. The chilling benefits are remarkable, as the cold temperature helps the mixture firm up, making it easier to handle later. I love how the texture transforms during this time, becoming more cohesive and less gooey. When I finally take it out, the mixture holds together beautifully, ready for the next step. It’s like magic! By giving it this time to chill, I guarantee my cake balls will have a delightful bite-sized shape, making them even more enjoyable for everyone who gets to taste them.
Step 4. Form Into Bite-Sized Balls
With the chilled mixture in hand, I scoop out small portions and roll them between my palms to form bite-sized balls. Each one should be about an inch in diameter—perfect for popping in your mouth! As I work, I can’t help but think about the endless flavor combinations I can create. From classic chocolate to zesty lemon, each ball can embody a unique taste experience. I place them on a baking sheet lined with parchment paper, ensuring they don’t stick together. These little gems are not just a treat; they’re a canvas for cake decoration. Sprinkles, edible glitter, or even crushed nuts can transform them into visually stunning delights. It’s all about letting your creativity run wild!
Step 5. Dip in Chocolate Coating
Now that the cake balls are rolled and ready on the baking sheet, it’s time to give them a delicious chocolate coating. I love experimenting with different chocolate types—dark, milk, or even white chocolate—each brings a unique flavor profile to the table. To start, melt your chosen chocolate in a microwave or double boiler, ensuring it’s silky smooth. Next, I dip each cake ball using a fork, letting the excess chocolate drip off for an even coating. For an innovative twist, try adding a sprinkle of sea salt or crushed nuts on top before the chocolate sets. Once coated, place them on parchment paper to cool and harden. This final touch transforms them into irresistible treats!
Nutritional Guide
While indulging in cake balls can be a delightful experience, it’s important to contemplate their nutritional profile. These little treats pack a flavorful punch, but knowing their calorie count and ingredient benefits can help you enjoy them guilt-free.
Here’s a quick look at the nutritional aspects:
| Ingredient | Calories per Serving | Benefits |
|---|---|---|
| Cake Mix | 150 | Quick energy source |
| Butter | 100 | Good for brain health |
| Chocolate Coating | 80 | Antioxidants for health |
| Cream Cheese | 70 | Protein boost for satiety |
| Sprinkles | 30 | Fun addition, limited calories |
Final Thoughts
As you savor each bite of cake balls, it’s easy to appreciate the joy they bring to any occasion. These delightful treats are not just about taste; they’re about creating memorable moments. Imagine a gathering where everyone’s excitedly sharing experiences while indulging in these bite-sized wonders. The fusion of flavors elevates a simple dessert into an innovative masterpiece. You can customize them endlessly, experimenting with various cake bases and coatings, which keeps the excitement alive. Whether it’s a birthday party or a casual get-together, cake balls have a way of uniting people through their delightful sweetness. So, let’s continue innovating, savoring flavors, and turning every celebration into a shared experience that lingers long after the last cake ball is gone.
Frequently Asked Questions
Can I Use Gluten-Free Cake Mix for Cake Balls?
I’ve used gluten-free options from various cake mix brands, and they work beautifully. Just follow the usual steps, and you’ll get delightful cake balls that everyone can enjoy, regardless of dietary needs.
How Long Do Cake Balls Last at Room Temperature?
Did you know most treats last about 2-3 days at room temperature? For ideal shelf life, I recommend storing them in a cool, dry place and using airtight containers to keep them fresh and delicious!
Can I Freeze Cake Balls for Later Use?
Absolutely, you can freeze cake balls for later use! I use effective freezing techniques, like wrapping them tightly, and follow storage tips to keep them fresh. Just thaw before serving, and they’ll taste amazing!
What Is the Best Way to Decorate Cake Balls?
Did you know that 75% of people love sprinkles on desserts? I like using colorful sprinkles options and finishing with chocolate drizzles to create visually stunning treats. It’s all about making them irresistible and fun!
Are Cake Balls Suitable for Vegan Diets?
Absolutely, cake balls can fit vegan diets! By using vegan substitutes like almond flour and dairy alternatives such as coconut cream, I create delicious treats that satisfy both my sweet tooth and my plant-based friends.
Conclusion
As I take a bite of those delightful cake balls, it’s like sinking into a cloud of sweetness, each flavor dancing on my tongue. Whether you’re celebrating a special occasion or simply indulging in a treat, these little gems bring joy in every morsel. So, why not whip up a batch and let your taste buds experience this delightful journey? Trust me, once you try them, you’ll find it hard to resist making them again and again!
