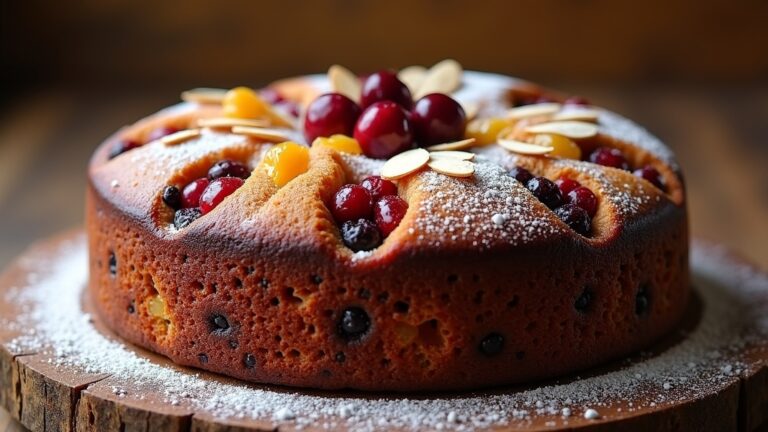
Jello Cake Recipe
I love making Jello Cake for its vibrant colors and delicious taste! You’ll need a box of vanilla cake mix, Jello (any flavor), boiling water, and whipped topping. First, prepare the cake base, then cool it. Once it’s chilled, poke holes in the cake and pour the Jello mixture over it, letting it set in the fridge. Finally, frost with whipped topping and enjoy! This cake’s a showstopper at gatherings, and there’s more to explore if you keep going!
Contents
History
When I think about Jello cake, I can’t help but be fascinated by its vibrant history that brings together simplicity and creativity. The origins of Jello date back to the late 19th century when gelatin desserts first captured hearts and taste buds. Initially marketed as a quick, easy treat, it quickly became a staple in American households. Cake evolution took a remarkable turn when innovative home bakers began incorporating Jello into their recipes, merging the light, wobbly texture of gelatin with traditional cake. This fusion not only transformed dessert presentations but also sparked culinary creativity, allowing vibrant colors and flavors to shine. As Jello cake continues to inspire, it’s a delicious reminder of how innovation can breathe new life into beloved classics.
Recipe
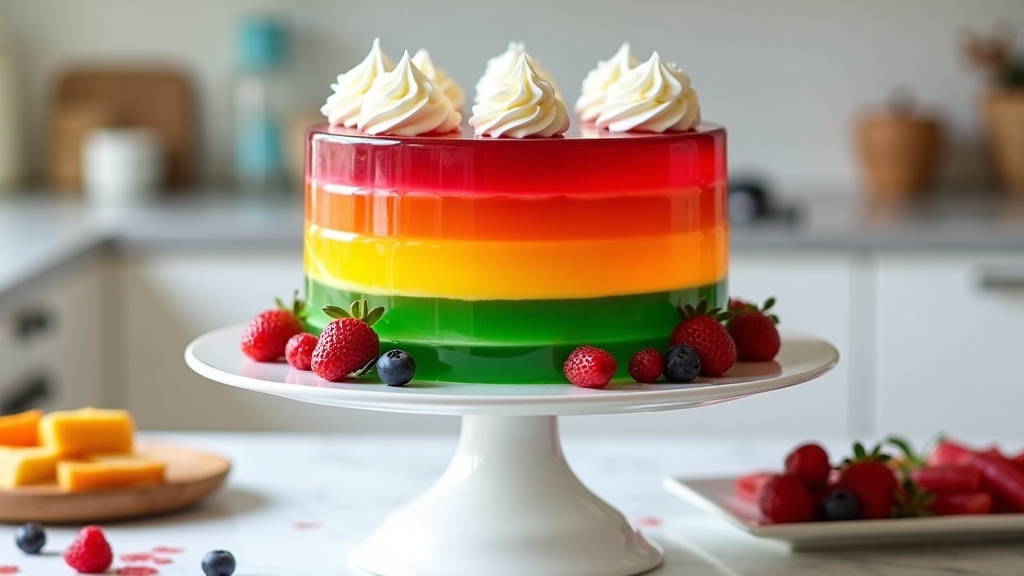
Jello Cake is a delightful and colorful dessert that combines the lightness of cake with the fun of Jello. This recipe is perfect for birthdays, summer gatherings, or any occasion where you want to impress guests with a visually appealing yet simple treat. The cake is layered with Jello and topped with whipped cream, making it not only delicious but also a feast for the eyes.
To make this cake, you’ll start with a basic vanilla or white cake mix. Once the cake is baked and cooled, you’ll create vibrant layers using your choice of flavored Jello. The result is a moist cake that bursts with flavor, making it a favorite among both kids and adults alike. Follow the steps below to create your very own Jello Cake that will surely become a staple at your celebrations.
Ingredients:
- 1 box of vanilla or white cake mix
- Ingredients required for the cake mix (usually eggs, water, and oil)
- 1 cup of boiling water
- 1 package (3 oz) of Jello (any flavor)
- 1 cup of cold water
- 1 container (8 oz) of whipped topping (like Cool Whip)
- Optional: fresh fruit for topping
Instructions:
Begin by preparing the cake mix according to the package instructions and bake it in a 9×13 inch pan. Once the cake is baked, allow it to cool completely. While the cake is cooling, dissolve the Jello powder in 1 cup of boiling water, stirring until fully dissolved. Add 1 cup of cold water and let it chill in the refrigerator for about 30 minutes until it’s slightly thickened. Once the cake is cooled, use a fork to poke holes all over the surface. Pour the Jello mixture evenly over the cake, ensuring it seeps into the holes. Refrigerate the cake for at least 4 hours or overnight. Before serving, top with whipped topping and decorate with fresh fruit if desired.
Extra Tips:
For a fun twist, try using different flavored Jello layers for a colorful effect. You can also experiment with various cake flavors, such as lemon or strawberry, to match the Jello you choose. Let the cake chill overnight for the best results, as this allows the flavors to meld beautifully. When serving, cut the cake into squares and enjoy the delightful rainbow layers that will surely capture everyone’s attention.
Cooking Steps
Now that we’ve got our ingredients ready, let’s jump into the cooking steps to create this delightful Jello cake. I’ll guide you through each phase, from preparing the cake base to adding that vibrant Jello layer and finishing it off with whipped topping. Trust me, you’ll want to savor every moment of this delicious process!
Step 1. Prepare the Cake Base
To kick off the process of creating a delightful Jello cake, I usually start by gathering my ingredients and preheating the oven to 350°F. The cake base is where the fun begins, and I love experimenting with different cake flavors to elevate the experience. Here’s how I prepare the base:
- Mix the dry ingredients: I combine flour, sugar, and baking powder in a bowl, ensuring they’re well blended for an even texture.
- Cream the butter and sugar: Using a mixer, I whip the butter until fluffy, then gradually add sugar for that perfect sweetness.
- Add eggs and vanilla: I incorporate eggs one at a time, followed by a splash of vanilla extract, which adds a delightful aroma.
These baking techniques set the stage for a truly innovative dessert!
Step 2. Chill the Jello Mixture
Once I’ve prepared the cake base, I turn my attention to creating the Jello mixture, which adds that signature burst of color and flavor to the dessert. I start by dissolving flavored gelatin in boiling water, stirring until it’s completely clear. Then, I mix in cold water to cool it down. This is where I get creative! I often experiment with unique flavor combinations, like raspberry with lemon or lime with coconut, to elevate the dessert. Once mixed, I pour the Jello into a container and let it chill in the fridge until it’s slightly thickened—perfect for jello layering techniques. This way, each layer will hold its shape beautifully, creating a stunning visual and taste experience when I finally combine it with the cake.
Step 3. Add Jello to Cake
With the Jello mixture nicely chilled and thickened, it’s time to bring everything together. I’m excited to share how to incorporate Jello flavors into your cake variations, creating a vibrant, flavorful masterpiece! Here’s how to do it:
- Prepare the Cake: Bake your favorite cake and let it cool completely. Think about using a vanilla or lemon base for a delightful contrast with the Jello.
- Poke Holes: Once cooled, use a fork to poke holes all over the cake. This allows the Jello to seep in and infuse flavor.
- Add Jello: Carefully pour the chilled Jello mixture over the cake, ensuring it fills the holes. Let it set in the fridge for a few hours, allowing those flavors to meld beautifully. Enjoy your colorful creation!
Step 4. Frost With Whipped Topping
Now that your cake is beautifully infused with Jello, it’s time to elevate its presentation and flavor by frosting it with whipped topping. I love using whipped topping because it adds a light, airy texture that perfectly balances the vibrant flavors of the Jello. For innovative frosting techniques, try using a piping bag with different nozzle shapes to create beautiful swirls and peaks. If you prefer a rustic look, simply spread the topping with a spatula for a more casual vibe. Don’t forget to leave some of that colorful Jello peeking through—it’s visually stunning! Refrigerate the frosted cake for a bit to set the topping, ensuring each slice is as delightful as the last. Enjoy the process; your masterpiece awaits!
Step 5. Serve and Enjoy Slices
After letting your frosted Jello cake chill, it’s time to slice and serve this colorful treat! As I prepare to share it, I love to reflect on some creative presentation ideas and serving suggestions that elevate the experience. Here are my top three tips:
- Garnish with Fresh Fruits: Top each slice with vibrant berries or citrus slices for a fresh burst of flavor.
- Serve with a Drizzle: A light drizzle of chocolate or caramel sauce can add a decadent touch that contrasts beautifully with the sweetness.
- Individual Portions: Contemplate cutting the cake into smaller squares and serving them on decorative plates for a charming, café-style presentation.
This Jello cake is not just a dessert; it’s a feast for the eyes and taste buds! Enjoy every colorful bite!
Nutritional Guide
While indulging in a slice of Jello cake, you might wonder about its nutritional profile. This delightful dessert offers not only a burst of flavor but also some surprising nutritional benefits. The calorie count can vary, but it’s generally lower than many traditional cakes, making it a guilt-free treat. Here’s a quick glance at the nutritional stats:
| Nutrient | Amount per Slice |
|---|---|
| Calories | 150 |
| Total Fat | 4g |
| Carbohydrates | 25g |
| Sugars | 12g |
| Protein | 2g |
With its vibrant colors and invigorating taste, Jello cake can be a fun addition to a balanced diet, allowing you to indulge without straying too far from your nutritional goals. Enjoy!
Final Thoughts
Reflecting on the delightful experience of enjoying Jello cake, it’s clear that this dessert not only satisfies a sweet craving but also adds a splash of color to any occasion. If you’re keen to elevate your Jello cake game, here are some final tips and serving suggestions:
Jello cake is the perfect colorful treat that brightens any gathering while satisfying your sweet tooth.
- Layer it Up: Experiment with different flavors and colors for a stunning multi-layered effect.
- Garnish Creatively: Top with whipped cream, fresh berries, or edible flowers to enhance visual appeal.
- Chill for Perfection: Make sure your cake is well-chilled before serving to achieve that invigorating taste.
With these tips, your Jello cake will be a showstopper at any gathering. So go ahead, get creative, and enjoy the process of making this vibrant dessert!
Frequently Asked Questions
Can I Use Sugar-Free Jello for This Recipe?
Absolutely, I’ve used sugar-free Jello before. It’s a great alternative, offering health benefits while still delivering that vibrant color and flavor. Plus, it’s perfect for those seeking innovative dessert options without the added sugar.
How Long Can Jello Cake Be Stored in the Fridge?
Storing Jello cake is like preserving a sweet memory. For ideal shelf life, keep it in the fridge for up to five days. Use airtight containers for the best storage tips and enjoy each delightful bite!
Can I Substitute Cake Mix Brands for This Recipe?
Absolutely, I’ve tried various cake mix brands, and the flavor differences can be surprising. When exploring cake mix comparisons, I’ve found that some brands deliver a richer taste, enhancing the overall dessert experience. Enjoy experimenting!
What Flavors of Jello Work Best for This Cake?
When I think of vibrant fruit pairings, strawberry and kiwi burst with color, while orange and pineapple create a tropical delight. Experimenting with these combinations makes each cake a stunning masterpiece that tastes as good as it looks!
Is There a Gluten-Free Version of Jello Cake?
Absolutely, I’ve found gluten-free alternatives work beautifully! Using Jello brand options, I replace regular cake ingredients with gluten-free flour and guarantee the gelatin’s safe. You’ll enjoy a delicious, vibrant dessert without the gluten worry!
Conclusion
As I take a bite of this vibrant jello cake, it’s like a burst of summer sunshine on my taste buds. The layers of color and flavor dance together, reminding me of childhood picnics and laughter. This recipe isn’t just about ingredients; it’s a celebration of joy and creativity. So, whether it’s for a special occasion or just a sweet treat, I hope you immerse yourself in this delightful creation and make your own delicious memories.
