Best Sourdough Bread Recipe
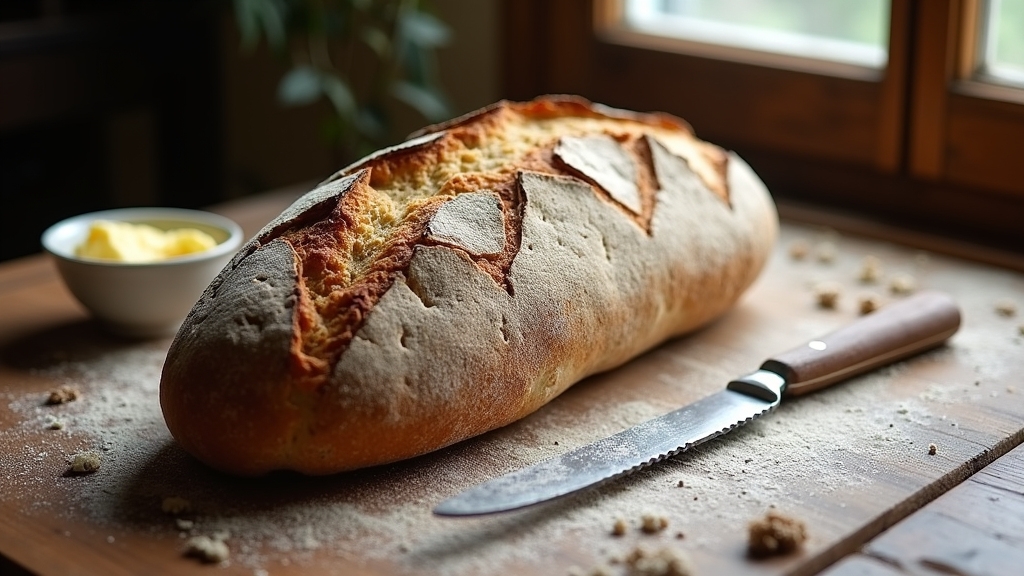
When I think of the best sourdough bread recipe, I remember the magic of wild yeast and lactic acid bacteria coming together. I start with a simple sourdough starter, whole wheat flour, and water, letting the dough ferment for hours. It’s fascinating how flavors develop during this time! I knead the dough until it’s smooth and elastic before shaping it. The result? A tangy crust and soft inside that’s utterly irresistible. There’s so much more to explore!
Contents
History
When I think about the history of sourdough bread, I can’t help but marvel at how this ancient recipe has stood the test of time. Dating back to ancient civilizations, sourdough was often made from wild yeast and lactic acid bacteria, creating a unique flavor profile that’s hard to replicate. What fascinates me most are the ancient grains used, like einkorn and spelt, which not only add depth but also connect us to our culinary roots. The fermentation techniques developed over centuries have been refined yet remain true to their origins, allowing for a beautiful balance of taste and texture. This timeless process inspires modern bakers to innovate while honoring the wisdom of those who came before us.
Recipe
Sourdough bread is a timeless staple that offers a unique flavor and texture, making it a favorite among bread enthusiasts. It’s known for its tangy taste, chewy crust, and soft, airy interior. The key to a successful sourdough loaf lies in the starter—a mixture of flour and water that ferments over time, cultivating the wild yeast and bacteria necessary for leavening. While the process may seem intimidating at first, with a little patience and the right techniques, you can create your very own artisanal sourdough bread at home.
To get started, you’ll need to verify your sourdough starter is active and bubbly. This means feeding it with equal parts flour and water about 4-8 hours before you plan to mix your dough. The fermentation process is what gives sourdough its distinctive flavor and texture, so be sure to give your starter enough time to develop. Once your starter is ready, you’ll combine it with flour, water, and salt to create a dough that will undergo several stages of fermentation and shaping before being baked to golden perfection.
Ingredients:
- 1 cup active sourdough starter
- 1 1/2 cups warm water
- 4 cups bread flour
- 1 1/2 teaspoons salt
Instructions:
In a large mixing bowl, combine the active sourdough starter and warm water, stirring until well mixed. Gradually add the bread flour and salt, mixing until a shaggy dough forms. Knead the dough on a lightly floured surface for about 10 minutes until it becomes smooth and elastic. Place the dough in a lightly greased bowl, cover it with a damp cloth, and let it rise at room temperature for 4-6 hours, or until it has doubled in size. After the first rise, gently deflate the dough, shape it into a round loaf, and place it in a well-floured proofing basket. Cover and let it rise again for 2-3 hours, or until puffy. Preheat your oven to 450°F (232°C) and place a Dutch oven inside to heat. Once ready, carefully transfer the dough into the hot Dutch oven, cover it, and bake for 30 minutes. Remove the lid and bake for an additional 15-20 minutes, or until the bread is golden brown and sounds hollow when tapped on the bottom. Allow the bread to cool completely on a wire rack before slicing.
Extra Tips:
For the best results, use a digital kitchen scale to measure your ingredients for accuracy. Temperature plays a critical role in sourdough baking; aim for a warm environment during fermentation to encourage the yeast activity. If your dough feels too sticky, allow it to rest for a few minutes before continuing to work with it. Don’t rush the rising times; patience is key when making sourdough. Finally, consider experimenting with different types of flour or adding seeds and herbs for unique flavor variations!
Cooking Steps
Now that we’ve gathered our ingredients, it’s time to roll up our sleeves and get into the cooking steps. First, I’ll combine the flour and water, creating a beautiful, sticky mixture that sets the stage for the magic of sourdough. Each step, from adding salt and starter to shaping the loaf, brings us closer to that perfect crust and airy crumb we all crave.
Step 1. Combine Flour and Water
To create that perfect sourdough starter, I start by combining equal parts flour and water in a mixing bowl. I love experimenting with different flour types—sometimes I use a mix of all-purpose and whole wheat, adding depth to the flavor. Next, I verify the water temperature is just right, between 75°F and 80°F. This warmth encourages the wild yeast and bacteria to flourish. As I mix, I watch the flour absorb the water, creating a thick, sticky paste that feels alive in my hands. It’s essential to achieve a smooth consistency, avoiding lumps, as this will set the foundation for my vibrant sourdough culture. The magic begins here, transforming simple ingredients into something extraordinary!
Step 2. Add Salt and Starter
Once the flour and water mixture is ready, I carefully add in the salt and my well-fed sourdough starter. The salt’s importance can’t be overstated; it enhances flavor and strengthens gluten, creating that desirable chewy texture. I usually opt for sea salt, but kosher salt works well too, depending on the starter types I’m using. My starter, a vibrant blend of wild yeast and bacteria, breathes life into the dough, ensuring a perfect rise. As I sprinkle the salt evenly, I can feel the excitement building—this is where the magic begins. Each ingredient plays a vital role, and I can’t wait to see how they come together, forging a symphony of flavors that’ll impress anyone who takes a bite.
Step 3. Knead the Dough Thoroughly
With the salt and starter incorporated, it’s time to knead the dough thoroughly. I like to use a combination of kneading techniques to achieve that perfect dough texture. Begin by folding the dough over itself, then pushing it away with the heel of your hand. Rotate it a quarter turn and repeat. This method not only develops gluten but also guarantees even distribution of ingredients. I typically knead for about 10 minutes until the dough feels smooth and elastic, bouncing back when poked. Trust your instincts—if it feels sticky, a light dusting of flour can help. Remember, the goal is a supple, slightly tacky dough that’ll yield a beautifully airy loaf once baked. Enjoy the process; it’s truly rewarding!
Step 4. Bulk Fermentation Period
As I set the kneaded dough aside, I enthusiastically anticipate the magic of the bulk fermentation period. This is where the real transformation happens! During this time, the dough expands and develops flavor, thanks to the wild yeast and bacteria at work. The ideal duration for bulk fermentation is typically 4 to 6 hours at room temperature, but I often experiment with longer times to enhance those complex flavors. I love watching the dough rise, feeling its texture change, and knowing the bulk fermentation benefits are unfolding. It’s a symphony of science and art, giving my sourdough the character it needs. Patience at this stage is vital; it’s where my bread begins to truly come alive!
Step 5. Shape the Dough Loaf
After the bulk fermentation, it’s time to shape the dough loaf, and this step is where your hands truly engage with the creation. I gently turn the dough onto a floured surface, feeling its texture as I begin to implement various dough shaping techniques. With a light touch, I stretch and fold, coaxing the gluten to form a beautiful structure. As I bring the edges toward the center, I’m mindful of the tension I create—this will elevate my loaf’s final rise. For loaf presentation tips, I make certain the seam is tucked underneath, which gives a polished finish. When I finally place it into a proofing basket, I can’t help but anticipate the delightful transformation that awaits in the oven.
Nutritional Guide
Understanding the nutritional aspects of sourdough bread can boost your appreciation for this artisanal loaf. The unique fermentation process not only gives it that delightful tang but also offers various nutritional benefits. Let’s explore the ingredient breakdown:
| Ingredient | Nutritional Value (per slice) | Benefits |
|---|---|---|
| Whole Wheat Flour | 70 calories | High in fiber |
| Water | 0 calories | Hydration |
| Salt | 0 calories | Enhances flavor |
| Sourdough Starter | 10 calories | Contains probiotics |
| Olive Oil (optional) | 40 calories | Healthy fats |
This combination guarantees you’re not just enjoying a tasty treat, but also nourishing your body with each bite. Embracing sourdough means indulging in innovation and tradition all at once!
Final Thoughts
While crafting the perfect loaf of sourdough is an art, it’s also a rewarding journey that brings both flavor and health benefits to your table. Throughout this process, I’ve discovered that a few baking tips can elevate your bread-making game. Experiment with hydration levels and fermentation times to reveal unique flavors. Once you’ve baked your masterpiece, it’s crucial to know proper storage methods to maintain freshness. I’ve found that wrapping your bread in a kitchen towel keeps it crusty, while a bread bag offers more softness. Embrace the creativity of sourdough, and don’t hesitate to tweak the recipe to suit your palate. Enjoy this delicious adventure, and remember, every loaf tells a story—yours is just beginning!
Frequently Asked Questions
How Do I Store Leftover Sourdough Bread Properly?
I always store leftover sourdough bread in a breathable bag, like linen, to maintain its freshness. A cool, dry spot works best, avoiding the fridge to prevent that dreaded stale texture. Enjoy your delicious loaves longer!
Can I Use Whole Wheat Flour Instead of All-Purpose?
Did you know that whole wheat flour contains 25% more protein than all-purpose? I love using it for its health benefits and unique flour texture, creating a heartier loaf that’s perfect for innovative baking adventures.
What Tools Are Essential for Making Sourdough Bread?
To make sourdough bread, I swear by a sturdy mixing bowl and a precise kitchen scale. These tools guarantee my ingredients blend perfectly, helping me achieve that delightful texture and flavor we all crave.
How Can I Tell if My Sourdough Is Over-Proofed?
I’ve learned to watch for telltale signs of over-proofing. If my sourdough’s texture becomes too soft and sticky, and fermentation timing drags on too long, I know I’ve pushed it past its prime.
Is It Possible to Make Sourdough Bread Without a Starter?
Absolutely, I’ve experimented with sourdough alternatives, like using commercial yeast or even yogurt as a starter. It’s fascinating how yeast substitutes can create different flavors and textures, delivering delicious results without the traditional starter.
Conclusion
As I savor the warm, crusty slices of my homemade sourdough, I can’t help but think: what’s more rewarding than sharing a piece of history with loved ones? This simple recipe connects us to generations past, turning flour and water into something truly magical. So, I encourage you to roll up your sleeves and give it a try. Trust me, the delightful aroma wafting through your kitchen will make every moment worthwhile. Happy baking!
