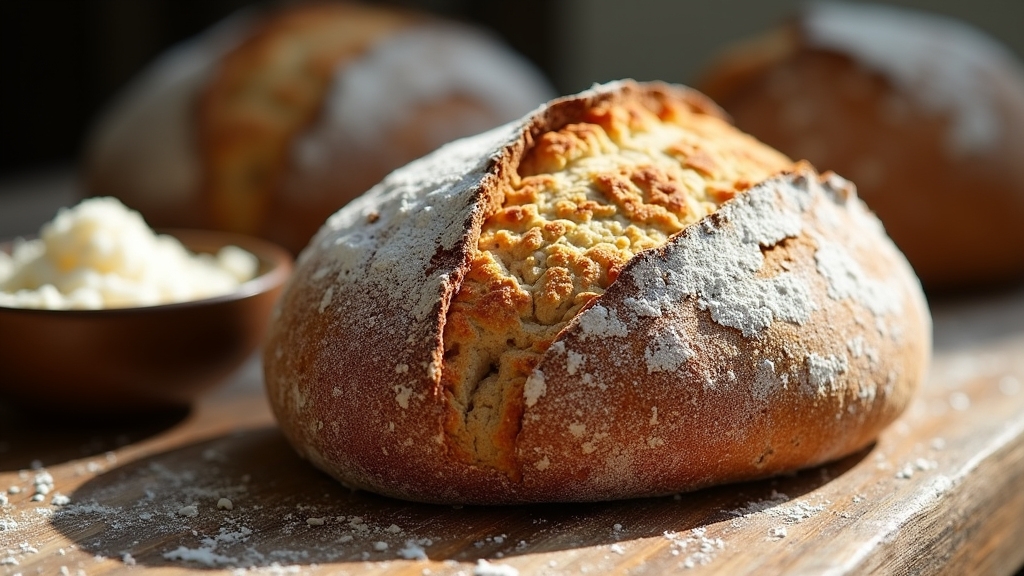
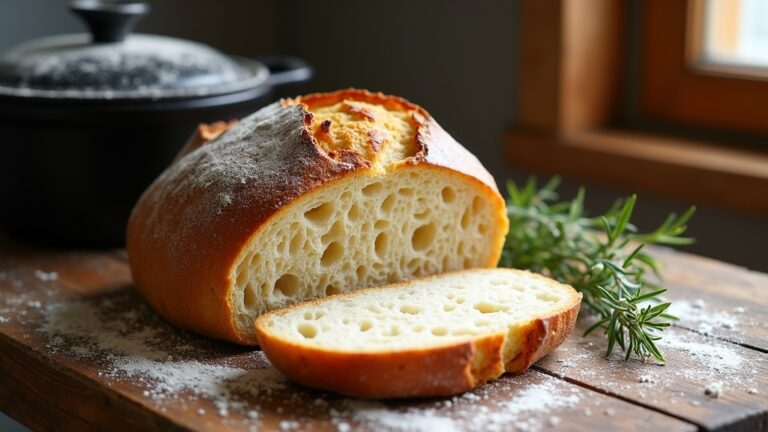
Beginner Sourdough Bread Recipe
Making sourdough bread is easier than you’d think! I start by mixing 500g of bread flour with 350g of water and letting it autolyse for 30 minutes. Then, I add 100g of my active sourdough starter and 10g of salt, mixing well. After kneading for 10-15 minutes, I let the dough rise for 4-5 hours. Finally, I shape the dough and bake at 450°F for 30-40 minutes. There’s so much more to explore in this rewarding process!
Contents
History
When I plunge into the history of sourdough bread, I find it fascinating that this ancient method of leavening dates back thousands of years. It’s rooted in the use of ancient grains, which our ancestors cultivated long before modern varieties emerged. These grains, like spelt and einkorn, carry stories of resilience and adaptation. As I explore fermentation science, I realize that the natural yeasts and bacteria present in the environment transform simple dough into a living organism. This symbiotic relationship not only enhances flavor but also improves digestibility. Each loaf becomes a reflection of the art of fermentation, connecting us to generations of bakers who harnessed these principles long before we understood the science behind them.
Recipe
Making sourdough bread at home can be a rewarding experience, especially for beginners. With just a few simple ingredients and some patience, you can create a delicious loaf with a crispy crust and tangy flavor that will impress your family and friends. The key to a successful sourdough is your starter, which is a naturally fermented mixture of flour and water that captures wild yeast and bacteria from the environment. If you don’t have a starter yet, you’ll need to make one or acquire it from a fellow baker.
Once you have your sourdough starter ready, baking your first loaf will be a delightful journey. This recipe will guide you through the process step-by-step, helping you understand the fermentation and baking stages. You’ll find that the hands-on time is minimal, while the waiting periods allow the dough to develop flavor and texture. So, roll up your sleeves and get ready to enjoy the art of sourdough baking!
Ingredients:
- 500g bread flour
- 350g water (room temperature)
- 100g active sourdough starter
- 10g salt
Cooking Instructions:
In a large mixing bowl, combine the bread flour and water. Mix until there are no dry bits of flour left, then let the mixture rest for about 30 minutes (this is called autolyse). After the rest, add the active sourdough starter and salt to the dough. Mix well to incorporate all ingredients, then begin the kneading process for about 10-15 minutes until the dough becomes smooth and elastic. Place the dough in a lightly greased bowl, cover it with a damp cloth, and let it rise at room temperature for 4-5 hours or until it has doubled in size. After the first rise, gently shape the dough into a round loaf and let it rest for another 30 minutes. Finally, preheat your oven to 450°F (230°C) and bake the loaf for 30-40 minutes or until it has a deep golden-brown crust.
Extra Tips:
To guarantee the best results, make sure your sourdough starter is active and bubbly before starting the recipe. If your kitchen is particularly cold, you can create a warm environment for the dough to rise by placing it in an oven with the light on. Additionally, using a Dutch oven can help create steam in the first part of the baking process, resulting in a crustier loaf. Experiment with different hydration levels and fermentation times to discover what works best for your taste. Happy baking!
Cooking Steps
Now, let’s get into the cooking steps that will bring your sourdough to life. I’ll guide you through mixing the flour and water, allowing the dough to rest during the autolyse, and then adding salt for flavor. Following this methodical process will guarantee you achieve a beautiful loaf.
Step 1. Mix Flour and Water
Begin by measuring out your flour and water with care. This step is essential, as the right ratios will set the foundation for your sourdough. I prefer to use a combination of flour varieties for depth of flavor and texture.
- Use a kitchen scale for accuracy
- Experiment with whole wheat or rye for complexity
- Make sure your water is at room temperature
Next, combine your flour and water in a large mixing bowl. I find using a pinch-and-fold mixing technique works wonders, helping to hydrate the flour evenly. This method not only incorporates the ingredients well but also encourages gluten development. Take your time, and don’t rush this process; each mix brings you closer to that perfect loaf!
Step 2. Autolyse the Dough Mixture
After you’ve mixed your flour and water, it’s time to let the dough rest in a process called autolyse. During this important phase, I typically set the mixture aside for about 30 minutes to an hour. This resting period allows the flour to fully hydrate, which enhances gluten development and improves the dough’s texture. One of the key autolyse benefits is that it makes the dough easier to work with, resulting in a more extensible and elastic final product. The hydration helps the enzymes in the flour activate, breaking down starches and producing sugars that contribute to flavor. Trust me, this step is essential for achieving that perfect sourdough crumb we all crave.
Step 3. Add Salt to Dough
Once the autolyse phase is complete, I gently sprinkle salt over the dough. This step is essential, as salt enhances flavor and strengthens gluten structure. I choose my salt type carefully, often opting for sea salt or kosher salt, as they dissolve well and impart a subtle taste.
- Measure accurately: I use a kitchen scale for precision, ensuring the correct amount.
- Sprinkle evenly: I distribute the salt across the dough surface to avoid clumping.
- Incorporate fully: I fold the dough gently, making sure the salt blends thoroughly for even seasoning.
Step 4. Knead the Dough Thoroughly
Kneading the dough transforms it into a smooth, elastic mass, essential for developing the gluten structure that gives sourdough its characteristic rise and texture. I start by lightly flouring my work surface and placing the dough in the center. Using the heel of my hand, I push the dough away from me, then fold it back over itself. I repeat this motion, incorporating a little flour if the dough sticks. After about 10 minutes, I notice the dough texture becoming more cohesive and springy. I also like to use kneading techniques like the “stretch and fold” method, which enhances gluten development. By the end, my dough feels alive and ready for the next exciting stage of the process!
Step 5. Bulk Fermentation Process
With the dough kneaded to a smooth consistency, it’s time to focus on the bulk fermentation process. This step is essential for developing flavor and texture in your sourdough. During bulk fermentation, I let the dough rest and rise, allowing the wild yeast to work its magic. Here are some key aspects to take into account:
- Fermentation Timing: Monitor the dough closely; it typically takes 3-4 hours at room temperature.
- Bulk Fermentation Benefits: This process enhances the bread’s flavor, creating a more complex taste.
- Stretch and Fold: Every 30 minutes, I gently stretch and fold the dough to strengthen the gluten structure.
Nutritional Guide
Understanding the nutritional aspects of sourdough bread helps me appreciate its unique benefits. This innovative bread not only boasts a complex flavor but also delivers impressive health benefits. The fermentation process enhances nutrient absorption, making it easier for our bodies to access vitamins and minerals. Plus, the ingredient ratios in sourdough, primarily flour and water, contribute to its lower glycemic index compared to regular bread.
Here’s a quick overview of the nutritional content:
| Nutrient | Amount per Slice | Health Benefit |
|---|---|---|
| Calories | 70 | Energy source |
| Protein | 3g | Muscle repair and growth |
| Fiber | 1g | Digestive health |
| Calcium | 30mg | Bone strength |
| Iron | 0.5mg | Oxygen transport in blood |
This guide highlights why sourdough is a great addition to my diet!
Final Thoughts
Sourdough bread has truly captivated me, not just for its rich flavor but also for its nutritional advantages. The sourdough benefits extend beyond taste; it’s a living, breathing project that fosters creativity in the kitchen. As you commence your own sourdough journey, keep these baking tips in mind:
- Experiment with different flours for unique textures and flavors.
- Be patient with the fermentation process; it’s key to developing that delightful tang.
- Trust your instincts; every starter behaves differently, and that’s part of the fun.
Embrace the process, and soon you’ll find that baking sourdough isn’t just about bread—it’s a fulfilling experience that connects you to a rich tradition. Happy baking!
Frequently Asked Questions
Can I Use Whole Wheat Flour for Sourdough Bread?
Sure, I’ve experimented with whole wheat flour in my sourdough. It enhances the flavor profile and boosts nutritional value, offering unique flour benefits. Just be mindful; it can change the dough’s texture and hydration needs.
How Do I Store Leftover Sourdough Bread?
I always store leftover sourdough bread in a paper bag, preserving freshness while preventing moisture buildup. If I need it to last longer, I slice and freeze it, ensuring I enjoy that delicious taste later.
What Is the Best Temperature for Sourdough Fermentation?
I’ve discovered that the ideal fermentation temperature is around 75°F to 80°F. This range promotes vibrant yeast activity, enhancing flavor and texture. Deviating too much can lead to unexpected results—trust me, it’s worth the precision!
Can I Make Sourdough Without a Starter?
I’ve found that you can make sourdough without a starter by using sourdough alternatives like wild yeast from the environment. It’s an exciting method that encourages creativity and experimentation in your baking journey.
How Long Does Sourdough Bread Last?
Sourdough bread’s shelf life typically lasts about three to four days at room temperature. I keep mine in a paper bag to maintain freshness, but refrigeration can extend its life while sacrificing that delightful texture.
Conclusion
As I wrap up this journey into sourdough, I can’t help but feel like a digital nomad in a world of ancient grains. Baking bread isn’t just about following a recipe; it’s a connection to our past, blending tradition with modern techniques. Each loaf tells a story, and with practice, yours will too. So, roll up your sleeves, embrace the process, and let the magic of fermentation turn your kitchen into a haven of warmth and flavor.
