Banana Nut Bread Recipe Moist Easy
I’ve got a fantastic, easy banana nut bread recipe that’ll make your kitchen smell divine! Start by mashing ripe bananas for sweetness, then fold in crunchy walnuts for texture. Combine wet and dry ingredients without overmixing to keep it moist and fluffy. Bake until golden, and you’ll have a delicious treat for breakfast or a snack. Want to know the best ways to enhance flavors or tips for serving? Stick around for more delightful insights!
Contents
History
When I think about the history of banana nut bread, I’m reminded of how this delicious treat evolved from humble beginnings into a beloved staple in many kitchens. The origins of bananas trace back thousands of years to Southeast Asia, where they were cultivated for their sweet, creamy flesh. As bananas spread globally, innovative bakers began experimenting with them in various recipes. The evolution of bread during the 19th century paved the way for incorporating ripe bananas into dough, creating a unique fusion of flavors. This delightful combination not only masked overripe bananas but also added moisture and richness to traditional bread. Today, banana nut bread continues to inspire culinary creativity, inviting us to embrace its rich history while making it our own.
Recipe
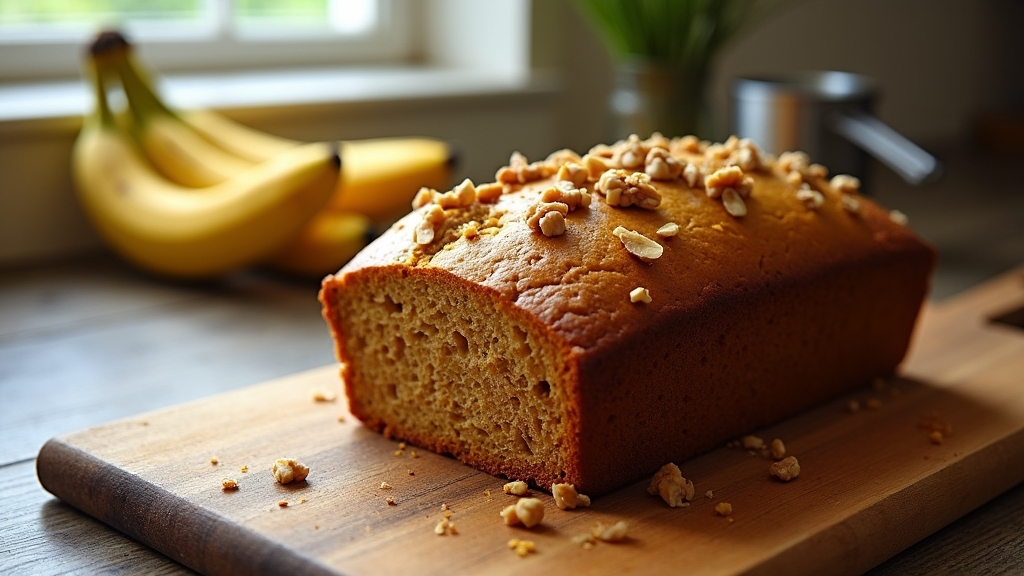
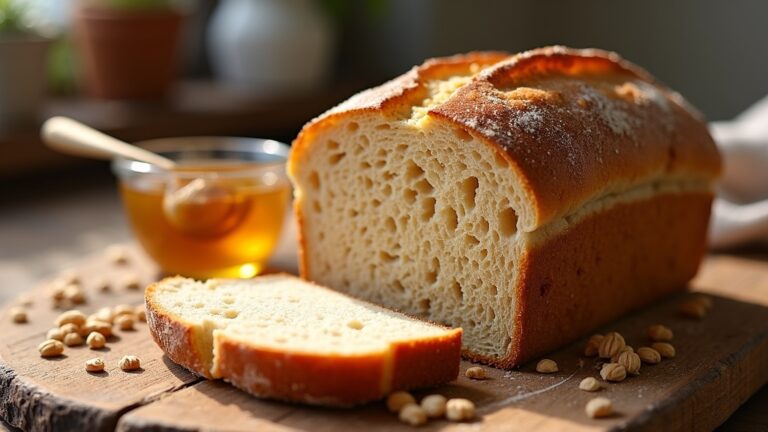
Banana nut bread is a delightful and comforting treat that combines the sweet, rich flavor of ripe bananas with the crunchy texture of nuts. This quick bread is perfect for breakfast, a snack, or even a dessert. With its simple ingredients and straightforward preparation, you can easily whip up a loaf to enjoy fresh from the oven or to share with friends and family.
To make the best banana nut bread, the key is to use overripe bananas, as they provide the ideal sweetness and moisture. You can also customize the bread by adding your favorite nuts or even incorporating chocolate chips for an extra indulgent twist. Whether served warm with a pat of butter or enjoyed plain, this banana nut bread is sure to become a staple in your baking repertoire.
Ingredients:
- 3 ripe bananas, mashed
- 1/3 cup melted butter
- 1 teaspoon baking soda
- Pinch of salt
- 3/4 cup sugar
- 1 large egg, beaten
- 1 teaspoon vanilla extract
- 1 cup all-purpose flour
- 1/2 cup chopped walnuts or pecans
To prepare the banana nut bread, preheat your oven to 350°F (175°C) and grease a 4×8 inch loaf pan. In a mixing bowl, combine the melted butter and mashed bananas, then mix in the baking soda and salt. Stir in the sugar, beaten egg, and vanilla extract. Finally, add the flour and fold in the nuts until just combined. Pour the batter into the prepared loaf pan and bake for 60-65 minutes, or until a toothpick inserted in the center comes out clean. Allow the bread to cool in the pan for about 10 minutes before transferring it to a wire rack to cool completely.
When baking banana nut bread, it’s important to use the ripest bananas you can find for the best flavor and texture. If you need to speed up the ripening process, you can place the bananas in a brown paper bag for a day or two. Additionally, feel free to experiment with different nuts or even add spices like cinnamon or nutmeg for a unique twist. For peak storage, keep the bread wrapped in plastic wrap or in an airtight container to maintain its moisture and freshness. Enjoy your delicious creation!
Cooking Steps
Let’s get started on making that delicious banana nut bread! First, I always preheat my oven to 350°F to guarantee it’s just right for baking. Next, I mash the ripe bananas thoroughly, setting the stage for that sweet, moist flavor we all love.
Step 1. Preheat Your Oven to 350°F
Preheating your oven to 350°F sets the perfect stage for baking a delicious banana nut bread. This specific oven temperature is critical because it guarantees even cooking, creating that delightful golden crust while keeping the inside moist and tender. I love using this temperature as it’s a standard in many baking techniques, allowing for the perfect balance of heat. As the oven warms up, I gather my ingredients, letting the anticipation of the aroma fill the kitchen. Once it reaches that ideal temperature, I know I’m ready to create something wonderful. Trust me, starting with the right oven temperature is the foundation of a successful bake, leading to a banana nut bread that’s both flavorful and inviting.
Step 2. Mash Ripe Bananas Thoroughly
With the oven now warmed up and ready, it’s time to turn our attention to the bananas. I grab my perfectly ripe bananas, their sweet aroma promising a delightful treat. The key here is to mash them thoroughly; this guarantees a moist banana nut bread. I use a fork, applying firm pressure to break them down until they’re almost liquid. Ripe bananas are not only sweeter but also packed with potassium and fiber, adding incredible health benefits. If your bananas aren’t quite ripe, consider using some innovative ripening techniques, like placing them in a paper bag with an apple. This traps ethylene gas and speeds up the process. Trust me, the flavor will shine through in every bite!
Step 3. Add Chopped Nuts Now
Now that the bananas are perfectly mashed, it’s time to elevate our banana nut bread with the addition of chopped nuts. Choosing the right nut varieties can truly transform the flavor and texture of our bread. I love incorporating a mix of nuts for a delightful crunch! Here’s how I do it:
- Select your nuts: Walnuts, pecans, or even macadamia nuts work wonders.
- Chop them finely: Aim for small pieces to distribute evenly throughout the batter.
- Fold them in gently: Using a spatula, incorporate the nuts without overmixing, preserving that airy texture.
Using these baking techniques guarantees each bite of our banana nut bread is packed with nutty goodness. Trust me, your taste buds will thank you!
Step 4. Mix in Dry Ingredients
After folding in those crunchy nuts, it’s time to bring in the dry ingredients that will give our banana nut bread its structure and flavor. I start by sifting together flour, baking soda, and a pinch of salt, ensuring an even distribution that enhances the bread’s texture. Using a gentle mixing technique, I carefully combine these dry ingredients with the wet mixture, mindful of the ingredient ratios for ideal moisture. This step is vital; over-mixing can lead to a dense loaf, while under-mixing might leave pockets of flour. I aim for a harmonious blend, just until I see no dry flour remaining. This balance of flavors and textures is what makes my banana nut bread so delightful and innovative!
Step 5. Pour Batter Into Loaf Pan
Carefully pour the batter into a greased loaf pan, ensuring it’s evenly distributed for a uniform bake. The key to a perfect banana nut bread lies in the batter consistency; it should be thick yet pourable. As I do this, I find it helps to:
- Use a spatula to scrape the bowl, making sure every last bit of that delicious mixture gets into the pan.
- Gently tap the loaf pan on the counter to release any air bubbles—this step can make a noticeable difference in texture.
- Smooth the top with the spatula for an aesthetically pleasing finish.
Once it’s in the oven, the delightful aroma of baking banana nut bread will soon fill your kitchen, and the anticipation will build!
Nutritional Guide
When I whip up a loaf of banana nut bread, I’m not just indulging my taste buds; I’m also considering its nutritional benefits. This delightful treat can be both delicious and nourishing, offering a balanced mix of nutrients.
Here’s a quick look at the caloric content per serving size:
| Nutrient | Amount per Serving |
|---|---|
| Calories | 200 |
| Protein | 4g |
| Carbohydrates | 30g |
With each slice, I enjoy not only the sweet, nutty goodness but also the energy it provides. The bananas are rich in potassium, while the nuts add healthy fats and protein. So, I can savor my banana nut bread knowing it’s a tasty, wholesome option!
Final Thoughts
As I reflect on my banana nut bread experience, it’s clear that this delightful loaf is more than just a treat; it’s a celebration of flavors and nutrition. Each slice brings warmth and joy, making it perfect for any occasion. Here are a few baking tips to elevate your creation:
- Ripeness Matters: Use overripe bananas for maximum sweetness and moisture.
- Explore Flavor Variations: Try adding chocolate chips, walnuts, or even a hint of cinnamon to customize your loaf.
- Don’t Overmix: Gently fold your ingredients to keep the bread light and fluffy.
With these insights, I hope you feel inspired to experiment and enjoy the endless possibilities of banana nut bread. Happy baking!
Frequently Asked Questions
Can I Use Frozen Bananas for This Recipe?
Using frozen bananas is a game-changer. Just verify their ripeness before freezing; the sweeter, the better. I love how they enhance my recipes, adding moisture and flavor that’s simply irresistible!
How Long Does Banana Nut Bread Last?
I’ve found that banana nut bread lasts about three to four days at room temperature if stored properly. For longer shelf life, refrigerate it, and follow my storage tips to keep it fresh and delicious!
Can I Make This Recipe Gluten-Free?
Did you know about 1 in 100 people are celiac? I love using gluten-free flours like almond or coconut for baking substitutions, making delicious treats that everyone can enjoy, regardless of dietary needs.
What Nuts Work Best in Banana Nut Bread?
When I make banana nut bread, I love using walnuts for their health benefits and pecans for their rich, buttery flavor. Both add delightful textures and enhance the overall taste, making each slice unforgettable.
Can I Add Chocolate Chips to the Recipe?
Absolutely, I love adding chocolate chips! They create delightful chocolate chip variations that enhance the flavor. Just remember to balance the sweetness, so your banana bread remains rich and satisfying without overwhelming the nutty goodness.
Conclusion
As I wrap up this delightful journey into the world of banana nut bread, I hope you’re inspired to whisk up your own batch of this comforting treat. Each bite is a warm hug, a sweet embrace of nostalgia that dances on your palate. So, don’t be shy—let those ripe bananas find their purpose and create a loaf that sings with flavor. Trust me, your taste buds will thank you, and your kitchen will smell like a slice of heaven.
