Bread Rolls Recipe
If you’re looking to make delicious homemade bread rolls, I’ve got a simple recipe for you! You’ll mix basic pantry staples, knead the dough until it’s soft and pliable, and let it rise to achieve fluffiness. Once shaped, bake them at 375°F for about 15-20 minutes until golden brown. The aroma will fill your kitchen, tantalizing everyone! Keep going, and I’ll share tips on serving suggestions and creative uses for these delightful rolls.
Contents
History
When I think about the history of bread rolls, I can’t help but marvel at their evolution over centuries. These delightful morsels trace their ancient origins back to the earliest civilizations, where simple grains were transformed into nourishing staples. As cultures flourished, bread rolls became more than just food; they symbolized community, celebration, and sustenance. In ancient Egypt, they were offered to deities, while in medieval Europe, sharing rolls marked hospitality. Each region infused its unique flavors and techniques, showcasing the cultural significance behind these humble creations. Today, as we innovate with ingredients and methods, it’s fascinating to see how bread rolls continue to adapt, bridging tradition and modern culinary artistry. The journey of these rolls is a reflection of our ever-changing relationship with food.
Recipe
Making homemade bread rolls is a delightful experience that fills your kitchen with the warm aroma of freshly baked bread. These soft and fluffy rolls are perfect for any meal, whether as a side dish or as a base for sliders and sandwiches. With just a handful of ingredients, you can create a delicious batch that will impress family and friends alike.
This bread rolls recipe combines basic pantry staples with a bit of love and patience to yield rolls that are golden on the outside and soft on the inside. The process involves mixing, kneading, and allowing the dough to rise, which develops the flavor and texture. Once baked, you’ll have irresistible bread rolls that are perfect for soaking up sauces or simply slathered with butter.
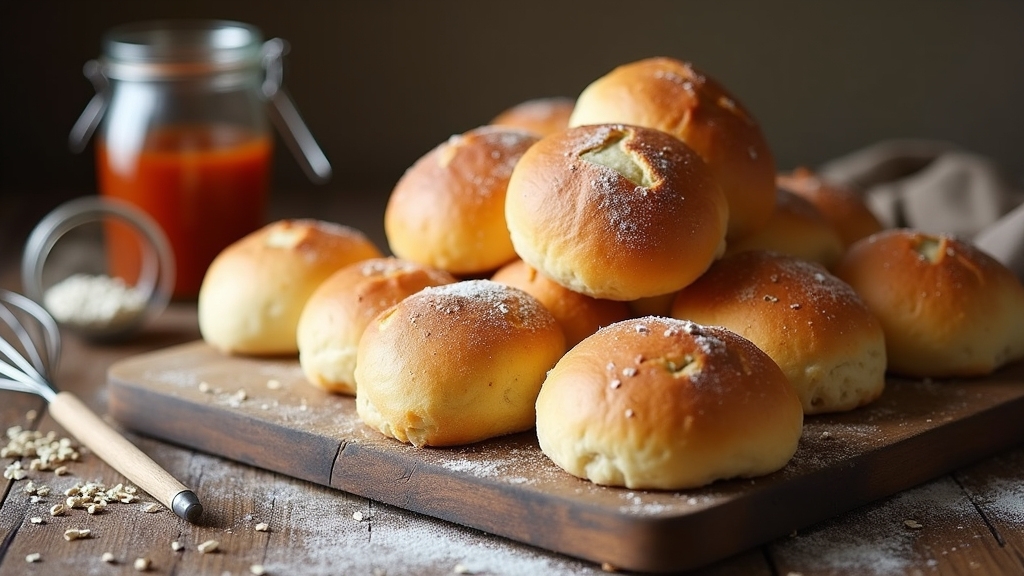
This simple bread rolls recipe transforms basic ingredients into golden, fluffy delights perfect for any meal.
Ingredients:
- 4 cups all-purpose flour
- 2 tablespoons sugar
- 1 teaspoon salt
- 2 ¼ teaspoons (1 packet) active dry yeast
- 1 ½ cups warm water (110°F)
- 2 tablespoons unsalted butter, melted
- 1 egg (for egg wash, optional)
Instructions:
In a large mixing bowl, combine the warm water and sugar, then sprinkle the yeast on top and let it sit for about 5 minutes until frothy. Next, add the melted butter, salt, and the flour gradually, mixing until a dough forms. Knead the dough on a floured surface for about 8-10 minutes until smooth and elastic. Place the dough in a greased bowl, cover it with a clean cloth, and let it rise in a warm place for about 1 hour, or until doubled in size. After rising, punch down the dough and divide it into 12 equal pieces, shaping each piece into a roll. Place the rolls on a greased baking sheet, cover them, and let them rise again for about 30 minutes. Preheat your oven to 375°F (190°C), and if desired, brush the tops of the rolls with an egg wash for a shiny finish. Bake for 15-20 minutes or until golden brown.
Extra Tips:
For best results, make certain that your water is the right temperature to activate the yeast without killing it, ideally around 110°F. If you’re in a hurry, you can create a warm environment for the dough to rise by placing it in an oven that’s turned off but has the light on. You can also experiment by adding herbs or spices to the dough for extra flavor, or if you prefer a sweeter roll, consider incorporating some honey or cinnamon. Always let the rolls cool for a few minutes before serving to enhance their flavor and texture. Enjoy your freshly baked bread rolls!
Cooking Steps
To bring our bread rolls to life, I’ll guide you through the essential cooking steps. First, we’ll preheat the oven to create the perfect environment for baking. Then, I’ll show you how to knead the dough and let it rise so it’s fluffy and delicious.
Step 1. Preheat Your Oven
Before diving into the dough, I always find it essential to preheat the oven. Setting the right oven temperature is vital for achieving those perfect bread rolls. I typically crank it up to 375°F (190°C), which creates a warm, inviting environment for baking. This temperature not only helps the rolls rise beautifully but also guarantees a golden-brown crust that’s simply irresistible.
While the oven heats up, I gather my ingredients, allowing the anticipation to build. I know that the baking time will be critical, usually around 15 to 20 minutes, depending on my oven’s quirks. By preheating properly, I set the stage for success, guaranteeing every batch of rolls is light, fluffy, and bursting with flavor.
Step 2. Knead the Dough Thoroughly
Kneading the dough is where the magic truly happens, transforming simple ingredients into a silky, elastic mixture. I start by dusting my countertop with a light sprinkle of flour, ensuring the dough doesn’t stick. Using my palms, I push the dough away from me, then fold it back over itself—a fundamental kneading technique. I repeat this process, feeling the dough’s consistency change with each motion. It should be smooth and slightly tacky, not too sticky. If it feels too dry, I add a tiny splash of water. Remember, kneading isn’t just about strength; it’s about rhythm and patience. Aim for about 8-10 minutes, and soon, you’ll have a beautifully kneaded dough ready to rise.
Step 3. Let Dough Rise Properly
Once the dough’s been kneaded to perfection, it’s time to let it rise. This step is essential for proper dough fermentation, allowing the yeast activation to work its magic. I like to find a warm, draft-free spot in my kitchen; it helps the dough rise beautifully. Cover the bowl with a damp cloth to retain moisture and prevent a crust from forming. As it rises, I watch the dough transform, puffing up and becoming airy. It’s fascinating to see the bubbles forming, a sign that the yeast is doing its job. I usually let it rise for about an hour, or until it’s doubled in size. This patience is key to achieving those light, fluffy rolls we all crave!
Step 4. Shape the Rolls Evenly
With the dough properly risen, it’s time to shape the rolls evenly for that perfect bake. I start by dividing the dough into pieces, aiming for uniform roll sizes that guarantee even cooking. Using various shaping techniques, like the classic round or the more playful knot shape, I create a visual feast. I gently tuck the edges under, creating tension on the surface, which helps achieve that delightful rise. As I work, I focus on maintaining consistency; each roll should be a similar size to promote even baking. The excitement builds as I prepare these beautifully shaped rolls, knowing that this step lays the foundation for a delightful, innovative bread experience that’ll impress everyone at the table.
Step 5. Bake Until Golden Brown
After shaping those rolls into perfect little rounds, it’s time to bring them to life in the oven. Preheat your oven to 375°F (190°C), and while it’s warming up, I like to let the dough rise for a few more minutes. This step enhances the texture. Once the oven is ready, place the rolls inside and set a timer for about 20 minutes. I often rotate the pan halfway through to guarantee even baking, a simple yet effective baking technique. Keep an eye on those rolls; they’ll transform into a beautiful golden crust. When they’re perfectly browned, I pull them out and let them cool slightly. There’s nothing quite like the aroma of freshly baked bread!
Nutritional Guide
While baking bread rolls may seem like a simple task, understanding their nutritional profile can greatly enhance your meal planning. I find it essential to pay attention to both caloric content and dietary fiber to create a well-balanced meal. Here’s a quick overview of the nutritional aspects you might want to take into account:
| Nutrient | Amount per Roll |
|---|---|
| Calories | 150 |
| Protein | 4g |
| Dietary Fiber | 2g |
| Carbohydrates | 30g |
Final Thoughts
Baking bread rolls offers not just a delightful aroma that fills your kitchen but also a fantastic opportunity to enjoy a nutritious addition to your meals. I’ve found that following a few baking tips can elevate the experience, like experimenting with herbs or adding seeds for texture and flavor. Remember, the dough should be soft and pliable, so don’t hesitate to adjust the flour as needed.
When it comes to serving suggestions, these rolls shine at any table. Picture them warm alongside a hearty soup or as the base for creative sandwiches. You can even transform them into mini sliders for gatherings. So, let your imagination run wild, and enjoy the delicious rewards of your baking adventure!
Frequently Asked Questions
Can I Use Whole Wheat Flour Instead of All-Purpose Flour?
Sure, I’ve swapped all-purpose flour for whole wheat before. Whole wheat’s benefits include added fiber and nutrients, but it can change the flour texture. I loved the nutty flavor it brought to my baking adventures!
How Can I Store Leftover Bread Rolls?
To store leftover bread rolls, I recommend wrapping them tightly in plastic or foil. For reheating, I love using the oven for that fresh-baked taste, or a microwave for quick warmth. Those are my favorite storing tips!
What Toppings Can I Add to Bread Rolls?
I love experimenting with toppings! For a delicious twist, try herb butter for a fresh, fragrant flavor or a rich garlic spread that adds a savory kick. Both options elevate your rolls to a whole new level!
Can I Freeze the Dough Before Baking?
Absolutely, I often freeze dough before baking! It preserves the dough texture beautifully. Just make sure to wrap it tightly, and when you’re ready, let it thaw and rise for delightful, fresh rolls.
How Do I Know When the Rolls Are Done Baking?
I usually check the rolls’ texture; they should be golden brown and sound hollow when tapped. Using baking techniques like an instant-read thermometer helps too—aim for around 190°F for perfectly baked rolls that everyone loves!
Conclusion
As I pulled the golden-brown bread rolls from the oven, I couldn’t help but recall the first time I baked with my grandmother. The warm aroma filled my kitchen, just like hers did years ago. It’s funny how a simple recipe can connect generations, isn’t it? I hope you give this bread roll recipe a try and create your own delicious memories. After all, there’s nothing quite like sharing warm rolls with loved ones—it’s magic in every bite!
