Bread Sticks Recipe
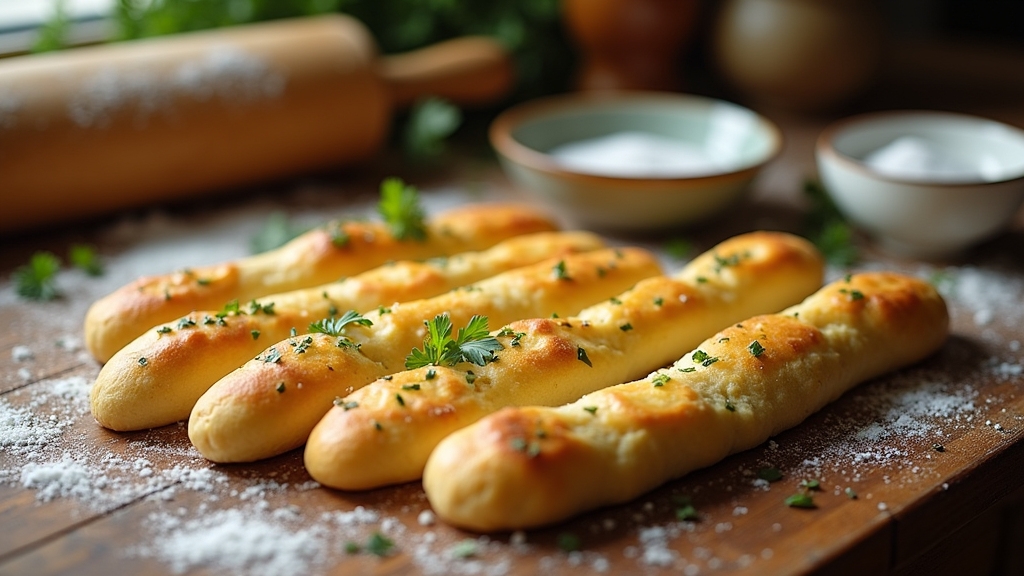
I love making homemade breadsticks that are soft and flavorful! You’ll start with simple ingredients like flour, warm water, and yeast. After mixing and kneading the dough, let it rise to create that perfect texture. Then shape the sticks, let them rise again, and bake until golden. These delicious breadsticks pair wonderfully with pasta or dips. If you’re excited to try out this recipe and explore creative twists, I’ve got plenty more tips to share!
Contents
History
When I think about the history of breadsticks, I can’t help but imagine their journey from humble beginnings to a beloved snack around the world. With ancient origins rooted in Italy, these crispy delights evolved from simple bread dough into the flavorful accompaniments we enjoy today. In the 14th century, bakers crafted them to accompany meals, believing their dry texture would last longer. As I dive deeper, I discover cultural variations that showcase creativity—think grissini in Italy and breadsticks in the United States, each reflecting regional flavors. This evolution speaks to our ever-changing tastes and desire for innovation in the kitchen. Breadsticks, once mere sustenance, have transformed into a canvas for culinary expression, uniting diverse cultures through a shared love of flavor.
Recipe
Breadsticks are a delightful addition to any meal, offering a warm, comforting side that complements various dishes. Whether you’re serving them alongside a hearty pasta, a fresh salad, or just enjoying them with a dip, homemade breadsticks bring a sense of satisfaction and aroma to your kitchen. The best part is that they are relatively easy to make, requiring only a handful of ingredients and some patience as they rise and bake to golden perfection.
Homemade breadsticks add warmth and comfort to any meal, making every dish even more delightful.
This simple breadstick recipe uses basic pantry staples to create a soft and chewy texture that will leave everyone craving more. With a hint of garlic and a sprinkle of herbs, these breadsticks are not only delicious but also versatile enough to pair with any cuisine. Baking them fresh means you can enjoy them warm from the oven, enhancing their flavor and making them even more irresistible.
Ingredients:
- 2 cups all-purpose flour
- 1 cup warm water (110°F)
- 1 packet (2 ¼ teaspoons) active dry yeast
- 1 teaspoon sugar
- 1 teaspoon salt
- 2 tablespoons olive oil
- 1 teaspoon garlic powder
- 1 teaspoon dried oregano
- 1 teaspoon dried basil
- 1 tablespoon melted butter (for brushing)
Instructions:
In a large mixing bowl, combine warm water, sugar, and yeast; let it sit for about 5 minutes until frothy. Add the olive oil, salt, and garlic powder, then gradually stir in the flour until a soft dough forms. Knead the dough on a floured surface for about 5-7 minutes until smooth. Place the dough in a greased bowl, cover it with a clean cloth, and let it rise in a warm place for about 1 hour or until doubled in size. Once risen, punch down the dough and roll it out into a rectangle about ½ inch thick. Cut the dough into strips, twist each strip, and place them on a baking sheet lined with parchment paper. Let them rise for another 20 minutes, then brush with melted butter and sprinkle with dried oregano and basil. Bake in a preheated oven at 375°F for 15-20 minutes or until golden brown.
Extra Tips:
For the best flavor, consider adding grated Parmesan cheese on top of the breadsticks just before baking. You can also experiment with different herbs and spices to customize the flavor to your liking. If you enjoy a crispier texture, bake the breadsticks a few minutes longer, but be sure to keep an eye on them to prevent burning. These breadsticks are best enjoyed fresh, but you can store any leftovers in an airtight container for up to two days; simply reheat in the oven for a few minutes to regain their softness.
Cooking Steps
Now that we have our ingredients ready, let’s jump into the cooking steps! I’ll guide you through mixing the dry ingredients, gently kneading the dough, and letting it rise just enough to get that perfect texture. By the end of this process, we’ll shape our dough into delightful sticks and bake them to a beautiful golden brown.
Step 1. Mix Dry Ingredients Together
To create the perfect base for your breadsticks, I begin by combining the dry ingredients. First, I carefully measure the flour, ensuring it’s light and fluffy—this step’s essential for achieving that airy texture. Next, I add salt and yeast, each bringing their unique flavor profiles to the mix. Using a whisk, I employ gentle mixing techniques to blend everything evenly, which helps distribute the yeast and salt without clumping. I often find that sifting the flour beforehand elevates the final product, making a noticeable difference in the dough’s quality. As I watch the ingredients come together, I can’t help but feel excited about how these simple elements will soon transform into delicious, golden-brown breadsticks!
Step 2. Knead the Dough Gently
Gently pressing my palms into the soft dough, I begin the kneading process, which is essential for developing gluten and creating that perfect chewy texture. Using various kneading techniques, I fold and push the dough, ensuring I maintain an even pressure. I can feel the dough transforming beneath my hands, becoming more elastic and smooth. If it feels too sticky, I sprinkle a little flour to adjust the dough consistency without overworking it. I pay close attention to the texture, aiming for a silky surface that springs back when pressed. This part of the process is where my bread sticks start to come alive, and with every knead, I can already envision the delicious outcome awaiting me.
Step 3. Let Dough Rise Briefly
As I place the kneaded dough in a lightly oiled bowl, I can’t help but feel a sense of anticipation for what’s to come. I cover it with a damp cloth, allowing the warmth to encourage dough fermentation. This brief rising period is essential; it activates the yeast, giving the dough that perfect airy texture we all crave. I set the bowl in a cozy spot, perhaps near the oven, where the gentle heat can work its magic. After about 30 minutes, I check the dough’s progress. It should have doubled in size, filled with tiny bubbles, a sign of successful yeast activation. This moment sets the stage for the delightful breadsticks that await.
Step 4. Shape the Dough Into Sticks
With the dough now beautifully risen, it’s time to bring it to life by shaping it into sticks. I gently punch down the dough to release air, then divide it into equal portions. Using simple dough shaping techniques, I roll each piece into long, even strands, ensuring they’re about half an inch thick. To add a twist, I experiment with stick variations, like sprinkling herbs or parmesan on top before baking. These flavorful additions not only enhance the taste but also invite creativity. As I shape each stick, I can already envision the delightful crunch and soft interior that awaits. It’s a satisfying process that transforms humble dough into something truly special, ready for the next step!
Step 5. Bake Until Golden Brown
Once I’ve shaped the dough into sticks, the next vital step is to bake them until they turn a beautiful golden brown. Preheating the oven to 400°F (200°C) is essential; this guarantees that the baking techniques I use yield a perfect result. As I place the sticks on a parchment-lined baking sheet, I brush them lightly with olive oil for that irresistible shine and flavor. I love to sprinkle a pinch of sea salt on top to enhance the taste. After about 12 to 15 minutes, I peek inside the oven and watch for that glorious golden crust to form. When they’re done, I can’t resist the urge to pull them out and let the aroma fill my kitchen!
Nutritional Guide
When it comes to enjoying breadsticks, understanding their nutritional value can enhance your dining experience. These delightful treats don’t just satisfy your cravings; they can also offer some health benefits when made with the right ingredients. Here’s a quick glance at their caloric content and ingredient benefits:
| Nutrient | Amount per Serving |
|---|---|
| Calories | 150 |
| Carbohydrates | 30g |
| Protein | 4g |
| Fat | 3g |
| Fiber | 1g |
Final Thoughts
Enjoying breadsticks can be a delightful experience, especially when you appreciate their nutritional benefits. As I reflect on this recipe, my final thoughts center around the joy of creativity. These versatile breadsticks aren’t just a side; they’re an opportunity to explore flavors. Experiment with herbs, cheeses, or even a sprinkle of garlic for that extra zing. I love pairing them with homemade marinara or a rich, herbed olive oil for dipping—such serving suggestions can elevate your meal. Remember, the joy of cooking lies in innovation, so don’t hesitate to tweak the recipe to suit your palate. Whether it’s a family dinner or a casual gathering, these breadsticks will surely impress. Happy baking, and enjoy every bite!
Frequently Asked Questions
Can I Use Whole Wheat Flour for Bread Sticks?
I love using whole wheat flour for breadsticks. It adds a nutty flavor and boosts nutrition. Just keep in mind, the texture might be denser, but the health benefits are totally worth it!
How Can I Make Gluten-Free Bread Sticks?
To make gluten-free bread sticks, I mix various gluten-free flours like almond and tapioca. I love experimenting with different bread stick variations, adding herbs or cheese for flavor. The results are always delicious and satisfying!
What Is the Best Way to Store Leftover Bread Sticks?
It’s funny how leftover bread sticks can vanish in an instant! For proper storage, I wrap them tightly in foil or plastic. Storing tips? Keep them in an airtight container to maintain freshness and flavor longer.
Can I Freeze Uncooked Bread Sticks?
Absolutely, I can freeze uncooked bread sticks! I shape the dough, then use proper freezing methods, ensuring the dough’s consistency remains intact. It’s a fantastic way to enjoy fresh bread sticks anytime I crave them!
What Dips Pair Well With Bread Sticks?
When I think about dips, my mind races with delicious sauce pairings and creamy cheese dips. Imagine the contrast of tangy marinara against rich alfredo, or spicy buffalo dip meeting smooth cheddar – pure bliss!
Conclusion
As I pull the golden-brown breadsticks from the oven, their warm aroma wraps around me like a cozy blanket. Making these delicious treats has been a delightful journey, blending history and flavor in every bite. Whether you serve them as a snack or alongside a hearty meal, they’re sure to elevate your dining experience. So, gather your ingredients and let your culinary creativity shine—these breadsticks are the perfect companion for any occasion! Enjoy every scrumptious bite!
