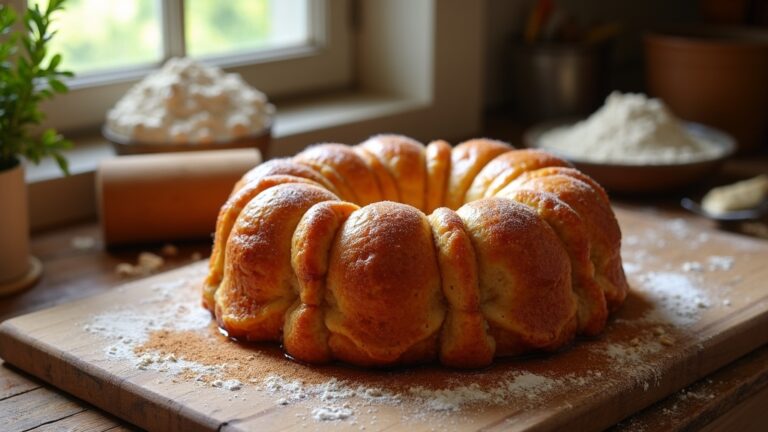
Ciabatta Bread Recipe
To create delicious ciabatta bread at home, mix 4 cups of all-purpose flour with 1 ½ cups of room temperature water, 2 teaspoons of salt, and 1 teaspoon of instant yeast. Knead the dough until it’s elastic, let it rise overnight, then shape it gently to keep the air bubbles intact. Bake in a preheated oven with a pan of water for a crispy crust. Enjoy this artisan loaf on its own or as a base for tasty sandwiches; there’s so much more to explore!
Contents
History
When you think of ciabatta bread, you might picture its rustic, airy texture and golden crust, but its history is just as fascinating. Originating in Italy during the late 20th century, ciabatta was crafted as a response to the popularity of French baguettes. Bakers sought to create a uniquely Italian loaf that embodied their culinary spirit. With its chewy interior and crisp exterior, it quickly gained acclaim. The secret lies in the innovative baking techniques used, such as high-hydration dough and long fermentation processes, which contribute to its distinct flavor and texture. This bread symbolizes the Italian passion for quality and tradition, making it a delectable staple in kitchens around the world, inviting you to explore its rich heritage as you savor each bite.
Recipe
Ciabatta bread is a delightful Italian loaf known for its rustic appearance, airy crumb, and crispy crust. This bread is perfect for sandwiches or simply enjoyed with olive oil and balsamic vinegar. The name “ciabatta,” which means “slipper” in Italian, refers to the bread’s shape, resembling a slipper. With its chewy texture and open crumb structure, ciabatta is a favorite among bread lovers and is surprisingly easy to make at home.
Ciabatta bread, with its rustic charm and airy texture, is a beloved Italian classic perfect for any meal.
To achieve the perfect ciabatta, you’ll need to be mindful of the dough’s hydration level. The high water content creates a wet dough that can be tricky to handle, but it’s essential for achieving that characteristic open crumb. Allowing the dough to rise slowly and develop flavor is key, so be patient and give it time. With a little practice, you’ll be able to bake a loaf that rivals those from artisan bakeries.
Ingredients:
- 4 cups all-purpose flour
- 1 ½ cups water (room temperature)
- 2 teaspoons salt
- 1 teaspoon instant yeast
Instructions:
In a large mixing bowl, combine the flour, salt, and instant yeast. Gradually add the water, mixing until a ragged dough forms. Cover the bowl with plastic wrap and let it rest for about 12-18 hours at room temperature, allowing the dough to rise and develop flavor. After the resting period, dust a clean work surface with flour and gently transfer the dough onto it. Carefully stretch and fold the dough a few times, then divide it into two pieces. Shape each piece into a rough rectangle and place them on a floured baking sheet. Cover with a kitchen towel and let them rise for another 1-2 hours. Preheat your oven to 450°F (230°C) and place a baking stone or an inverted baking sheet inside to heat up. Once the ciabatta loaves have risen, carefully transfer them onto the preheated surface and bake for about 25-30 minutes or until golden brown. Let them cool on a wire rack before slicing.
Extra Tips:
When working with this high-hydration dough, keep your hands and work surface floured to prevent sticking. Consider using a bench scraper to help handle the dough without deflating it too much. For a more intense flavor, you can add a poolish or a preferment the night before. Also, if you want an even crispier crust, place a pan with water in the oven during baking to create steam. Enjoy your freshly baked ciabatta bread!
Cooking Steps
Now that you have your ingredients ready, it’s time to bring them together and create something magical. Start by mixing your flour and water, then add in the yeast and salt for that perfect flavor. Kneading the dough thoroughly and letting it rise overnight will set the stage for beautifully airy loaves.
Step 1. Mix Flour and Water
To create the perfect ciabatta dough, you’ll start by mixing flour and water, ensuring a strong foundation for your bread. Choose high-quality flour types, like bread flour or all-purpose flour, to achieve that delightful texture. In a large mixing bowl, combine your selected flour with water at the ideal temperature—around 75°F (24°C). This warmth encourages optimal hydration, promoting gluten development. Stir the mixture until it forms a shaggy mass, and don’t worry about lumps; they’ll smooth out later. Embrace the freedom of experimenting with ratios and textures! As you mix, feel the dough transform, sensing the magic of simplicity. This step is essential, setting the stage for a delicious, airy ciabatta that’ll impress anyone lucky enough to taste it.
Step 2. Add Yeast and Salt
As you prepare to elevate your ciabatta dough, adding yeast and salt is essential for flavor and fermentation. Start by choosing the right yeast types; whether you opt for active dry yeast or instant yeast, both will work wonders in creating that airy texture. Dissolve the yeast in warm water if you’re using active dry, ensuring it activates before mixing. Next, sprinkle in the salt, which plays an important role in strengthening the dough’s structure and enhancing its taste. Remember, too much salt can inhibit yeast activity, so balance is key. Stir everything together until well combined, setting the stage for a beautifully risen ciabatta that’s packed with flavor. Embrace the process and let your creativity flow!
Step 3. Knead the Dough Thoroughly
Kneading the dough thoroughly is where the magic truly happens. As you begin, use your palms to push the dough away, then fold it back over itself. This kneading technique builds strength and elasticity, essential for that signature ciabatta texture. You’ll want to keep going until the dough achieves a smooth, slightly tacky consistency. Don’t be afraid to flour your surface lightly to prevent sticking, but remember, too much flour can alter the dough consistency. Feel the dough transform under your hands; it should spring back when poked. Aim for about 10 to 15 minutes of kneading—you’ll know it’s ready when it feels soft and supple. Enjoy the process; it’s a liberating experience that connects you to the art of baking!
Step 4. Let Dough Rise Overnight
Once you’ve kneaded the dough to perfection, it’s time to let it rise overnight, allowing the flavors to develop and the texture to improve. This step is vital for dough fermentation, as the yeast works its magic while you sleep. Place your dough in a lightly oiled bowl, cover it with a damp cloth or plastic wrap, and let it sit in a warm spot. You’ll notice it doubling in size by morning, a sign that the overnight rising has been successful. This slow fermentation process enhances the bread’s flavor and creates those signature holes throughout. Embrace the anticipation; tomorrow you’ll shape that fluffy, aromatic dough into beautiful loaves ready for baking!
Step 5. Shape the Dough Loaves
After letting the dough rise overnight, you’re ready to shape it into loaves that will soon become the star of your meal. Start by dusting your work surface with flour to prevent sticking. Gently turn the dough out, being careful not to deflate it too much—this will preserve those lovely air bubbles. For effective dough shaping, divide it into two equal pieces. Using loaf techniques, stretch each piece into a rectangle, folding the edges inward to create structure. Once shaped, let the loaves rest for about 30 minutes. This short resting period allows the gluten to relax, making it easier to handle. With a little patience, you’ll achieve beautifully shaped ciabatta loaves, ready for baking!
Nutritional Guide
While enjoying a slice of freshly baked ciabatta, you might wonder about its nutritional profile and how it fits into your diet. This delightful bread not only satisfies your cravings but also offers various ingredient benefits. With a balanced caloric content, ciabatta can be a part of a wholesome diet when consumed in moderation. Here’s a quick look at its nutritional components:
| Nutrient | Per Slice (approx. 50g) | Benefits |
|---|---|---|
| Calories | 130 | Energy source |
| Carbohydrates | 25g | Fuel for your body |
| Protein | 4g | Muscle repair and growth |
| Fat | 1.5g | Supports cell function |
| Fiber | 1g | Aids digestion |
Embrace the goodness of ciabatta and enjoy its benefits!
Final Thoughts
Enjoying ciabatta is more than just a treat; it’s about experiencing the delightful interplay of flavors and textures that this bread brings to your meals. With its airy, chewy crumb and crispy crust, ciabatta pairs beautifully with various dishes. For the best results, remember these baking tips: always use high-quality ingredients and let your dough rise properly to achieve that perfect texture. When it comes to serving suggestions, think beyond the ordinary—try it as a base for bruschetta, a sandwich, or simply dipped in olive oil. Each bite is a reminder that baking can be both an art and a joy. So, release your creativity and enjoy the freedom of making this wonderful bread at home!
Frequently Asked Questions
Can I Use Whole Wheat Flour Instead of All-Purpose Flour?
You can use whole wheat flour instead of all-purpose flour, but expect a denser, heartier texture. It’ll add a nutty flavor and more nutrients, giving you a delightful twist on your usual baking experience. Enjoy experimenting!
How Long Does Ciabatta Bread Stay Fresh?
Ciabatta freshness typically lasts about two to three days at room temperature. After that, its shelf life decreases, but storing it in an airtight bag can help maintain that delightful texture and flavor a bit longer.
Can I Freeze Ciabatta Bread?
Yes, you can freeze ciabatta bread! Use proper freezing methods to wrap it tightly, and when you’re ready, employ thawing techniques like leaving it at room temperature for a delightful taste of freedom and freshness.
What Is the Best Way to Store Ciabatta Bread?
To keep your ciabatta bread fresh, wrap it in a clean kitchen towel and store it at room temperature. Avoid plastic bags; they trap moisture and can ruin your bread’s delightful crust. Enjoy every bite!
Can I Add Herbs or Spices to the Dough?
You can elevate your dough by adding vibrant herb combinations like rosemary or thyme, or experimenting with spice variations such as garlic or chili flakes. It’ll create a unique, flavorful experience you’ll love!
Conclusion
As you savor the crispy crust and airy interior of your homemade ciabatta, you might realize it’s more than just bread—it’s a connection to centuries of tradition. Each bite carries whispers of Italian bakers, their hands crafting loaves just like yours. Coincidentally, in a world that often rushes by, you’ve taken the time to create something beautiful and nourishing. So, share your ciabatta with loved ones and let it remind you of the power of simple pleasures in life.


