Gluten Free Bread Recipe
I’ve found that making gluten-free bread is both fun and rewarding! Using ingredients like almond flour and brown rice flour gives it a delightful texture and flavor. The process starts with mixing dry ingredients, slowly adding wet ones, and kneading until smooth. Hydration is key for the perfect rise—don’t rush it! With fresh ingredients, your bread not only tastes better but is also more nutritious. Stick around, and I’ll share more tips for perfecting your gluten-free baking adventures!
Contents
History
When I plunge into the history of gluten-free bread, I can’t help but appreciate how far we’ve come in redefining what bread can be. Once, ancient grains like quinoa and millet were the staples for those with dietary restrictions, offering nourishment without gluten’s challenges. Early bakers experimented with these grains, crafting unique textures and flavors that resonated with diverse cultures. Over time, as awareness of gluten intolerance grew, innovation surged. Today, we blend these ancient grains with modern techniques, creating gluten-free bread that’s not just a substitute but a celebration of taste and health. I find it fascinating how our journey reflects a commitment to inclusivity in food, allowing everyone to savor the joys of bread, regardless of their dietary needs.
Recipe
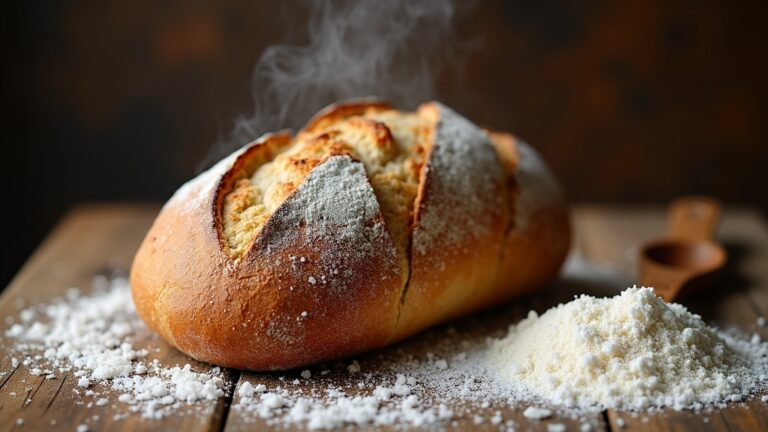
Gluten-free bread is a delightful alternative for those who are sensitive to gluten or simply prefer a gluten-free lifestyle. With the right blend of ingredients, you can achieve a soft and fluffy texture that rivals traditional bread. This recipe is not only easy to follow but also versatile—perfect for sandwiches, toast, or simply enjoying with butter and jam.
Making gluten-free bread at home guarantees that you have full control over the ingredients, avoiding any additives or preservatives often found in store-bought options. Plus, the aroma of freshly baked bread filling your kitchen is truly irresistible. Gather your ingredients and get ready to enjoy a warm slice of homemade gluten-free goodness!
Ingredients:
- 3 cups gluten-free all-purpose flour
- 1 teaspoon salt
- 1 tablespoon sugar or honey
- 1 tablespoon instant yeast
- 1 cup warm water (about 110°F)
- 1/4 cup olive oil or melted coconut oil
- 2 large eggs
- 1 teaspoon apple cider vinegar
Instructions:
In a large mixing bowl, combine the gluten-free all-purpose flour, salt, sugar, and instant yeast. In a separate bowl, whisk together the warm water, oil, eggs, and apple cider vinegar. Gradually add the wet ingredients to the dry ingredients, mixing until a smooth batter forms. Pour the batter into a greased loaf pan, smoothing the top with a spatula. Cover with a clean towel and let it rise in a warm place for about 30-45 minutes or until it has doubled in size. Preheat your oven to 375°F (190°C) and bake for 30-35 minutes or until the top is golden brown and a toothpick inserted into the center comes out clean.
Extra Tips:
For best results, allow your gluten-free bread to cool completely before slicing; this helps set the texture and prevents it from crumbling. You can experiment with different gluten-free flour blends to find the one that suits your taste best. Additionally, adding seeds or herbs can enhance the flavor and nutrition of your bread. If you want to store any leftovers, wrap them tightly in plastic wrap or foil and keep them in the freezer to maintain freshness. Enjoy your baking!
Cooking Steps
Let’s get started on making that delicious gluten-free bread! First, I always preheat my oven to guarantee it’s ready to create the perfect crust. Then, I carefully mix the dry ingredients before adding the wet ones, setting the stage for a smooth and satisfying dough.
Step 1. Preheat Your Oven
Preheating your oven is an essential step that sets the stage for baking delicious gluten-free bread. I always set my oven to 375°F, which is the perfect oven temperature for achieving that golden crust while guaranteeing a soft, airy interior. As the oven heats up, I like to take a moment to gather my ingredients, knowing that this initial warmth will create the ideal environment for my bread to rise beautifully. Once the temperature’s just right, I can confidently move on to the next steps, knowing that the baking times will be spot on. Remember, a well-preheated oven not only enhances the texture but also guarantees a consistent bake, leading to a loaf that’s simply irresistible.
Step 2. Mix Dry Ingredients Thoroughly
Start by gathering your dry ingredients in a large mixing bowl, as this foundational step is vital for achieving a well-balanced gluten-free bread. I like to make sure that every component is thoroughly mixed to create a harmonious blend. Using gluten alternatives and flour substitutions not only enhances flavor but also improves the texture of your bread.
Here’s what I typically include:
- Gluten-free all-purpose flour for the base
- Psyllium husk to mimic the elasticity of gluten
- Baking powder for lift
- Salt for flavor enhancement
Once everything’s in the bowl, I whisk the ingredients together until they’re evenly combined. This step is critical, as it prevents clumping and guarantees a consistent rise during baking.
Step 3. Add Wet Ingredients Gradually
As I prepare to add the wet ingredients, I guarantee that my dry mix is well-prepared, setting the stage for a delightful bread. I carefully measure my wet ingredient ratios, ensuring they’re just right for that perfect blend. Slowly, I pour the mixture into the bowl, allowing it to meet the dry ingredients with intention. Gradual mixing is key here; I gently stir, letting the ingredients embrace each other without clumping. This method not only melds the flavors but also creates a smoother dough. I can already envision the texture and aroma! By taking my time, I’m setting the foundation for a gluten-free bread that’s not only innovative but also irresistibly delicious.
Step 4. Knead Dough Until Smooth
Once the wet ingredients have mingled with the dry mix, it’s time to knead the dough until it achieves that silky smooth consistency. This step is essential for developing the right dough texture, even without gluten. As I work the dough, I can feel it transforming, becoming more cohesive and elastic thanks to the gluten alternatives I’ve chosen.
- It should feel slightly tacky but not sticky.
- Aim for a soft, pliable texture that springs back when pressed.
- Knead for about 5-7 minutes, enjoying the rhythmic motion.
- Don’t rush—patience is key to achieving that perfect finish.
With every push and fold, I’m setting the stage for a delicious gluten-free bread that’s sure to impress!
Step 5. Shape Dough Into Loaf
Gently transfer the kneaded dough onto a clean, lightly floured surface, ready to shape it into a loaf. I begin by flattening the dough slightly, creating a rectangle. Using my hands, I carefully fold the edges toward the center, embracing the art of dough shaping. This technique helps build structure and air pockets, essential for that perfect rise. Next, I roll the dough tightly from one end to form a log, ensuring it’s snug but not too tight. I pinch the seams to seal them well. With a gentle touch, I place the shaped loaf seam side down in a greased pan, ready to rise. Mastering these loaf techniques elevates my gluten-free bread to new heights!
Nutritional Guide
While many people associate gluten-free diets with restrictive eating, I find that understanding the nutritional benefits of gluten-free bread can be quite liberating. By exploring ingredient alternatives, I’ve discovered that gluten-free bread can be both nutritious and delicious. Here’s a quick overview of some key nutritional components:
| Ingredient | Nutritional Benefit | Alternative Options |
|---|---|---|
| Almond Flour | High in protein & healthy fats | Coconut flour, chickpea flour |
| Brown Rice Flour | Rich in fiber | Quinoa flour, tapioca flour |
| Flaxseed Meal | Omega-3 fatty acids | Chia seeds, hemp seeds |
Using these ingredients, I’ve crafted a gluten-free bread that not only satisfies but also supports my health goals.
Final Thoughts
As I reflect on my journey with gluten-free bread, I realize how it has transformed my approach to baking and nutrition. Embracing this new culinary adventure not only satisfied my taste buds but also introduced me to a world of health benefits. Here are some key takeaways that might inspire you:
- Experimentation is key: Don’t hesitate to mix flours for unique flavors and textures.
- Hydration matters: Adjusting liquid levels can vastly improve your bread’s consistency.
- Patience pays off: Allowing dough to rise properly guarantees a better crumb.
- Utilize fresh ingredients: They elevate the taste and nutritional value.
With these baking tips, you’ll find gluten-free bread isn’t just a substitute; it can be a delicious innovation in your kitchen!
Frequently Asked Questions
Can I Use a Bread Machine for Gluten-Free Bread?
Absolutely, I’ve used my bread machine for gluten-free bread. Just make sure to adjust the bread machine settings specifically for gluten-free results. It’s a game-changer! My loaves come out fluffy and delicious every time.
How Can I Store Leftover Gluten-Free Bread?
Storing leftover bread can feel tricky, but it doesn’t have to be! I love using airtight storage containers for short-term, while freezing methods let me enjoy fresh-tasting bread weeks later without losing flavor.
What Are Common Gluten-Free Flour Alternatives?
When exploring gluten-free flour alternatives, I love using almond flour for its nutty flavor and coconut flour for its lightness. They both add unique textures and nutrients, making my baking adventures exciting and innovative!
Can I Make This Recipe Vegan?
Think of your recipe as a canvas. By using vegan substitutions like flaxseed or aquafaba as egg alternatives, you can create a masterpiece that’s both compassionate and delicious. Let’s innovate together!
How Do I Know if My Bread Is Properly Baked?
I check my bread by tapping the bottom; it should sound hollow. The texture should be firm yet slightly springy. Mastering these baking techniques guarantees I create a delightful loaf that’s perfectly baked every time!
Conclusion
In the grand tapestry of gluten-free baking, this bread recipe is like the shining star in a galaxy of culinary wonders! With each warm, fluffy slice, you’ll feel like you’ve revealed the secret to happiness itself. Trust me, once you take that first bite, you’ll wonder how you ever lived without it. So, roll up your sleeves, embrace the deliciousness, and let your taste buds dance! You’ll be the gluten-free hero of your kitchen in no time!

