Honey Bun Cake Recipe
If you’re looking for a comforting dessert, Honey Bun Cake is the perfect choice! It combines a buttery cake with swirls of cinnamon and sugar, topped with a simple glaze. Just mix yellow cake mix, eggs, sour cream, and oil, layer it with cinnamon-sugar, and bake. It’s an easy, one-bowl recipe suitable for any gathering. This cake not only tastes delightful but also carries a piece of culinary history. Stick around, and I’ll share more tips and variations!
Contents
History
When I think about the history of honey bun cake, I can’t help but feel a sense of nostalgia. Its cake origins trace back to Southern kitchens, where home bakers infused sweet flavors into their creations. Initially, this delightful dessert emerged as a way to celebrate gatherings, with each family adding their unique twist. Regional variations abound, showcasing local ingredients like cinnamon, nutmeg, or even fruits, making every version distinct yet comforting. It’s fascinating how this cake has evolved, maintaining its charm while embracing innovation. Today, you’ll find modern interpretations that play with textures and flavors, catering to adventurous palates. Honey bun cake is more than just a dessert; it’s a delicious piece of culinary heritage that connects generations.
Recipe
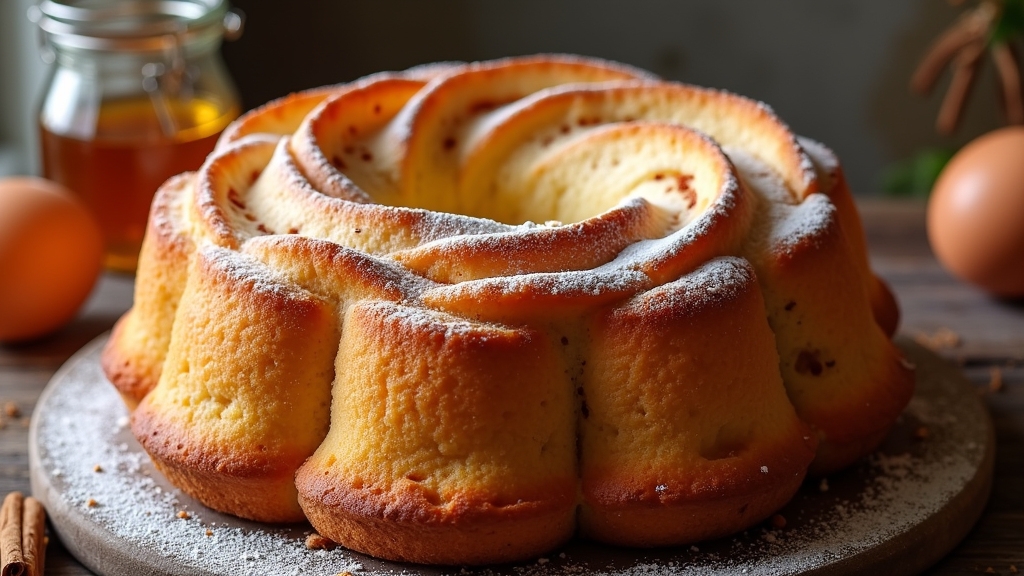
Honey Bun Cake is a delightful dessert that combines the rich flavors of cinnamon, vanilla, and a buttery cake base. This easy-to-follow recipe is perfect for family gatherings, brunches, or just a sweet treat to enjoy at home. The cake features a beautiful swirl of cinnamon and sugar that resembles a honey bun, hence the name. Topped with a simple glaze, it’s sure to impress both visually and with its delicious taste.
The best part about this Honey Bun Cake recipe is that it can be made in just one bowl, making cleanup a breeze. With a moist and tender crumb, the cake is simple yet satisfying. Each bite offers a warm, comforting flavor that is reminiscent of a classic honey bun. Whether served warm or at room temperature, this cake is a surefire hit that will have everyone coming back for seconds.
Ingredients:
- 1 box of yellow cake mix
- 4 large eggs
- 1 cup of sour cream
- 1/2 cup of vegetable oil
- 1 cup of granulated sugar
- 2 teaspoons of ground cinnamon
- 1 cup of powdered sugar
- 2 tablespoons of milk
- 1 teaspoon of vanilla extract
Instructions:
Preheat your oven to 350°F (175°C) and grease a 9×13 inch baking pan. In a large mixing bowl, combine the yellow cake mix, eggs, sour cream, and vegetable oil. Mix until the batter is smooth and well combined. In a separate small bowl, mix together the granulated sugar and cinnamon. Pour half of the cake batter into the prepared pan, then sprinkle half of the cinnamon-sugar mixture over the top. Add the remaining batter and finish with the rest of the cinnamon-sugar mixture on top. Use a knife or skewer to swirl the mixtures together gently. Bake for 30-35 minutes or until a toothpick inserted in the center comes out clean. Let the cake cool completely before drizzling with a glaze made from mixing powdered sugar, milk, and vanilla extract.
Extra Tips:
For an added touch, consider incorporating chopped nuts or shredded coconut into the cinnamon-sugar mixture for extra texture and flavor. To make the glaze thicker, reduce the amount of milk slightly, or for a sweeter glaze, add more powdered sugar. This cake can be stored in an airtight container at room temperature for up to 3 days or in the refrigerator for about a week. Reheating individual slices in the microwave for a few seconds can bring back that freshly baked taste—enjoy!
Cooking Steps
Let’s get started on making this delightful Honey Bun Cake! First, I’ll preheat the oven to 350°F to guarantee everything bakes evenly. Then, I’ll mix the butter and sugars, setting the stage for a sweet, indulgent treat.
Step 1. Preheat Oven to 350°F
Before diving into the delicious world of Honey Bun Cake, I always make certain to preheat the oven to 350°F. Getting the oven temperature just right is vital for the perfect bake. Here are some baking tips I follow to guarantee success:
- Clear the oven: Remove any racks or items that might interfere with the heat circulation.
- Use an oven thermometer: This helps confirm that your oven reaches the desired temperature accurately.
- Allow time to preheat: I usually let it sit for about 15 minutes to make sure it’s evenly heated.
- Check for readiness: I can often tell the oven is ready when I feel a steady warmth radiating from it.
With that done, I’m ready to create some magic!
Step 2. Mix Butter and Sugars
With the oven preheated and ready to go, it’s time to mix the butter and sugars. I take my softened butter and add a combination of granulated and brown sugars. This mix of sugar types not only enhances flavor but also contributes to that luscious, cream texture we’re aiming for. Using a stand mixer or hand mixer, I whip them together until the mixture turns light and fluffy—this step is essential! It’s where the magic begins, creating a delightful base for our cake. The granulated sugar adds a bit of crunch, while the brown sugar lends a rich, caramel-like depth. Once it’s perfectly blended, I can’t help but sneak a taste—pure bliss!
Step 3. Add Eggs and Vanilla
Next, I crack in the eggs one by one, watching as they blend seamlessly into the buttery mixture. I prefer using large eggs for their perfect balance, but feel free to experiment with different egg types for unique flavors. After the last egg, I reach for my favorite vanilla extract, pouring in the rich aroma. The magic truly begins! Here’s how I do it:
- Use room temperature eggs for better emulsification.
- Select a pure vanilla extract for a more robust flavor.
- Beat the mixture until it’s light and fluffy, ensuring everything’s well-combined.
- Don’t forget to scrape down the sides of the bowl for even mixing.
This step brings a delightful harmony to the cake, setting the stage for the next delicious layers!
Step 4. Fold in Cinnamon Swirl
As I prepare to fold in the cinnamon swirl, I can already envision the warm, inviting aroma that will soon fill my kitchen. I take my prepared cinnamon mixture, a delightful blend of brown sugar and fragrant cinnamon variations, and gently incorporate it into my batter. Using a simple yet effective swirl technique, I aim for a beautiful marbled effect rather than a uniform blend. With each turn of the spatula, I can see the rich, golden batter intertwining with the sweet cinnamon goodness. It’s essential to be gentle during this process; I want to maintain the airy texture while ensuring the flavors meld beautifully. This step is where my cake transforms, promising a deliciously spiced bite in every slice.
Step 5. Add Flour Mixture Gradually
After swirling in that enticing cinnamon mixture, it’s time to add the flour mixture gradually. This step is essential for achieving that perfect, fluffy texture we all crave. Here’s how I do it:
- Measure the flour accurately – Use the spoon-and-level method for precise flour measurement.
- Add in batches – I typically add about a third at a time to keep things manageable.
- Mix gently – Using a spatula, I fold the flour in to avoid overmixing, which can toughen the cake.
- Watch for lumps – I make sure everything’s well combined but still soft and airy.
Incorporating these mixing techniques not only enhances flavor but also guarantees a delightful cake that no one can resist!
Nutritional Guide
When it comes to enjoying a slice of Honey Bun Cake, understanding its nutritional aspects can enhance your experience. This delightful treat, while indulgent, offers some interesting benefits hidden within its ingredients. For instance, the use of cinnamon not only elevates flavor but also boasts antioxidant properties. Here’s a quick breakdown of the caloric content and ingredient benefits:
| Nutrient | Amount per Slice |
|---|---|
| Calories | 300 |
| Sugar | 18g |
| Fiber | 1g |
| Protein | 4g |
While it’s a dessert, being mindful of these elements can help you savor every bite. Each slice is a balance of taste and nutrition that can make your dessert experience even more enjoyable.
Final Thoughts
While enjoying a slice of Honey Bun Cake, I can’t help but reflect on how this delightful dessert brings comfort and joy to any occasion. It’s more than just a cake; it’s a canvas for creativity! If you’re looking to elevate your baking game, here are some baking tips and flavor variations to contemplate:
- Add spices: A sprinkle of cinnamon or nutmeg can enhance the warmth of the cake.
- Try different extracts: Almond or vanilla extracts can bring a unique twist.
- Incorporate fruits: Chopped apples or berries can add a revitalizing burst.
- Experiment with toppings: Glazes or cream cheese frosting can take your Honey Bun Cake to the next level.
Embrace these ideas, and let your creativity shine!
Frequently Asked Questions
Can I Use Gluten-Free Flour for This Recipe?
Absolutely, I’ve experimented with gluten-free options before! Just remember, the flour texture can differ, so I recommend blending a gluten-free mix with a bit of almond or coconut flour for a delightful outcome.
How Should I Store Leftover Honey Bun Cake?
You’d think a cake would vanish instantly, right? For storing tips, I recommend wrapping leftover slices in plastic wrap and placing them in an airtight container. This guarantees delightful cake preservation for those sweet cravings later!
Can I Freeze Honey Bun Cake?
Absolutely, I’ve successfully frozen cakes before! For proper cake preservation, wrap it tightly using freezing techniques, like plastic wrap and foil, to maintain moisture and flavor. Just thaw it before serving, and you’re good to go!
What Can I Substitute for Sour Cream?
If you need a substitute for sour cream, I often use yogurt substitutes like Greek yogurt. For cream alternatives, I’ve found that blended silken tofu works wonders too—both options keep your dishes creamy and delicious!
How Long Does the Cake Last at Room Temperature?
Think of cake freshness as a fleeting sunset; it’s beautiful but doesn’t last forever. At room temperature, my cakes typically stay fresh for about three days. After that, I recommend refrigerating for best taste and texture.
Conclusion
As I pulled the honey bun cake from the oven, the sweet aroma enveloped my kitchen, teasing my senses. I could hardly wait to slice into that golden, gooey goodness, each bite promising a tender crumb and a swirl of cinnamon. Imagine the delight of sharing this warm treat with friends and family, their eyes lighting up in anticipation. Trust me, this cake isn’t just a dessert; it’s an experience you won’t want to miss!
