Indian Fry Bread Recipe
I love making Indian fry bread! It’s a simple dish that combines 2 cups of flour, 1 teaspoon each of baking powder and salt, and 1 cup of warm water. After kneading the dough, I shape it into discs and fry them until they’re golden brown. The crispy outside and soft inside are so satisfying. You can enjoy it sweet or savory, making it perfect for gatherings. There’s so much more to discover about this delicious dish!
Contents
History
When I think about Indian fry bread, I can’t help but appreciate its rich history, deeply intertwined with Native American culture. This dish emerged from hardship, a response to displacement and forced assimilation. It symbolizes resilience, embodying the stories of communities that adapted to new ingredients while preserving their culinary heritage. The cultural significance of fry bread is immense; it’s more than food—it’s a connection to identity and tradition. I’ve learned that regional variations add layers to its story, with each tribe infusing unique flavors and techniques. Whether served sweet or savory, fry bread speaks to the creativity born out of necessity, uniting diverse Native American cultures while inviting innovation in modern kitchens. It’s a true reflection of heritage and adaptability.
Recipe
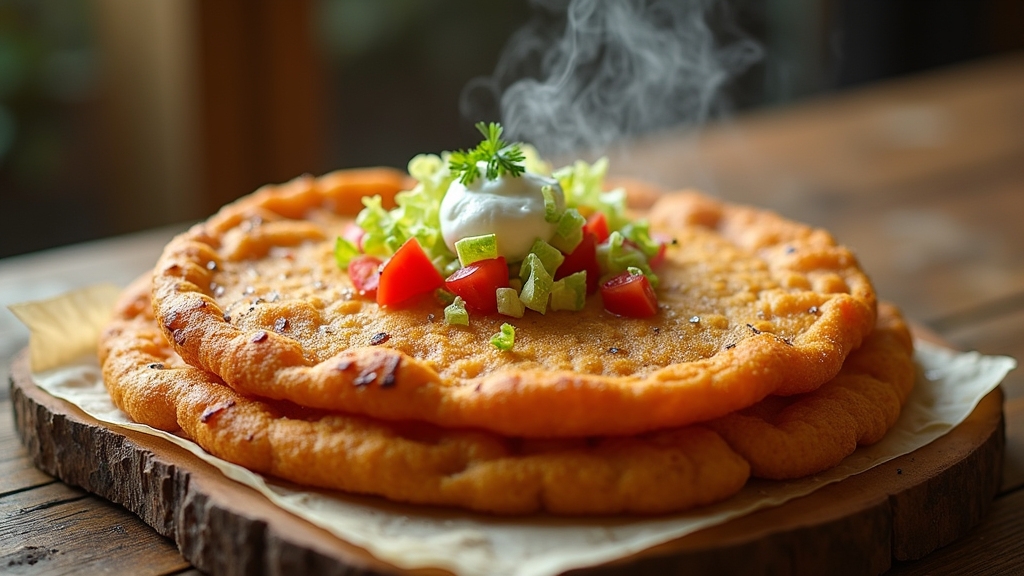
Indian fry bread is a delicious and traditional Native American dish that has roots in the history of various tribes. It is a simple, yet versatile recipe that involves frying a dough made from basic ingredients, resulting in a crispy exterior and a soft, pillowy interior. Fry bread can be enjoyed on its own or topped with various ingredients, making it a popular choice for gatherings and celebrations.
The beauty of Indian fry bread lies in its adaptability; it can be served in a variety of ways, from savory to sweet. Whether you’re enjoying it with chili, honey, or simply dusted with powdered sugar, the warm, comforting flavors are sure to please your taste buds. This recipe will guide you through making your own fry bread at home, perfect for sharing with family and friends.
Ingredients
- 2 cups all-purpose flour
- 1 teaspoon baking powder
- 1 teaspoon salt
- 1 cup warm water
- Oil for frying
Cooking Instructions
In a large mixing bowl, combine the flour, baking powder, and salt. Gradually add the warm water, mixing until a dough forms. Knead the dough for about 5 minutes on a floured surface until it is smooth and elastic. Divide the dough into small balls, about the size of a golf ball. Flatten each ball into a disc about 1/4 inch thick. Heat oil in a deep skillet or frying pan over medium-high heat. Carefully place the discs in the hot oil, frying until they are golden brown on both sides, about 2-3 minutes per side. Remove from the oil and drain on paper towels.
Extra Tips
When making Indian fry bread, verify that the oil is hot enough before frying; this will help achieve that perfect crispy texture. If the oil is not hot enough, the bread may absorb too much oil and become greasy. You can also experiment with the thickness of the dough discs to find your preferred texture. For a sweeter version, consider adding a bit of sugar to the dough or topping it with cinnamon and sugar after frying. Enjoy your homemade fry bread with a variety of toppings for a delicious treat!
Cooking Steps
Now that we’ve gathered our ingredients, it’s time to get our hands a bit messy! I’ll walk you through the essential steps, from mixing the dry ingredients to shaping the dough into perfect patties. Trust me, the smell of frying bread will make it all worthwhile!
Step 1. Mix Dry Ingredients Thoroughly
To create the perfect base for my Indian fry bread, I dive right into mixing the dry ingredients thoroughly. First, I gather my flour, baking powder, and salt, ensuring the ingredient ratios are spot on. Using a whisk, I employ mixing techniques that blend the ingredients seamlessly, breaking up any clumps that might disrupt the dough’s texture. I can almost feel the anticipation as the dry mix transforms into a cohesive mixture, ready to absorb moisture. This step is essential; it sets the foundation for that delightful, fluffy fry bread I crave. As I combine everything, I pay attention to consistency, aiming for a blend that will yield a deliciously satisfying bread. Each swirl and fold brings me closer to the final masterpiece!
Step 2. Knead Dough Until Smooth
Once the dry ingredients are perfectly blended, it’s time to bring the dough to life. I’ll turn my attention to kneading, an essential step that transforms our mixture into a pliable, smooth dough. Using my hands, I’ll push and fold the dough, employing various kneading techniques to achieve just the right dough consistency. I enjoy the tactile sensation as I feel the ingredients meld together, creating a soft, elastic texture. If the dough feels too sticky, I can sprinkle in a bit more flour, but I need to be careful not to overdo it. I’ll knead for about 5 to 10 minutes, until it’s smooth and ready to rise, ensuring my fry bread will turn out perfectly delicious!
Step 3. Rest Dough for 30 Minutes
After kneading the dough to a smooth consistency, it’s time to let it rest for 30 minutes. This step might seem simple, but the resting benefits are vital for achieving that perfect fry bread texture. As the dough relaxes, the gluten continues to develop, making it more pliable and easier to work with later. I always find it fascinating how a little patience transforms the dough; it becomes softer and more forgiving, ensuring a delightful bite when fried. While it rests, I like to cover it with a damp cloth to prevent drying out. Trust me, this resting period is a game changer, enhancing the flavor and texture that’ll elevate your fry bread experience to a whole new level!
Step 4. Shape Dough Into Patties
With the dough now rested and ready, shaping it into patties is the next exciting step in our fry bread journey. I start by lightly flouring my hands to prevent sticking, then pinch off a generous portion of dough. Depending on my mood, I can create different patty sizes—small for bite-sized snacks or larger ones for a hearty meal. I gently flatten each piece, ensuring an even thickness of about half an inch. As I shape, I feel the dough’s elasticity, which is satisfying and essential for that perfect fry. Each patty is a canvas, waiting to transform into a delicious, golden treat. This dough shaping process is where creativity meets tradition—an essential step in our fry bread adventure!
Step 5. Heat Oil in Skillet
I heat up a generous amount of oil in my skillet, enthusiastic to create that perfect fry bread texture. I prefer using a cast iron skillet for even heat distribution, but non-stick varieties work well too. I monitor the oil temperature closely, aiming for around 350°F. If it’s too hot, the bread will burn; too cool, and it’ll soak up excess oil. I drop a small piece of dough into the oil to test; it should sizzle and bubble immediately. Once the oil reaches the right temperature, I gently place my shaped patties in, watching them puff up beautifully as they fry to a golden brown. The aroma fills my kitchen, and I can’t wait to enjoy the fruits of my labor!
Nutritional Guide
When considering the nutritional aspects of Indian fry bread, it’s important to recognize its rich, yet indulgent nature. Each bite carries a unique flavor profile, but let’s not overlook the caloric content. It can be quite substantial, depending on the ingredients used.
Here’s a quick breakdown of some ingredient benefits:
| Ingredient | Benefits |
|---|---|
| Flour | Source of carbohydrates |
| Salt | Essential for hydration |
| Baking Powder | Aids in leavening |
| Oil | Provides healthy fats |
While fry bread isn’t a health food, its ingredients offer some benefits. Enjoy it in moderation, and you’ll find a delightful balance between indulgence and nutrition!
Final Thoughts
Indian fry bread embodies a rich cultural tradition, making it more than just a dish; it’s an experience. As I’ve explored this recipe, I’ve come to appreciate its deep cultural significance, a symbol of resilience and community. Each bite tells a story, connecting generations and celebrating heritage. When it comes to serving suggestions, the possibilities are endless. I love topping mine with savory meats, fresh vegetables, or even sweet toppings like honey and powdered sugar for dessert. It’s versatile, allowing you to innovate while honoring its roots. I encourage you to try your hand at this delightful creation. Embrace the process, and enjoy the flavors that unite us all, turning a simple meal into a cherished moment.
Frequently Asked Questions
Can I Use Gluten-Free Flour for Indian Fry Bread?
Absolutely, I’ve experimented with substituting flours for fry bread variations, and gluten-free flour works surprisingly well! It creates a delightful texture, allowing everyone to enjoy this classic dish without compromising on taste or experience.
How Can I Store Leftover Fry Bread?
I know you might think leftover fry bread won’t taste great later, but I store mine in an airtight container in the fridge. For reheating, a quick warm-up in the oven restores its crispy goodness!
What Toppings Pair Well With Indian Fry Bread?
When I think about toppings, I love pairing savory options like seasoned meats and fresh veggies with Indian fry bread. For a sweet twist, drizzle honey or top with fruit and whipped cream—it’s divine!
Can I Freeze Indian Fry Bread?
I’ve discovered that freezing fry bread is a game-changer. Using proper freezing techniques, I store them in airtight bags, preserving their deliciousness for future cravings. It’s a culinary miracle you won’t want to miss!
Is There a Vegan Version of Fry Bread?
I’ve experimented with vegan alternatives, using plant-based milk and oil in fry bread variations. The results are delicious and satisfying, proving you don’t need dairy to enjoy this classic treat. Give it a try!
Conclusion
As I savor each bite of my homemade Indian fry bread, I can’t help but feel a connection to its rich history and cultural roots. You might think it’s too difficult to make, but trust me, the joy of sharing this warm, flaky delicacy with loved ones is worth every effort. It’s more than just a recipe; it’s a celebration of tradition and community. So, roll up your sleeves and experience the magic of fry bread for yourself!
