Irish Soda Bread Recipe
To whip up a delicious Irish soda bread, combine 4 cups of all-purpose flour, a teaspoon of baking soda, a teaspoon of salt, and gradually mix in 1 ¾ cups of buttermilk. Knead the dough gently, shape it into a loaf, and score the top for even baking. Preheat your oven to 425°F (220°C) and bake until golden. This easy, rustic bread pairs beautifully with butter or soup and will become a family favorite. Discover more tips and variations to elevate your baking!
Contents
History
Irish soda bread has a rich history that dates back to the 19th century, when it became a staple for many Irish households. This simple yet nourishing bread emerged from necessity, using readily available ingredients like baking soda, buttermilk, and flour. You’ll find that it embodies Irish traditions, reflecting the resourcefulness and resilience of the people during tough times.
Its cultural significance goes beyond sustenance; it represents community and family gatherings, often served at special occasions. The unique texture and flavor carry the essence of Ireland’s heart and soul. As you explore the history of Irish soda bread, you’ll appreciate how it connects generations, reminding you of the warmth and spirit of the Emerald Isle.
Recipe
Irish soda bread is a classic quick bread that is perfect for any occasion. This traditional recipe utilizes baking soda as a leavening agent, which allows for a simple and straightforward preparation process. With just a handful of ingredients, you can create a warm and hearty loaf that pairs wonderfully with butter, jam, or even a hearty soup. The rustic texture and slightly tangy flavor make it a beloved staple in Irish households and beyond.
Making Irish soda bread is not only easy but also a rewarding experience. The bread can be prepared in less than an hour, making it an excellent choice for those who may be short on time but still want to enjoy homemade bread. The addition of buttermilk gives the bread its signature taste and texture, while the distinctive cross on top is both practical and symbolic, helping to guarantee that the bread cooks evenly throughout. Let’s explore the ingredients and cooking instructions to create this delightful bread.
Ingredients:
- 4 cups all-purpose flour
- 1 teaspoon baking soda
- 1 teaspoon salt
- 1 ¾ cups buttermilk
Instructions:
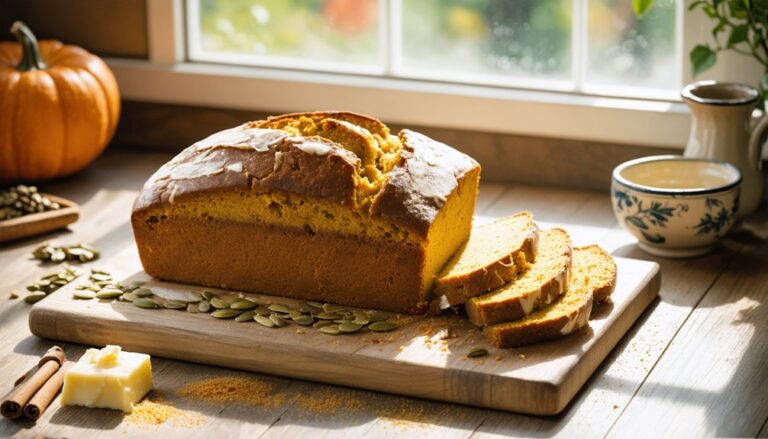
Preheat your oven to 425°F (220°C) and line a baking sheet with parchment paper. In a large bowl, whisk together the flour, baking soda, and salt until well combined. Make a well in the center of the dry ingredients and pour in the buttermilk. Using your hands or a wooden spoon, mix the ingredients together until a soft dough forms. Turn the dough out onto a lightly floured surface and gently knead it for about 1 minute until it just comes together. Shape the dough into a round loaf and place it on the prepared baking sheet. Using a sharp knife, score a deep cross on the top of the dough, about 1/4 inch deep. Bake for 30-35 minutes, or until the bread is golden brown and sounds hollow when tapped on the bottom. Allow it to cool slightly before slicing.
Extra Tips:
For a richer flavor, consider adding a handful of raisins or currants to the dough. If you don’t have buttermilk on hand, you can create a substitute by mixing regular milk with a tablespoon of vinegar or lemon juice and letting it sit for about 5 minutes. This bread is best enjoyed fresh, but you can store it in an airtight container for a couple of days or freeze it for longer storage. To revive the bread, simply warm it in the oven before serving. Enjoy your homemade Irish soda bread with a generous spread of butter for an authentic experience!
Cooking Steps
To kick off your Irish soda bread journey, you’ll want to preheat your oven to a toasty 425°F. Next, gather your dry ingredients and mix them thoroughly to create a solid base. As you add buttermilk gradually, you’ll feel the dough come together, setting the stage for a delightful loaf.
Step 1. Preheat the Oven to 425°F
Before diving into the delightful process of making Irish soda bread, you’ll want to confirm your oven is preheated to a sizzling 425°F. This oven temperature is essential for achieving that perfect crust—golden brown and slightly crispy on the outside while remaining soft and tender within. As the heat builds, take a moment to gather your ingredients; the anticipation of that warm, freshly baked aroma will keep your spirits high. Remember, a well-preheated oven is one of the best baking tips you can follow. It guarantees even cooking and helps your bread rise beautifully. So, set your timer, adjust those racks, and let the oven work its magic as you prepare for the joyful act of baking!
Step 2. Mix Dry Ingredients Thoroughly
With the oven now warmed to the perfect baking temperature, it’s time to turn your attention to the dry ingredients. Achieving the right dry ingredient ratios is essential for your Irish soda bread’s texture and flavor. Start by gathering your flour, baking soda, and salt. Here are some effective mixing techniques to guarantee everything is well-combined:
- Use a whisk to aerate the flour, breaking up any clumps.
- Combine the baking soda and salt evenly throughout the flour.
- Mix until you achieve a consistent color and texture, with no visible dry spots.
This step sets the foundation for your bread, allowing each ingredient to shine. Embrace the freedom of baking as you create something delicious!
Step 3. Add Buttermilk Gradually
As you prepare to add the buttermilk, remember that this ingredient is essential for achieving the signature tenderness of Irish soda bread. Start by pouring a small amount into your dry mixture, stirring gently to combine. The buttermilk benefits your dough, providing moisture and a subtle tang that enhances flavor. By adding gradually, you can control the dough’s consistency, ensuring it’s neither too wet nor too dry. Keep mixing until you form a shaggy dough, and don’t worry if it looks rough at this stage—this is part of the charm! Trust your instincts; you want to feel the dough come together without overdoing it. Each step brings you closer to that warm, homemade loaf you crave.
Step 4. Knead Dough Gently
Now that you’ve mixed the buttermilk into your dry ingredients, it’s time to knead the dough gently. This step is essential for achieving that perfect dough texture. You don’t want to overwork it; instead, treat it like a delicate treasure.
- Press down lightly with your palms.
- Fold the dough over itself a few times.
- Keep your movements soft and intentional.
Step 5. Shape the Dough Into Loaf
Once you’ve gently kneaded the dough, it’s time to shape it into a loaf that will become the star of your table. Start by lightly flouring your work surface to prevent sticking. With your hands, gently flatten the dough into a round disc, appreciating its soft, supple dough texture. Fold the edges inward, pinching them together to form a cohesive ball. This loaf shaping technique helps create a beautiful crust while keeping the inside tender. Once you’ve formed the loaf, place it on a parchment-lined baking sheet. Don’t forget to score the top with a sharp knife—this allows steam to escape during baking, ensuring a light, airy interior. Your creation is ready to rise!
Nutritional Guide
While baking Irish soda bread, you might be surprised to discover its nutritional benefits. This delightful bread packs a punch with essential nutrients, and with simple ingredient substitutions, you can cater it to your dietary needs.
| Nutritional Component | Amount per Slice |
|---|---|
| Calories | 120 |
| Fiber | 2g |
| Protein | 4g |
Opt for whole wheat flour for added fiber or replace buttermilk with a non-dairy alternative for a vegan twist. You’ll find that these substitutions not only enhance health benefits but also maintain the bread’s charming flavor. So, embrace the freedom of creativity in your baking while savoring a nutritious treat!
Final Thoughts
As you reflect on your baking experience with Irish soda bread, it’s clear that this beloved recipe offers not only a delicious treat but also an opportunity to explore creativity in the kitchen. Whether you’re a novice or a seasoned baker, you’ve likely discovered a few baking tips along the way.
Consider these serving suggestions to elevate your soda bread experience:
- Slather it with fresh butter or jam for a delightful breakfast.
- Pair it with hearty soups or stews for a satisfying meal.
- Toast slices for a crunchy snack, topped with avocado or cheese.
Frequently Asked Questions
Can I Use Whole Wheat Flour Instead of All-Purpose Flour?
Yes, you can use whole wheat flour instead of all-purpose flour. Whole wheat offers nutritional benefits, but expect a denser texture. Embrace the heartiness and flavor it brings, making your dish uniquely satisfying and wholesome.
How Long Can I Store Leftover Irish Soda Bread?
You can store leftover bread for about three to five days at room temperature. For ideal freshness, wrap it tightly in plastic. For longer storage, freeze it, ensuring you maintain that delightful bread freshness!
Can I Freeze Irish Soda Bread?
Imagine capturing a fleeting moment of warmth. You can freeze your bread using proper freezing techniques, then savor it later. When the time comes, use gentle thawing methods to revive that freshly baked taste and aroma.
What Are Common Variations of Irish Soda Bread?
You’ll find delightful variations like raisin bread, sweetened with plump raisins, or herb twists, infused with aromatic herbs. Each offers a unique twist, letting you enjoy different flavors while keeping the essence of traditional bread alive.
Is Irish Soda Bread Suitable for Vegans?
You’ll find that Irish soda bread can easily become vegan! With simple vegan substitutes like plant-based milk and vinegar, you can whip up a delicious loaf. Just follow some baking tips for the best results!
Conclusion
In the end, you’ve not only baked a warm, crusty loaf of Irish soda bread, but you’ve also connected with a rich history that spans generations. As the aroma fills your kitchen, you might find it fascinating that this simple recipe has brought families together just like yours. Whether enjoyed with a hearty stew or slathered in butter, each bite is a delicious reminder of tradition and comfort. So, slice into your creation and savor every moment!


