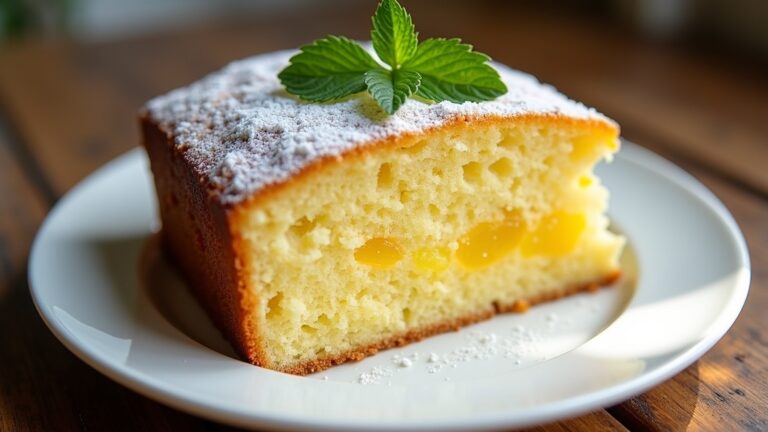
Jello Poke Cake Recipe
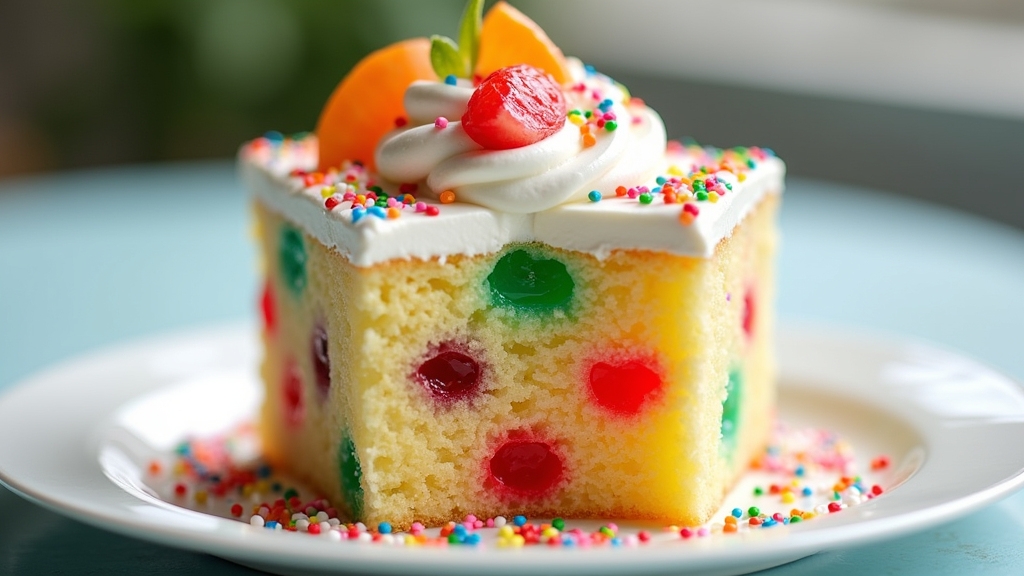
I love making Jello Poke Cake; it’s such a fun and colorful dessert! Start with a box of vanilla cake mix and bake it as directed. Once cooled, poke holes all over and pour your favorite flavored Jello mixture over the top. Chill it for a few hours, then top with whipped cream and fresh fruit. The result is a moist, flavorful cake that’s perfect for any gathering. Stick around to discover creative toppings and flavor combinations!
Contents
History
When I think about the history of Jello Poke Cake, I can’t help but be fascinated by its evolution from simple dessert to a beloved classic. Its cooking origins trace back to the mid-20th century, when home bakers began experimenting with innovative ways to infuse flavors into traditional cakes. The concept of poking holes in a baked cake and pouring flavored gelatin over it transformed mundane desserts into vibrant, fruity delights. This unique dessert evolution not only reflects the creativity of American kitchens but also showcases a playful approach to baking. Over the years, Jello Poke Cake has become a staple at gatherings, symbolizing nostalgia while inspiring countless variations that keep it fresh and exciting for new generations of dessert lovers.
Recipe
Jello Poke Cake is a delightful dessert that combines the moistness of cake with the colorful, fruity flavors of Jello. This treat is perfect for gatherings, parties, or just a sweet indulgence at home. The process of poking holes into the cake allows the vibrant Jello mixture to seep into the cake, infusing it with flavor and creating a visually appealing dessert that everyone will love.
To make Jello Poke Cake, you’ll need a simple vanilla cake base that can be easily prepared from scratch or from a box mix. Once baked, the cake is cooled and soaked with Jello, which adds a burst of color and taste. Topped with a fluffy whipped cream or frosting, this dessert is sure to impress your family and friends with its eye-catching appearance and delightful flavor.
Ingredients:
- 1 box of vanilla cake mix (plus ingredients needed for cake)
- 3 cups boiling water
- 1 package (3 oz) of Jello (any flavor)
- 1 cup cold water
- 1 container (8 oz) of whipped topping (thawed)
- Fresh fruit for garnish (optional)
Instructions:
Begin by baking the vanilla cake according to the package instructions in a 9×13 inch baking pan. Once the cake is baked, remove it from the oven and allow it to cool for about 10 minutes. While the cake is cooling, prepare the Jello by dissolving the Jello powder in boiling water, stirring until completely dissolved. Add in the cold water, mix well, and then use a fork to poke holes all over the top of the cake. Pour the Jello mixture evenly over the cake, ensuring it seeps into the holes. Refrigerate the cake for at least 4 hours or until the Jello is set. Once set, top the cake with whipped topping, and garnish with fresh fruit if desired.
Extra Tips:
For the best flavor and texture, allow the cake to cool completely before adding the Jello to prevent it from melting. You can experiment with different Jello flavors for a fun twist, or even layer multiple flavors for a rainbow effect. Additionally, try using a homemade whipped cream for an even richer topping. Remember to keep the cake refrigerated until serving to maintain its freshness and flavor!
Cooking Steps
Now that we have our ingredients ready, let’s jump into the cooking steps that make this Jello poke cake so irresistible. First, I’ll prepare the cake mix batter and bake it to perfection. Once it’s cooled, I can’t wait to poke holes and pour that vibrant Jello over the cake, creating a delightful burst of flavor in every bite!
Step 1. Prepare Cake Mix Batter
Let’s plunge into the delightful process of preparing the cake mix batter! First, I gather my ingredients, ensuring I have the right ingredient ratios for that perfect balance. I pour the cake mix into a large mixing bowl, adding the required eggs, water, and oil. As I blend everything together, I can already envision the fluffy cake texture that’s about to emerge. I use an electric mixer on medium speed, beating until the batter is smooth and well combined. This step is essential, as it creates the airy bubbles that will give the cake its lightness. Once blended, I’m ready to bake, but I can already tell this batter is going to yield a deliciously moist cake!
Step 2. Poke Holes in Baked Cake
After pulling the freshly baked cake from the oven, the aroma fills the kitchen, promising a treat ahead. I let it cool slightly before diving into the next exciting step—poking holes in the cake. Using the handle of a wooden spoon, I gently press down, creating evenly spaced holes throughout the cake. This isn’t just for show; it’s vital for achieving that perfect cake texture and ensuring the Jello can deeply penetrate the cake. As I poke, I think about the flavor infusion that’s about to happen. Those holes are gateways for the vibrant Jello to seep in, transforming my cake into a delightful masterpiece. Trust me, this step is essential for a moist, flavorful experience!
Step 3. Pour Jello Over Cake
Once the holes are made, I grab my vibrant Jello mixture, which has been chilling and thickening just the right amount. As I prepare to pour, I focus on my pouring technique to guarantee even distribution across the cake. This step is essential for flavor infusion! Here’s how I do it:
- Tilt the bowl slightly for better control.
- Start at the edges of the cake to allow the Jello to seep into the holes.
- Pour slowly, watching the colorful liquid cascade over the surface.
- Add a final drizzle to any untouched spots for maximum flavor.
With each pour, I can hardly wait for the delightful combination of jello flavors to meld into the cake!
Step 4. Chill Cake in Refrigerator
To guarantee the Jello seeps in perfectly and the flavors meld beautifully, I pop the cake into the refrigerator for at least a couple of hours. This chilling time is essential for achieving the ideal temperature, allowing the vibrant colors and flavors to blend seamlessly. As the cake cools, I can almost sense the chilling benefits at work—the Jello transforms from a simple topping to an integral part of the cake’s deliciousness. The texture firms up, making each slice a delight, as the moistness seeps into every bite. Trust me, this step elevates the experience, turning an ordinary dessert into something extraordinary. So, don’t rush; let your masterpiece chill and develop those mouthwatering flavors!
Step 5. Frost With Whipped Topping
Now it’s time to transform your chilled Jello poke cake into a showstopper by frosting it with whipped topping. This step not only enhances the flavor but also elevates the cake decoration to a new level. Here’s how I do it:
- Beat the Whipped Topping: Use a mixer to whip until it’s light and fluffy.
- Spread Evenly: Start from the center and gently work your way to the edges, ensuring a smooth finish.
- Add Texture: Use a spatula to create swirls or peaks for a visually appealing look.
- Garnish: Top with fresh fruit or sprinkles for that extra pop of color.
With these tips, your Jello poke cake will not just taste amazing, but it’ll also be a feast for the eyes!
Nutritional Guide
Understanding the nutritional aspects of a Jello Poke Cake can enhance your enjoyment and help you make informed choices. This delightful dessert offers a balance of flavors, but it’s important to be aware of its caloric content and ingredient benefits.
Here’s a quick breakdown of the key nutritional components:
| Ingredient | Caloric Content (per slice) | Benefits |
|---|---|---|
| Cake Mix | 150 | Energy from carbs |
| Jello | 80 | Low-calorie sweetness |
| Whipped Topping | 50 | Light and airy texture |
| Fresh Fruit | 30 | Vitamins and hydration |
| Total (approx.) | 310 | Enjoyable indulgence |
Final Thoughts
While indulging in a Jello Poke Cake can feel like a special treat, it’s essential to appreciate the balance it brings to any gathering. This cake isn’t just about flavor; it’s a canvas for creativity. Here are some innovative ideas to elevate your dessert presentations:
Indulging in a Jello Poke Cake is more than just a treat; it’s an opportunity for creative expression at any gathering.
- Flavor Combinations: Experiment with different Jello flavors and cake variations for unique tastes.
- Toppings Galore: Enhance the visual appeal with whipped cream, fresh fruit, or chocolate shavings.
- Layered Designs: Try layering multiple cake flavors for a stunning cross-section.
- Themed Decorations: Customize your cake with seasonal themes or color palettes to wow your guests.
These ideas can transform a simple dessert into a memorable centerpiece, making your Jello Poke Cake the star of the show!
Frequently Asked Questions
Can I Use Sugar-Free Jello for This Recipe?
I’ve tried sugar-free alternatives and they work great. You’ll find a variety of jello flavor options to choose from, making it easy to create a delicious dessert that fits your dietary needs. Enjoy experimenting!
How Long Does Jello Poke Cake Last in the Fridge?
Like a fleeting summer day, Jello poke cake storage is essential. It lasts about 3 to 5 days in the fridge, but its shelf life shortens as the flavors meld. Enjoy it fresh for the best experience!
Can I Make This Cake a Day in Advance?
Absolutely, I often make this cake a day ahead! Just follow my make-ahead tips, and choose your favorite Jello flavors. It actually enhances the taste and texture, making it even more delightful for serving.
What Frosting Pairs Best With Jello Poke Cake?
When it comes to frosting, I can’t resist a dreamy cream cheese and whipped topping blend! It’s like a cloud of flavor dancing on your tongue, perfectly balancing the sweetness of the cake. Pure bliss!
Is Jello Poke Cake Suitable for Gluten-Free Diets?
I’ve found that using gluten-free flours and clever cake substitutions can make this dessert suitable for gluten-free diets. With the right ingredients, you can enjoy a deliciously moist cake without sacrificing flavor.
Conclusion
As I take that first bite of my jello poke cake, it feels like a burst of sunshine on a cloudy day. This delightful dessert isn’t just a treat; it’s a canvas for creativity, inviting you to experiment with flavors and colors. Whether you’re celebrating a special occasion or simply satisfying a sweet tooth, this cake brings joy to the table. So, let your culinary spirit soar, and whip up this vibrant masterpiece that everyone will love!
