Pita Bread Recipe
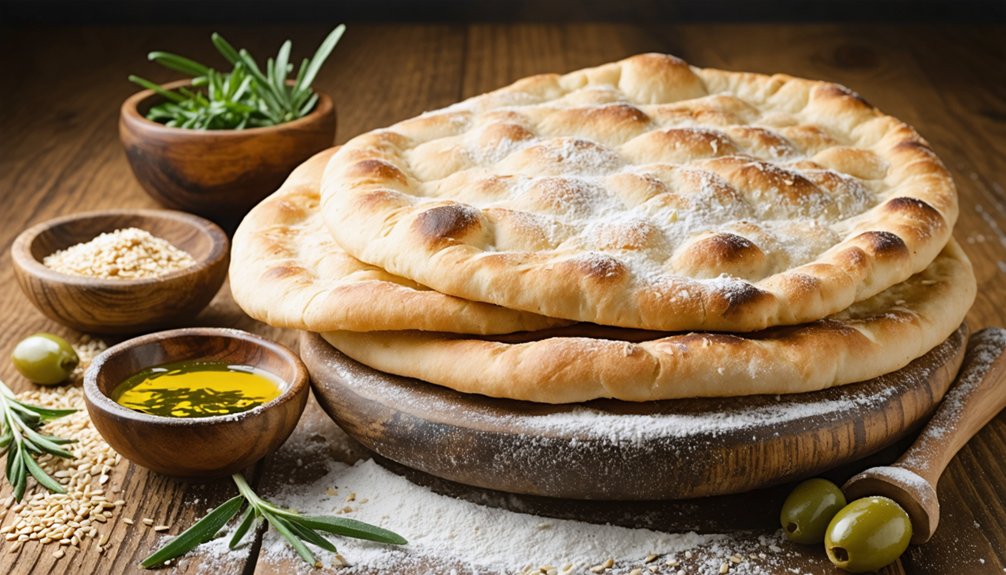
To make delicious pita bread, combine 2 cups of flour with warm water, yeast, salt, olive oil, and sugar. Knead the dough until it’s elastic, then let it rise until doubled in size. Shape it into rounds and bake at a high temperature to achieve that signature puff. You’ll love how versatile and satisfying pita is for wraps, dips, or even pizzas. Stick around to discover more meal ideas and creative ways to enjoy this flatbread!
Contents
History
When you think about pita bread, you might not realize it has roots that stretch back thousands of years. Its ancient origins trace back to the Middle East, where it played an essential role in daily life. Picture bustling markets filled with the aroma of freshly baked bread, a staple that nourished communities. Pita wasn’t just food; it held cultural significance, often used to scoop up flavorful dips or accompany hearty stews. As you enjoy this versatile bread today, remember it symbolizes a shared culinary heritage, transcending borders and connecting people. From family gatherings to street food stalls, pita’s enduring presence reminds you of the freedom food brings, uniting diverse cultures through flavor and tradition.
Recipe
Pita bread is a delicious and versatile flatbread that is a staple in many Mediterranean and Middle Eastern cuisines. With its soft, chewy texture and distinctive pocket, it’s perfect for stuffing with your favorite fillings or serving as a side to dips like hummus or tzatziki. Making pita bread at home is surprisingly simple, and the aroma of freshly baked bread will fill your kitchen, making it an enjoyable culinary experience.
To create the perfect pita, you’ll want to use quality ingredients and allow some time for the dough to rise. The key to achieving that iconic pocket is using the right temperature during baking, which causes the dough to puff up. Once you master this recipe, you can experiment with different variations, such as whole wheat or flavored pitas, to suit your taste.
Ingredients:
- 2 cups all-purpose flour
- 1 cup warm water
- 2 teaspoons active dry yeast
- 1 teaspoon salt
- 1 tablespoon olive oil
- 1 teaspoon sugar
To make the pita bread, start by combining the warm water, sugar, and yeast in a bowl. Let it sit for about 5-10 minutes until it becomes frothy. In a separate bowl, mix the flour and salt. Once the yeast mixture is ready, pour it into the flour mixture along with the olive oil. Knead the dough on a floured surface for about 8-10 minutes until it is smooth and elastic. Place the dough in a greased bowl, cover it with a damp cloth, and let it rise in a warm area for about 1 hour or until it has doubled in size. Preheat your oven to 475°F (245°C). Once the dough has risen, divide it into 8 equal pieces and roll each piece into a ball. Flatten each ball into a disc about 1/4 inch thick. Place the discs on a baking sheet and bake for 5-7 minutes, or until they puff up and turn lightly golden. Remove from the oven and cover with a clean towel to keep them soft.
When cooking pita bread, remember that the key to a successful puff is a hot oven and enough steam. If you find your pita doesn’t puff up as expected, it may be due to insufficient heat or moisture in the oven. To create steam, you can place a pan of water in the oven while it preheats. Additionally, make sure that your dough is well-kneaded and adequately risen, as this will contribute to the overall texture. Enjoy your homemade pita fresh, and store any leftovers in an airtight container to maintain their softness.
Cooking Steps
To make perfect pita bread, you’ll want to start by mixing warm water with yeast to create that magical rise. After kneading the dough thoroughly, let it rest and rise under a cover, allowing it to develop its flavor. Once it’s doubled in size, shape the dough into rounds and get ready to bake them at a high temperature for that signature puff!
Step 1. Mix Warm Water and Yeast
As you commence your pita bread-making journey, mixing warm water with yeast is an essential first step that sets the foundation for your dough. Begin by measuring about one cup of warm water, ensuring it’s around 110°F (43°C)—a perfect water temperature for yeast activation. If it’s too hot, you might kill the yeast; too cold, and it won’t activate properly. Pour the warm water into a bowl and sprinkle the yeast over the surface. Give it a gentle stir, allowing it to dissolve and awaken. You’ll notice tiny bubbles forming, which means your yeast is alive and kicking! This bubbly mixture is your signal that you’re on the right track to creating delicious, fluffy pita bread.
Step 2. Knead Dough Thoroughly
Once your yeast mixture is bubbly and ready, it’s time to knead the dough thoroughly, transforming those simple ingredients into a cohesive, elastic ball. Begin by dusting your work surface with flour to prevent sticking. Use various kneading techniques, like folding and pressing, to develop the gluten structures. Don’t be afraid to get your hands messy! As you work, pay attention to the dough consistency; it should feel smooth and elastic, not sticky or dry. If it’s too sticky, sprinkle in a little more flour, but be cautious not to overdo it. Knead for about 8 to 10 minutes, and soon you’ll have a beautiful ball of dough that’s ready for its next adventure in pita creation!
Step 3. Let Dough Rise Covered
After kneading your dough to perfection, it’s essential to let it rise covered, allowing the yeast to work its magic. This step is vital for proper dough fermentation, as it creates an ideal environment for the yeast to thrive. Place your dough in a lightly oiled bowl and cover it with a damp cloth or plastic wrap. This seals in moisture and warmth, promoting effective rising techniques. As the dough expands, it’ll develop that airy texture you crave in pita bread. Be patient and let it rise until it’s doubled in size, which usually takes about an hour. Once this transformation occurs, you’re one step closer to enjoying fresh, homemade pita that’s ready for shaping!
Step 4. Shape Dough Into Rounds
With your dough now beautifully risen and full of promise, it’s time to shape it into rounds. Start by gently deflating the dough on a lightly floured surface. Using your hands, pinch off portions—about the size of a golf ball. Roll each piece between your palms to form smooth balls. This dough shaping technique guarantees an even round formation, essential for puffing up in the oven. Next, flatten each ball gently with your fingertips, creating a disc. Keep them spaced apart on a floured surface to prevent sticking. Remember, the goal is to create uniform rounds, which will help achieve that delightful pocket in your pita bread. Embrace the freedom of crafting your perfect rounds!
Step 5. Bake at High Temperature
As you prepare to bake your pita bread, preheat your oven to a scorching 475°F (245°C) to guarantee those pockets puff up perfectly. This high temperature is essential for achieving that delightful, airy texture. Place your shaped rounds on a baking sheet lined with parchment paper, ensuring they have space to expand. You’ll want to bake them for about 5 to 7 minutes, keeping a watchful eye as they puff up. This baking technique allows steam to form inside the dough, creating those signature pockets. When they turn golden brown, pull them from the oven and let them cool slightly. Enjoy your freshly baked pita, ready to be filled with your favorite ingredients, offering you the freedom to create delicious meals!
Nutritional Guide
Pita bread, a delicious and versatile staple in many cuisines, offers a range of nutritional benefits that make it a great addition to your diet. With its moderate caloric content, you can enjoy it without guilt. It’s packed with fiber, aiding digestion and keeping you full longer. Plus, its low fat and sodium levels contribute to healthier choices.
Here’s a quick nutritional overview:
| Nutrient | Amount per 100g | Dietary Benefits |
|---|---|---|
| Calories | 275 | Energy source |
| Fiber | 7g | Supports digestive health |
| Protein | 9g | Aids muscle repair and growth |
Incorporating pita into meals can enhance your nutrition while satisfying your cravings for something wholesome and tasty.
Final Thoughts
While exploring the many benefits of pita bread, you might find yourself inspired to incorporate it into your meals more often. Its versatility is truly remarkable—try different pita variations like whole wheat, spinach, or even gluten-free to suit your preferences. You can stuff them with savory fillings, dip them in hummus, or use them as a base for delightful pizzas. The serving suggestions are endless; pair your pita with fresh salads, grilled meats, or vibrant vegetables for a colorful feast. Plus, pita’s pocket design makes it perfect for on-the-go meals, allowing you to enjoy freedom in your culinary adventures. Embrace the simplicity and joy of pita bread, and let it elevate your dining experience!
Frequently Asked Questions
Can I Use Whole Wheat Flour for Pita Bread?
Absolutely, you can use whole wheat flour for pita bread! It adds nutritional benefits and a nutty flavor, though it may alter the pita texture, making it slightly denser. Enjoy your healthier, flavorful creation!
How Do I Store Leftover Pita Bread?
To store leftover pita bread, wrap it in plastic wrap or aluminum foil. For longer freshness, place it in an airtight container or freezer bag. These storing tips guarantee your pita stays soft and delicious!
Can I Freeze Pita Bread?
If you want to hold onto your pita like cherished memories, freeze it using simple techniques. Wrap each piece tightly, then thaw them gently at room temperature or in the microwave for a warm embrace later.
What Are Common Variations of Pita Bread?
When exploring pita bread, you’ll discover delightful variations like herbed pita, bursting with flavor, and stuffed pita, filled with savory ingredients. Each offers a unique experience, inviting you to savor the freedom of culinary creativity.
How Can I Make Gluten-Free Pita Bread?
To make gluten-free pita bread, mix gluten-free flours like almond or rice with essential pita bread ingredients. Knead the dough, let it rise, then bake for delicious, fluffy pockets that everyone can enjoy without restrictions.
Conclusion
In the end, making pita bread is like crafting a warm hug for your taste buds. With each bite, you savor the rich history and simple ingredients that come together in perfect harmony. Whether you’re enjoying it with dips or as a wrap, homemade pita brings a delightful, fresh touch to any meal. So, roll up your sleeves, embrace the process, and let your kitchen fill with the comforting aroma of freshly baked bread. Happy baking!
