Pizza Crust Recipe
To make a delicious pizza crust, mix 1½ cups of warm water and 2¼ teaspoons of active dry yeast, letting it foam. Gradually add 4 cups of flour, 2 tablespoons of olive oil, 2 teaspoons of salt, and 1 teaspoon of sugar. Knead until smooth, let it rise for about an hour, then shape it into your desired base. This crust is your canvas for endless flavor combinations. Keep exploring to discover perfect pairings and toppings for your pizza!
Contents
History
When you think about pizza, it’s easy to focus on the delicious toppings and gooey cheese, but the history of pizza crust is just as fascinating. It all began with ancient origins, where flatbreads were baked by early civilizations in places like Egypt and Mesopotamia. These early creations laid the foundation for what would evolve into the beloved pizza crust we recognize today. As cultures mingled, regional variations emerged, from the thick, fluffy crusts of Chicago to the thin, crispy styles of Naples. Each region adds its unique flair, reflecting local ingredients and tastes. This rich history celebrates both tradition and creativity, allowing you to enjoy a slice that’s not just tasty but also steeped in centuries of culinary evolution.
Recipe
Making your own pizza crust at home can be a fun and rewarding experience. With just a few simple ingredients, you can create a delicious base for your favorite toppings. Whether you prefer a thin, crispy crust or a thick, chewy one, this recipe is versatile enough to meet your preferences. Plus, homemade pizza allows you to control the quality of ingredients, ensuring a fresher and more flavorful bite every time.
Before you start, it’s crucial to gather all your ingredients and tools. This will make the process smoother and more enjoyable. Make sure to use high-quality flour for the best texture and flavor. Once you’ve mastered this basic pizza crust recipe, you can experiment with different flavors by adding herbs or spices to the dough or trying out unique toppings for a personalized touch.
Ingredients:
- 2 ¼ teaspoons active dry yeast
- 1 ½ cups warm water (110°F)
- 4 cups all-purpose flour
- 2 tablespoons olive oil
- 2 teaspoons salt
- 1 teaspoon sugar
To prepare the pizza crust, begin by dissolving the active dry yeast and sugar in warm water. Let it sit for about 5 to 10 minutes until it becomes frothy. In a large mixing bowl, combine the flour and salt. Make a well in the center and pour in the yeast mixture and olive oil. Stir until a dough forms, then knead on a floured surface for about 8-10 minutes until smooth and elastic. Place the dough in a lightly oiled bowl, cover it with a damp cloth, and let it rise in a warm place for about 1 hour, or until it doubles in size. After rising, punch down the dough, roll it out to your desired thickness, and it’s ready for your favorite toppings!
When making pizza crust, keep in mind that the quality of your ingredients can greatly affect the final product. Using bread flour instead of all-purpose flour can yield a chewier texture. Additionally, allowing the dough to rise in a warm, draft-free area will help achieve a better rise. Don’t be afraid to experiment with different herbs or spices in the dough for added flavor. Finally, if you plan to store the dough for later use, it can be refrigerated for up to 3 days or frozen for up to a month—just make sure to let it come to room temperature before rolling it out!
Cooking Steps
Now that you’ve gathered your ingredients, it’s time to get your hands a little messy. Start by mixing warm water and yeast, then gradually add the flour for that perfect dough texture. Kneading it until smooth sets the stage for a delicious rise, leading you right to the ideal pizza base.
Step 1. Mix Warm Water and Yeast
To create the perfect pizza crust, start by combining one cup of warm water with two teaspoons of active dry yeast. The water temperature should be around 110°F; this warmth is vital for yeast activation. If it’s too hot, you risk killing the yeast, and if it’s too cold, the yeast won’t wake up properly. Stir the mixture gently until the yeast dissolves, and let it sit for about five to ten minutes. You’ll notice a frothy layer forming on top, indicating that the yeast is alive and ready to work its magic. This step is essential, as it sets the foundation for a crust that’s both airy and chewy, giving you that delightful pizza experience you crave. Enjoy the process!
Step 2. Add Flour Gradually
As you move forward in creating your pizza crust, gradually adding flour is crucial for achieving the right texture. Start with all-purpose flour, known for its versatility, then consider experimenting with other flour types like whole wheat or bread flour for added flavor and nutrition. Pour in the flour slowly, mixing continuously to guarantee even incorporation. This gradual addition allows you to monitor the dough’s consistency, preventing it from becoming too dry or too sticky. You’ll feel the transformation as the mixture starts to pull away from the bowl. Trust your instincts—if it feels tacky, hold back on more flour. The goal is a soft, pliable dough that’s ready for kneading. Enjoy the freedom to customize your crust!
Step 3. Knead Dough Until Smooth
Kneading the dough is where the magic begins, transforming your mixture into a silky, elastic masterpiece. You’ll want to flour your work surface lightly and turn your dough out, using your palms to push it down and away from you. Fold it over, then rotate and repeat. This rhythmic motion not only helps develop gluten but also guarantees the perfect dough consistency. Depending on your dough’s texture, you might need to tweak your kneading techniques, adding a sprinkle of flour if it feels too sticky or a splash of water if it’s too dry. In about 8-10 minutes, your dough should be smooth and elastic, ready for the next step in your pizza-making adventure!
Step 4. Let Dough Rise Covered
Once your dough is smooth and elastic, it’s time to let it rise. Place your dough in a lightly oiled bowl and cover it with a damp cloth or plastic wrap. This keeps the dough warm and creates the perfect dough temperature for fermentation. Ideally, you want it to rise in a cozy spot, away from drafts. During rising time, the dough will double in size, filling your kitchen with a delightful aroma. Check on it after about an hour; if it’s not quite ready, give it a little more time. Remember, patience is key! Once it’s puffed up, you’ll be one step closer to crafting that delicious pizza crust you crave. Enjoy the process!
Step 5. Shape Dough Into Pizza Base
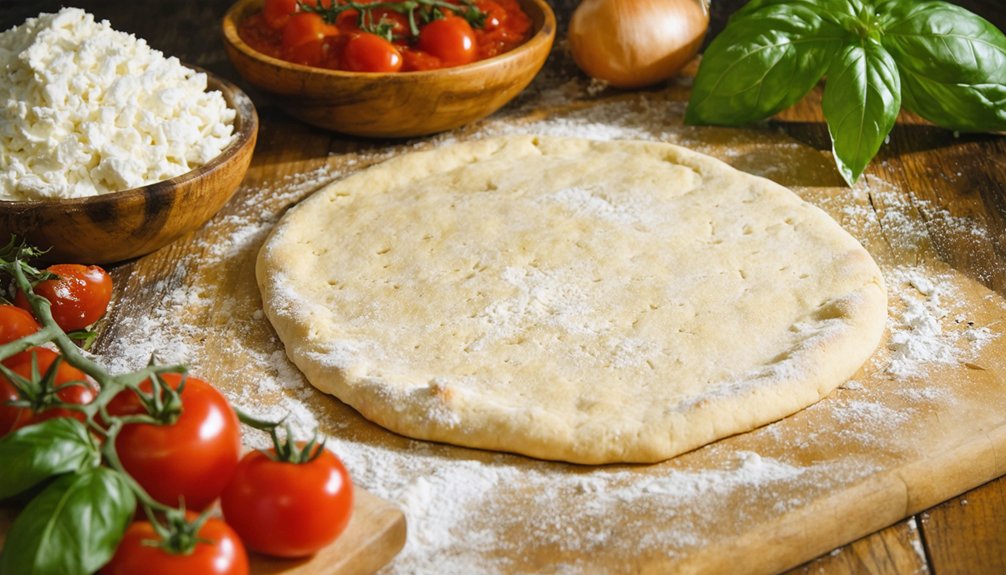
Transform your risen dough into a perfect pizza base by gently pressing it down on a floured surface. Use your fingertips to create a slight indentation in the center, which helps to maintain the dough’s airy texture. As you work, employ various dough shaping techniques—stretching, swirling, or tossing—to achieve your desired pizza base style. For a classic round shape, keep the edges thicker for a delicious crust, or go for a rectangular shape for a rustic appeal. Don’t rush; let the dough breathe and find its form. Once shaped, you’re ready to add your favorite toppings and bake. Embrace the freedom of creativity as you craft a pizza base that’s uniquely yours!
Nutritional Guide
Understanding the nutritional content of your pizza crust can empower you to make healthier choices in your meals. By being aware of caloric content and ingredient benefits, you can create a satisfying crust without sacrificing nutrition.
Here’s a quick nutritional overview:
| Ingredient | Caloric Content (per serving) | Benefits |
|---|---|---|
| Whole Wheat Flour | 100 | High in fiber, aids digestion |
| Olive Oil | 120 | Heart-healthy fats |
| Yeast | 10 | Boosts metabolism |
Opting for whole wheat flour enhances your crust while adding essential nutrients. A drizzle of olive oil not only enhances flavor but also promotes heart health. With this knowledge, you can craft a pizza that delights your taste buds and nurtures your body.
Final Thoughts
As you savor each bite of your homemade pizza, remember that the crust is more than just a base—it’s a canvas for creativity and nutrition. The beauty of making your own pizza lies in the endless possibilities. Experiment with various sauce pairings, from classic marinara to zesty pesto, and let your taste buds guide you. Don’t shy away from topping suggestions; whether you prefer spicy pepperoni, fresh veggies, or gourmet cheeses, the choice is yours. This freedom allows you to craft a pizza that truly reflects your personal style. Remember, each crust you create is unique and can be tailored to suit any dietary needs. Enjoy the process, embrace your creativity, and share your delicious masterpieces with friends and family!
Frequently Asked Questions
Can I Use Gluten-Free Flour for the Pizza Crust?
Absolutely, you can use gluten-free flour for your crust! Experiment with different flour types like almond or rice flour for delightful gluten-free options, allowing you to create a delicious, satisfying pizza that suits your dietary needs.
How Can I Store Leftover Pizza Crust?
So, you’ve got leftover pizza crust? Fear not, culinary adventurer! Wrap it tightly and freeze using smart freezing techniques. When hunger strikes, simply reheat it in the oven for a crispy comeback, ready to delight!
What Can I Substitute for Yeast in the Recipe?
If you’re out of yeast, try using baking soda combined with an acid, like vinegar. Alternatively, self-rising flour works too, as it already contains leavening agents. Both options can elevate your dish beautifully!
How Do I Prevent My Crust From Becoming Soggy?
To prevent a soggy crust, choose toppings wisely and avoid excessive moisture. Pre-bake your crust for a few minutes, and use high heat to create that perfect, crispy base. You’ll love the difference!
Can I Add Herbs to the Pizza Crust Dough?
You might worry adding herbs could overpower your dough, but it actually enhances the flavor! Experiment with various herb varieties like oregano or rosemary for a delicious twist that elevates your pizza experience to new heights.
Conclusion
As you take that first bite of your homemade pizza, the warm, golden crust cradles a symphony of flavors that dance on your palate. It’s not just a meal; it’s a celebration of creativity and comfort, a delicious canvas where your culinary dreams come alive. With each chew, you’re reminded that the simple act of making pizza can turn an ordinary night into a feast of joy. So, roll up your sleeves and let the magic of pizza-making inspire you!
