Potato Skins Recipe
When I crave a savory snack, potato skins always hit the spot! I start by baking russet potatoes and scoop out the flesh, leaving just the sturdy shell. After seasoning with salt, pepper, and maybe some garlic, I bake them until they’re crispy. Then, I load them with cheese and bacon, popping them back in the oven until the cheese melts. They’re perfect for any gathering, and there are countless variations to try!
Contents
History
When I think about the history of potato skins, I can’t help but marvel at how a simple dish transformed into a beloved appetizer. Originally, these delightful morsels emerged from humble kitchens, where frugality met creativity. As cultures intertwined, potato skins evolved, showcasing their culinary significance. They became a canvas for innovation, inviting toppings like cheese, bacon, and sour cream, each bite a reflection of culinary evolution. I find it fascinating how this dish reflects our changing tastes and social gatherings, bridging gaps between cultures and generations. From bar menus to upscale restaurants, potato skins embody a journey of flavors that resonate with so many. It’s a dish that not only satisfies hunger but also tells stories of tradition and modernity.
Recipe
Potato skins are a delightful appetizer or snack that can bring a burst of flavor and satisfaction to any gathering. They are made by baking potatoes until the skins are crispy and then stuffing them with a variety of delicious toppings. This dish is versatile, allowing you to customize it according to your taste preferences—whether you prefer the classic combination of cheese and bacon or want to experiment with vegetarian options.
This recipe is not only easy to follow but also perfect for parties, game days, or simply when you’re craving something savory. The key to perfect potato skins lies in selecting the right potatoes and ensuring that they are baked to a golden crisp. Once you master the technique of creating these delicious treats, they will quickly become a favorite in your household.
Ingredients:
- 4 medium russet potatoes
- 2 tablespoons olive oil
- Salt and pepper to taste
- 1 cup shredded cheddar cheese
- ½ cup cooked and crumbled bacon
- ¼ cup sour cream
- 2 green onions, sliced
- Optional: jalapeños, diced tomatoes, or any other desired toppings
Instructions:
Preheat your oven to 400°F (200°C). Wash and scrub the russet potatoes thoroughly, then poke several holes in each potato with a fork. Rub the potatoes with olive oil and sprinkle with salt. Place them directly on the oven rack and bake for about 45-60 minutes, or until they are tender and the skins are crispy. Once baked, remove the potatoes from the oven and let them cool slightly. Cut each potato in half lengthwise and scoop out some of the flesh, leaving about ¼ inch of potato on the skin. Brush the insides with a little more olive oil, season with salt and pepper, then return them to the oven for an additional 10 minutes. Remove them, fill with cheese and bacon, and bake for another 5-10 minutes until the cheese is melted and bubbly. Top with sour cream and green onions before serving.
Extra Tips:
For an even crispier finish, consider broiling the potato skins for a couple of minutes after adding the toppings. Keep an eye on them to prevent burning. Additionally, you can experiment with different types of cheese, such as mozzarella or pepper jack, for varied flavors. If you have leftover filling from the scooped-out potato, use it in soups, mashed potatoes, or as a filling for other dishes. Enjoy your potato skins fresh out of the oven, but they also reheat well if you have leftovers!
Cooking Steps
Let’s get started on making those delicious potato skins! First, I preheat the oven to 400°F, setting the stage for that perfect crispiness. From there, it’s all about scooping, seasoning, baking, and topping these tasty treats to perfection.
Step 1. Preheat Oven to 400°F
Before diving into the delicious world of potato skins, I always make certain to preheat my oven to a toasty 400°F. This oven temperature is essential for achieving that perfect crispiness on the outside while keeping the insides fluffy. It’s one of those cooking techniques that truly elevates the dish.
Here’s why I love this step:
- It guarantees even cooking throughout the potato skins.
- The high temperature helps render any fat for a richer flavor.
- Preheating saves time, so I can enjoy my snacks sooner.
- It creates a golden, crispy texture that’s irresistible.
- Consistent oven temperature makes every batch a success.
Step 2. Scoop Out Potato Flesh
With a sharp knife in hand, I carefully slice the baked potatoes in half lengthwise, revealing their soft, fluffy interiors. Using a small spoon, I gently scoop out the potato flesh, taking care to leave a sturdy shell for the skins. The flesh texture varies so much depending on the potato varieties; I often prefer russets for their light, airy quality or red potatoes for a creamier finish. As I scoop, I can imagine all the delicious fillings I’ll soon add. I make certain to collect the flesh in a bowl, setting it aside for later use in mashed potatoes or other tasty dishes. This step is essential, as it guarantees the perfect base for my flavorful potato skins.
Step 3. Season With Salt and Pepper
Once the potato flesh is scooped out, I turn my attention to the shells, ready to enhance their flavor. I grab my salt and pepper, knowing these basic seasoning techniques are key for taste enhancement. A sprinkle of sea salt elevates the natural flavor of the potato, while freshly cracked black pepper adds just the right amount of kick.
To really amp up the experience, I also consider adding:
- Garlic powder for a savory depth
- Smoked paprika for a hint of smokiness
- Onion powder for a bit of sweetness
- Parmesan cheese for a rich finish
- A dash of cayenne for some heat
With each shell seasoned to perfection, I can’t wait for the next steps.
Step 4. Bake Until Crispy
As I preheat the oven to a sizzling 400°F, I can’t help but feel the anticipation build for those perfectly crispy potato skins. To achieve that coveted crispy texture, I carefully place my seasoned potato halves, skin-side up, on a baking sheet lined with parchment paper. This simple baking technique allows air to circulate, ensuring an even crispness. Once they’re in the oven, I set a timer for 25 minutes, but I keep an eye on them. Halfway through, I rotate the tray for uniform browning. The aroma wafts through the kitchen, heightening my excitement. When I finally pull them out, golden and crunchy, I know that the perfect potato skin experience is just moments away.
Step 5. Top With Cheese and Bacon
Now that those potato skins are out of the oven and perfectly crispy, it’s time to take them to the next level by adding cheese and bacon. I like to mix things up with different cheese varieties, like sharp cheddar or creamy mozzarella, to create a delightful melty topping. For bacon alternatives, you might try crumbled turkey bacon or smoky tempeh for a unique twist. Here’s how I enhance my potato skins:
- Sprinkle a generous layer of cheese on each skin.
- Add crispy bacon pieces or your chosen bacon alternative.
- Return them to the oven for a few minutes until the cheese bubbles.
- Top with chopped green onions.
- Serve with sour cream for dipping.
Trust me, this combo is unbeatable!
Nutritional Guide
When I think about potato skins, I can’t help but appreciate their nutritional value alongside their deliciousness. These tasty treats offer a variety of nutritional benefits, making them a great option for both snack and meal. With a moderate calorie count, they can fit perfectly into a balanced diet while still satisfying cravings.
Here’s a quick breakdown of their nutritional profile:
| Nutrient | Amount per Serving | Benefits |
|---|---|---|
| Calories | 150 | Energy source |
| Protein | 5g | Muscle repair |
| Fiber | 3g | Digestive health |
Potato skins are a clever way to enjoy a guilt-free indulgence, providing essential nutrients while keeping your taste buds happy.
Final Thoughts
Though many might see potato skins as a simple appetizer, I believe they offer much more than meets the eye. These delightful bites can be a canvas for innovation, especially when savoring leftovers or experimenting with creative toppings.
Here are some ideas to elevate your potato skins experience:
- Cheesy Garlic Bliss: Melted cheese with roasted garlic for a savory twist.
- Spicy Tex-Mex: Top with black beans, jalapeños, and avocado for a kick.
- Breakfast Delight: Scramble eggs and bacon bits for a morning treat.
- Mediterranean Fusion: Add feta, olives, and a drizzle of olive oil for a fresh flavor.
- Sweet and Savory: Drizzle with honey and sprinkle crushed nuts for a dessert option.
Frequently Asked Questions
Can I Use Sweet Potatoes Instead of Regular Potatoes?
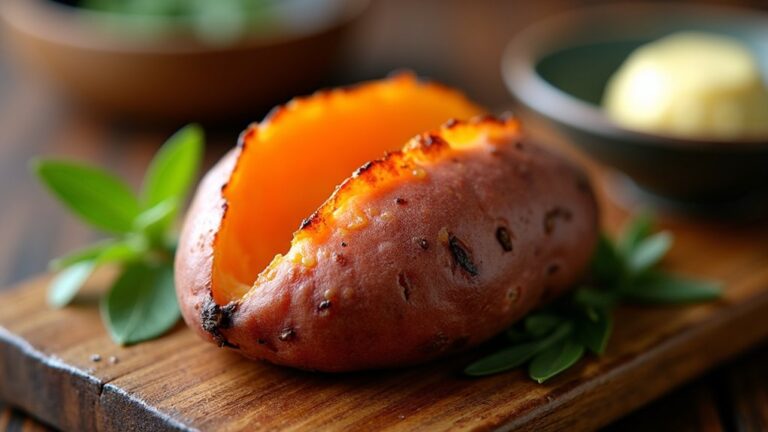
Absolutely, I love using sweet potatoes! They add a unique sweetness and nutritional benefits like more fiber and vitamins. Just remember, they cook a bit differently, so adjust your cooking time for perfect results.
How Do I Store Leftover Potato Skins?
Storing leftover potato skins is like tucking in a cozy blanket for the night. I wrap them tightly in foil, then pop them in the fridge. It’s the best practice for keeping them fresh and tasty!
Can I Freeze Cooked Potato Skins?
I’ve tried freezing cooked potato skins, but I noticed texture changes that aren’t ideal. If you do it, use proper freezing techniques like wrapping tightly to minimize freezer burn and preserve flavor. It’s worth experimenting!
What Toppings Can I Use for Potato Skins?
When I make potato skins, I love experimenting with cheese options like cheddar or vegan toppings such as avocado and salsa. It’s all about balancing flavors and textures for a delicious twist every time!
How Do I Make Potato Skins Healthier?
To make healthier choices, I opt for healthy substitutes like Greek yogurt instead of sour cream and load up on veggies. Practicing portion control helps me enjoy the flavors while keeping my meals light and nutritious.
Conclusion
So, if you think making potato skins is too complicated, let me assure you, it’s easier than you might believe! With just a few simple ingredients and steps, you can create a crispy, cheesy delight that’s perfect for any gathering or cozy night in. Picture the golden, crispy edges topped with melted cheese and crispy bacon, all bursting with flavor. Trust me, once you take that first bite, you’ll be hooked on this deliciously satisfying treat!
