Red Velvet Cake Recipe
To make a delicious red velvet cake, you’ll whisk together 2 ½ cups of flour, 1 ½ cups of sugar, and cocoa powder, then mix in buttermilk, eggs, and red food coloring. Bake the batter in two greased round pans at 350°F for about 25-30 minutes. Let it cool, then top with cream cheese or buttercream frosting. Each bite combines rich flavors and a velvety texture. Discover more tips and tricks to elevate your baking experience!
Contents
History
While many people associate red velvet cake with modern celebrations, its origins trace back to the early 20th century. You’ll find that this delightful dessert emerged from Southern origins, where cocoa powder and buttermilk combined to create a unique flavor and texture. The cake’s striking red hue, initially a result of chemical reactions, sparked curiosity and culinary evolution. As it gained popularity, bakers began enhancing its color with food dyes, solidifying its iconic status. Over the years, red velvet cake’s rich history has intertwined with Southern hospitality, becoming a staple at weddings and holidays. Each bite tells a story of tradition, creativity, and the pursuit of freedom through delicious flavors, inviting you to celebrate life’s moments with this vibrant treat.
Recipe
Red velvet cake is a beloved dessert that beautifully combines a rich, velvety texture with a striking crimson hue. Originating from the southern United States, this cake is not only visually stunning but also offers a delightful flavor profile that includes hints of cocoa and a creamy frosting. With its perfect balance of sweetness and tanginess, red velvet cake has become a popular choice for birthdays, weddings, and special celebrations.
Making red velvet cake at home is easier than you might think. With just a handful of ingredients and a little bit of patience, you can create a show-stopping dessert that will impress your family and friends. This recipe will guide you through the process of baking and assembling the cake, guaranteeing that you achieve the iconic look and taste that makes red velvet cake so irresistible.
Ingredients:
- 2 ½ cups all-purpose flour
- 1 ½ cups granulated sugar
- 1 teaspoon baking soda
- 1 teaspoon salt
- 1 teaspoon cocoa powder
- 1 ½ cups vegetable oil
- 1 cup buttermilk, room temperature
- 2 large eggs, room temperature
- 2 tablespoons red food coloring
- 1 teaspoon vanilla extract
- 1 teaspoon white vinegar
Cooking Instructions:
Preheat your oven to 350°F (175°C) and grease two 9-inch round cake pans. In a large mixing bowl, whisk together the flour, sugar, baking soda, salt, and cocoa powder. In another bowl, combine the vegetable oil, buttermilk, eggs, red food coloring, vanilla extract, and white vinegar. Gradually mix the wet ingredients into the dry ingredients until just combined, being careful not to overmix. Divide the batter evenly between the prepared pans and bake for 25-30 minutes or until a toothpick inserted in the center comes out clean. Allow the cakes to cool in the pans for 10 minutes before transferring them to a wire rack to cool completely.
Extra Tips:
For a perfect red velvet cake, confirm that all your ingredients are at room temperature before you start mixing. This will help achieve a smoother batter and a more even bake. If you want to elevate your cake, consider adding a cream cheese frosting or a buttercream frosting for a delicious contrast to the cake’s flavor. Additionally, you can add a splash of espresso powder to the batter to enhance the chocolate flavor without overpowering the iconic red hue. Finally, when decorating, feel free to get creative with sprinkles or edible flowers for an extra festive touch!
Cooking Steps
To create the perfect red velvet cake, you’ll start by preheating your oven to 350°F, setting the stage for baking magic. Next, mix your dry ingredients thoroughly to guarantee a fluffy texture, then gradually add in the wet ingredients for a smooth batter. Don’t forget to fold in the cocoa powder and add that vibrant food coloring carefully, bringing your cake to life with its signature hue.
Step 1. Preheat Oven to 350°F
The key to baking a perfect red velvet cake starts with the oven, and preheating it to 350°F is crucial. This oven temperature sets the stage for that moist, tender crumb you crave. Here are some baking tips to make certain your cake rises beautifully:
- Always preheat: It guarantees even cooking and prevents dense layers.
- Use an oven thermometer: Your oven’s built-in gauge might be off, so double-check for accuracy.
- Embrace the wait: Patience is essential; letting the oven reach the right temperature helps the cake develop flavor.
Step 2. Mix Dry Ingredients Thoroughly
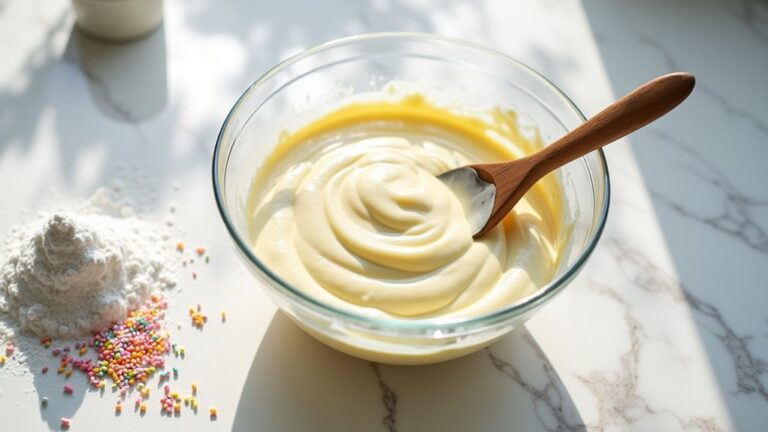
Mixing your dry ingredients thoroughly is an essential step that can make or break your red velvet cake. Start by accurately measuring flour, as too much or too little can ruin your cake’s texture. Use a spoon to aerate the flour before scooping, guaranteeing you don’t pack it too tightly. Once measured, combine your flour, cocoa powder, baking soda, and salt in a large bowl. Employ mixing techniques like whisking or sifting to blend everything evenly, helping to prevent clumps. This step not only enhances flavor distribution but also guarantees a consistent rise. Remember, a well-mixed dry base is the foundation of a moist, delicious red velvet cake, setting the stage for the perfect bake. Enjoy the freedom of creating!
Step 3. Add Wet Ingredients Gradually
As you shift from dry to wet ingredients, it’s essential to add them gradually to maintain the cake’s texture and secure a smooth batter. This method not only guarantees even blending but also enhances the overall flavor of your red velvet cake. Follow these steps using effective whisking techniques:
- Pour in the buttermilk – This creamy base will infuse moisture and richness.
- Add the vegetable oil – It keeps your cake tender while beautifully balancing the ingredient ratios.
- Incorporate eggs one at a time – This allows each egg to fully integrate, creating a velvety consistency.
Step 4. Fold in Cocoa Powder
Once you’ve successfully added the wet ingredients, it’s time to gently fold in the cocoa powder, ensuring your red velvet cake achieves that signature rich flavor and beautiful color. Using a spatula, scoop the batter from the bottom of the bowl, lifting it over the cocoa powder. This folding technique helps maintain the airy texture you want while evenly distributing the cocoa flavor. Be careful not to overmix; just a few strokes will do! You want to see streaks of cocoa swirling through the luscious batter. By mastering this baking technique, you’re on your way to a decadent cake. Remember, the cocoa powder not only adds flavor but also contributes to that iconic red hue once you add the coloring later.
Step 5. Add Food Coloring Carefully
To achieve that vibrant red hue characteristic of red velvet cake, you’ll need to add food coloring carefully. The right techniques can elevate your cake from ordinary to extraordinary. Here’s how to master the art of food coloring:
- Start small: Add a few drops of red food coloring and mix well. You can always add more if needed.
- Check color intensity: After mixing, evaluate the shade. Aim for that bold red, but remember, you can’t take it back!
- Layer it: If you’re feeling adventurous, consider using a combination of food coloring techniques, like gel and liquid, to achieve a deeper, richer color.
With these tips, you’ll guarantee your red velvet cake shines with that unmistakable, luscious hue!
Nutritional Guide
While enjoying a slice of red velvet cake, you might wonder about its nutritional profile. This delightful dessert has a unique blend of ingredients that contribute to its caloric content and benefits.
Here’s a quick look at some key components:
| Nutrient | Amount per Slice |
|---|---|
| Calories | 350 |
| Sugar | 22g |
| Protein | 4g |
The cake’s red hue comes from cocoa powder, which offers antioxidants, while buttermilk adds calcium for strong bones. The cream cheese frosting provides a dose of healthy fats, making each bite both indulgent and beneficial. So, as you savor that slice, appreciate the balance of taste and nutrition!
Final Thoughts
Enjoying a slice of red velvet cake isn’t just about satisfying your sweet tooth; it’s also a celebration of rich flavors and textures. As you plunge into this delightful treat, consider these baking tips to elevate your experience:
- Experiment with flavor variations: Try adding espresso or orange zest for a unique twist.
- Perfect your cream cheese frosting: Balance sweetness with tanginess for the ideal topping.
- Don’t rush the baking process: Allowing your cake to cool completely guarantees perfect layering.
Each bite embodies a sense of freedom and joy, making your baking journey worthwhile. So, roll up your sleeves, embrace your creativity, and let the deliciousness of red velvet cake bring happiness to your table!
Frequently Asked Questions
Can I Use a Gluten-Free Flour Substitute for This Recipe?
Yes, you can use gluten-free options! Just make sure to adjust your baking tips for moisture and texture. Experiment with blends that include almond or coconut flour for a delightful, satisfying result without gluten. Enjoy!
How Can I Store Leftover Red Velvet Cake?
Think of your cake as a treasure; storing leftovers requires care. Wrap it tightly in plastic, then refrigerate. This keeps it fresh and moist, ensuring every slice remains a delightful experience for you later!
What Other Frostings Pair Well With Red Velvet Cake?
You’ll love pairing your cake with cream cheese frosting for a tangy kick. Buttercream adds sweetness, while chocolate ganache brings richness. For a lighter touch, whipped cream provides a fluffy, airy finish that’s simply delightful.
Is There a Vegan Version of Red Velvet Cake?
Absolutely, you can enjoy a vegan version! Use plant-based options like almond milk, flaxseed eggs, and coconut oil as vegan substitutes. These ingredients create a moist, delicious cake that everyone can savor, regardless of dietary preferences.
Can I Use Food Coloring Alternatives for This Recipe?
Why settle for boring food coloring? Embrace your freedom! You can use natural colorants like beet juice for a vibrant hue. It’ll not only brighten your dish but also add a delicious twist. Enjoy the creativity!
Conclusion
In the end, you’ve crafted a stunning red velvet cake that’s sure to impress your guests—just like a glamorous Hollywood starlet at an award show! With its vibrant color and rich flavor, this dessert isn’t just a treat; it’s an experience. Remember, every slice tells a story, blending history with your own culinary creativity. So, the next time you whip up this classic, you’re not just baking; you’re participating in a delicious legacy that’s stood the test of time!


