Sourdough Sandwich Bread Recipe
To make a delightful sourdough sandwich bread, I start with 1 cup of active sourdough starter, mix it with warm water, flour, sugar, salt, and melted butter. I blend the ingredients, knead the dough until smooth, and let it ferment for rich flavor. After shaping it into loaves, I bake until golden brown for a perfect texture. This recipe is simple yet rewarding, and there’s so much more to explore about enhancing flavors and techniques.
Contents
History
When I think about the history of sourdough, I can’t help but marvel at its ancient roots that stretch back thousands of years. The sourdough origins trace to ancient civilizations, where wild yeast and bacteria naturally mingled, creating a unique fermentation process. Imagine our ancestors discovering that a simple mixture of flour and water could transform into a leavening agent, revolutionizing their bread-making. This spontaneous fermentation not only enhanced flavor but also improved the bread’s shelf life. As I explore the past, I find inspiration in how this age-old technique has evolved, sparking innovative approaches in modern baking. Embracing these historical elements allows us to blend tradition with creativity, crafting something truly remarkable today.
Recipe
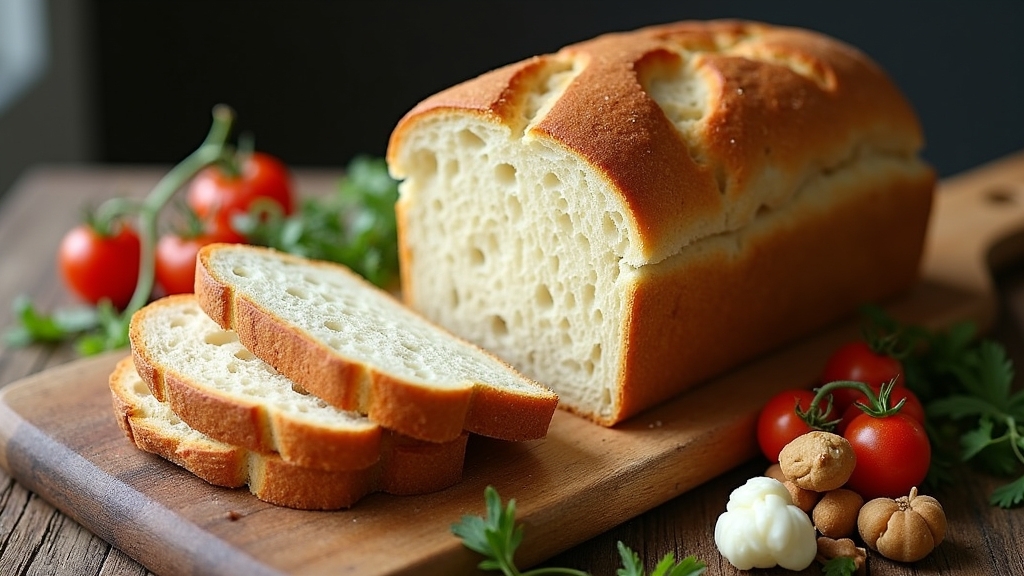
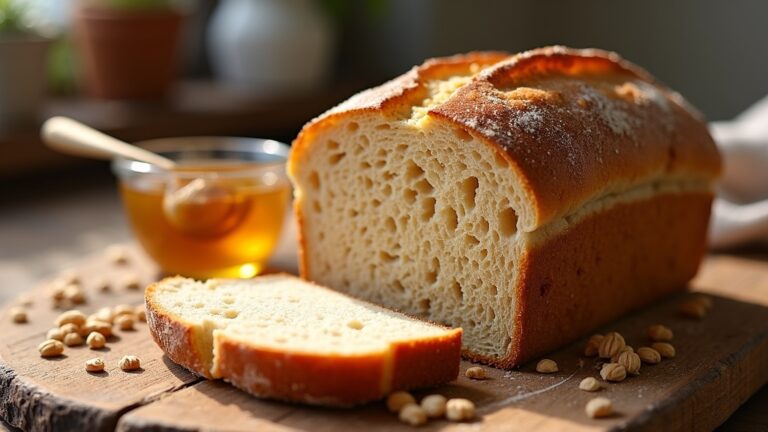
Sourdough sandwich bread is a delightful and versatile bread that adds a touch of tanginess to your lunches. Unlike standard sandwich bread, this recipe utilizes the natural fermentation process of sourdough, resulting in a loaf that is not only flavorful but also has a lovely chewy texture. The crust is golden brown and slightly crisp, while the interior remains soft and airy, making it perfect for sandwiches, toast, or simply enjoying with butter.
Sourdough sandwich bread brings a delightful tanginess and a chewy texture, perfect for sandwiches or enjoying with butter.
To make sourdough sandwich bread, you’ll need an active sourdough starter, which is the key ingredient for achieving that characteristic sour flavor. The process requires a bit of patience, as the dough needs time to rise and develop flavor, but the end result is well worth the wait. This recipe is straightforward enough for both beginners and seasoned bakers, so gather your ingredients and let’s get started!
Ingredients:
- 1 cup active sourdough starter
- 1 cup warm water
- 4 cups all-purpose flour
- 2 tablespoons sugar
- 1 tablespoon salt
- 2 tablespoons unsalted butter, melted
Instructions:
In a large mixing bowl, combine the active sourdough starter and warm water, stirring until well mixed. Gradually add the flour, sugar, and salt, mixing with a wooden spoon or your hands until a shaggy dough forms. Add the melted butter and knead the dough on a floured surface for about 8-10 minutes, until smooth and elastic. Place the dough in a lightly greased bowl and cover it with a damp cloth or plastic wrap. Allow it to rise in a warm place for 4 to 6 hours, or until it has doubled in size. Once risen, punch down the dough and shape it into a loaf. Place it in a greased 9×5-inch loaf pan, cover it again, and let it rise for an additional 2 to 3 hours. Preheat the oven to 375°F (190°C) and bake the bread for 30-35 minutes, or until golden brown and sounding hollow when tapped. Let it cool before slicing.
Extra Tips:
For best results, make sure your sourdough starter is active and bubbly before beginning the recipe. If your kitchen is cool, consider placing the dough in a slightly warm oven (turned off) to encourage rising. You can also experiment by adding seeds, herbs, or other spices to the dough for additional flavor. When storing your bread, keep it wrapped in a cloth or in a paper bag to maintain its crusty exterior, and slice it only when you’re ready to eat to prevent it from getting stale. Enjoy your homemade sourdough sandwich bread!
Cooking Steps
Now that we have our ingredients ready, let’s jump into the cooking steps! I’ll guide you through activating the sourdough starter, mixing the dough, and kneading it to perfection. Each step is essential in creating that soft, flavorful sandwich bread we all love.
Step 1. Activate Sourdough Starter
To kick off the activation of my sourdough starter, I gather a few essential ingredients: flour, water, and a pinch of patience. I mix equal parts of flour and water, creating a thick, paste-like consistency. As I stir, I think about the myriad sourdough benefits—enhanced flavor, better digestion, and that delightful tang. After mixing, I cover the bowl with a breathable cloth, allowing it to breathe while keeping out unwanted pests. I set it in a warm spot, perfect for fermentation. Daily, I check on my starter, feeding it more flour and water to guarantee its liveliness—this is fundamental for effective starter maintenance. Within days, I can smell the sour notes, signaling that my starter is ready for baking magic!
Step 2. Mix Dough Ingredients Thoroughly
Combining the ingredients is where the magic begins. I start by measuring my flour and water with precision, ensuring the ingredient ratios are just right. Using a mixing technique like the pinch and fold method, I gently incorporate my activated sourdough starter. This technique not only blends the ingredients but also maintains the dough’s texture, essential for that perfect rise. I focus on achieving a cohesive mixture, ensuring there are no dry patches. It’s fascinating to watch as the flour transforms, absorbing moisture and coming alive. As I mix, I can feel the dough becoming more elastic, hinting at its potential. This step sets the foundation for the incredible bread to come, so I give it my full attention.
Step 3. Knead Dough Until Smooth
After thoroughly mixing the dough ingredients, it’s time to knead. I find this step essential for developing the right dough consistency. I turn the dough onto a lightly floured surface and use the classic push-fold-turn kneading technique. With each push of my palms, I feel the dough transforming—becoming smoother and more elastic. I pay attention to its texture, ensuring it isn’t too sticky or dry; if it is, I sprinkle in a touch more flour or a splash of water. Kneading for about 10 minutes, I enjoy the tactile feedback of the dough as it responds to my movements. This process not only strengthens the gluten but also infuses a personal touch into my sourdough, making it uniquely mine.
Step 4. Shape the Dough Loaf
Gently pressing and folding the dough, I begin shaping it into a loaf. This part is essential not only for structure but also for loaf aesthetics. I use a few shaping techniques to create a beautiful and functional bread. Here’s how I do it:
- Pre-shape: I lightly flatten the dough and fold the edges toward the center, creating a round shape.
- Bench rest: I let the dough relax for 15 minutes, allowing it to recover.
- Final shape: I stretch and tuck the dough into a tight rectangle, ensuring the seams are on the bottom.
- Tension: I pull the dough towards me while shaping, building surface tension for that perfect rise.
With each fold, I can feel the potential of the loaf coming to life!
Step 5. Proof the Dough Properly
Proofing the dough is an essential step that transforms your loaf into a light and airy masterpiece. I typically start by placing my shaped dough in a warm, draft-free spot, aiming for a dough temperature around 78°F to 82°F. This ideal warmth activates the yeast, encouraging fermentation. I use various proofing techniques, like the “poke test,” to check readiness; if the indentation springs back slowly, I’m good to go. Covering my dough with a damp cloth prevents it from drying out and helps maintain moisture. Timing can vary, but I usually let it rise for 1 to 2 hours. Trust your instincts—watching for that perfect rise is part of the fun!
Nutritional Guide
While crafting a delicious loaf of sourdough sandwich bread, it’s important to reflect on its nutritional value to make informed choices about what we eat. Understanding the caloric content and ingredient benefits can elevate our baking experience. Here’s a quick glance at what goes into our bread:
| Ingredient | Nutritional Benefits |
|---|---|
| Whole Wheat Flour | High in fiber, aids digestion |
| Sourdough Starter | Probiotics for gut health |
| Sea Salt | Essential minerals, enhances flavor |
This table highlights how each ingredient contributes to both taste and nutrition. By choosing quality ingredients, we not only create a flavorful bread but also nourish our bodies. So, let’s embrace sourdough’s wholesome goodness!
Final Thoughts
As I reflect on my journey of baking sourdough sandwich bread, I can’t help but appreciate how this process blends both artistry and science. It’s been a delightful adventure filled with experimentation and learning. Here are some of my favorite baking tips and flavor variations that you might find inspiring:
- Experiment with Add-ins: Try adding herbs, seeds, or even cheese for a unique twist.
- Adjust Hydration Levels: A wetter dough can yield a more open crumb.
- Play with Fermentation Time: Longer fermentation enhances flavor complexity.
- Use Different Flours: Incorporating whole wheat or rye can elevate the taste profile.
Baking sourdough is about more than just bread; it’s about creativity and connection. Enjoy your own baking journey!
Frequently Asked Questions
Can I Use All-Purpose Flour Instead of Bread Flour?
I’ve often used all-purpose flour instead of bread flour. The benefits include a lighter texture, making my creations softer. While it may not rise as much, it still yields delicious results, perfect for innovative baking adventures!
How Long Does Sourdough Bread Stay Fresh?
Sourdough bread stays fresh for about three to four days at room temperature. I love storing it in a paper bag to maintain its crusty texture, enhancing the sourdough shelf life and overall bread freshness.
Can I Freeze Sourdough Sandwich Bread?
They say, “A stitch in time saves nine.” I often freeze my sourdough sandwich bread using smart freezing techniques. For best results, I thaw it slowly in the fridge, keeping that fresh taste intact.
What Can I Add for Flavor Variations?
If you’re looking to jazz up your bread, try adding herbs like rosemary, nut options like walnuts, cheese varieties like cheddar, spice blends like smoked paprika, sweeteners like honey, and seed toppings for crunch and flavor!
How Do I Store Leftover Sourdough Bread?
To keep my leftover bread fresh, I use the best storage method: wrapping it in a cloth and placing it in a paper bag. This way, it stays flavorful and retains that delightful texture longer!
Conclusion
In the end, baking sourdough sandwich bread is a delightful journey that’s well worth the effort. You’ll find the aroma wafting through your kitchen will have everyone coming back for seconds. It’s true what they say—there’s no place like home, especially when it’s filled with the warmth of freshly baked bread. So, roll up your sleeves and immerse yourself in this rewarding adventure; you’ll be savoring each slice long after the last crumb has vanished!


