Starbucks Cake Pops Recipe
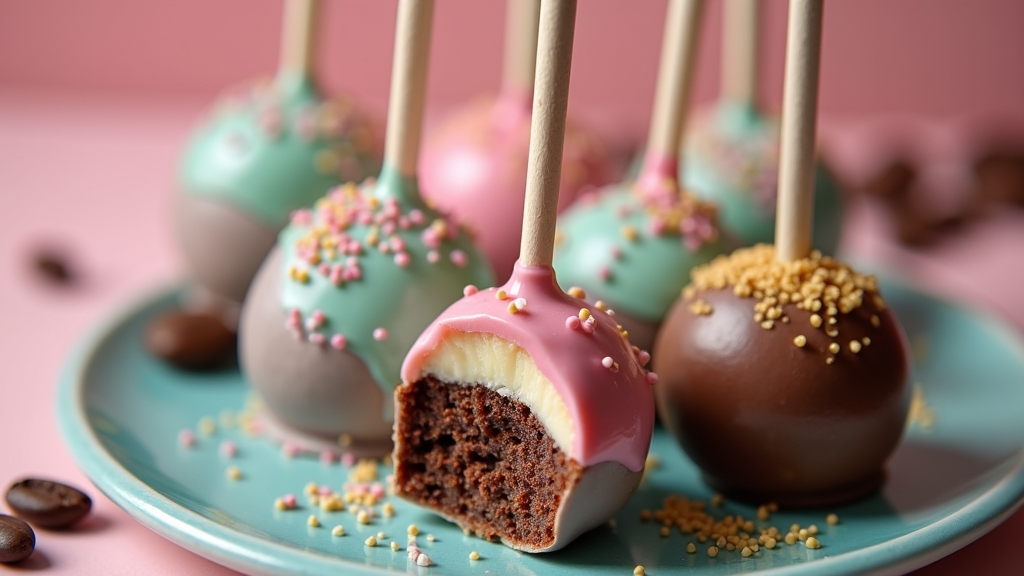
If you’re craving Starbucks cake pops, I’ve got a simple recipe for you! Just bake a cake, crumble it, and mix it with frosting to form small balls. Then, dip them in melted chocolate and chill until set. Feel free to customize with sprinkles or unique toppings! With just a few steps, you can enjoy these delightful treats at home. Keep going, and I’ll share more tips and inspirations to elevate your cake pop game!
Contents
History
When I think about the history of Starbucks cake pops, I can’t help but feel a sense of nostalgia. These delightful treats burst onto the scene in the early 2010s, enchanting coffee lovers and sweet tooths alike. Their origins trace back to the trend of cake pops pioneered by Bakerella, who showcased these miniature confections as playful, portable desserts. Starbucks embraced this innovation, crafting their own versions with unique flavors and eye-catching designs. The cake pop quickly became a staple in their stores, balancing the rich taste of cake with the convenience of a lollipop. This combination of creativity and accessibility transformed the dessert landscape, making cake pops a beloved treat for both adults and kids, and forever changing how we indulge on the go.
Recipe
Starbucks Cake Pops have become a popular treat for those who enjoy a sweet bite with their coffee. These delightful little confections are not only fun to eat, but they also provide a perfect canvas for creativity in flavor and decoration. Making your own cake pops at home can be a rewarding experience, allowing you to explore different cake flavors, coatings, and toppings that suit your taste.
The process of creating cake pops starts with baking a cake, which is then crumbled and mixed with frosting to form a dough-like consistency. This mixture is shaped into small balls and placed on sticks before being coated in chocolate or candy melts. The result is a moist, flavorful treat that can be customized with sprinkles, drizzles, or other decorations, making them an ideal choice for parties, celebrations, or just a sweet snack.
Creating cake pops involves baking a cake, crumbling it, and mixing it with frosting to shape delicious, customizable treats on sticks.
Ingredients:
- 1 box of cake mix (any flavor)
- 1 can of frosting (matching flavor to cake)
- 1 package of candy melts or chocolate
- Lollipop sticks
- Sprinkles or other decorations (optional)
- Styrofoam block or a cake pop stand (for drying)
Instructions:
Begin by baking the cake according to the package instructions, then let it cool completely. Once cooled, crumble the cake into a large bowl and mix in the frosting until fully combined. Scoop out small portions of the mixture and roll them into balls, placing them on a baking sheet lined with parchment paper. Melt the candy melts or chocolate according to the package instructions, then dip the tip of each lollipop stick into the chocolate before inserting it into a cake ball. Once all the sticks are in, refrigerate the cake pops for about 30 minutes to firm them up. After chilling, coat each cake pop in the melted chocolate, letting any excess drip off, then decorate with sprinkles as desired. Allow the pops to dry and set in a styrofoam block or cake pop stand.
Extra Tips:
When making cake pops, be sure to allow the cake to cool completely before crumbling, as this will prevent the mixture from becoming too wet. If the dough feels too soft to roll into balls, refrigerate it for a bit longer to firm it up. Experiment with different flavors of cake and frosting combinations for unique taste profiles, and don’t hesitate to get creative with decorations—coconut flakes, crushed nuts, or colored sugar can all add a fun touch to your cake pops!
Cooking Steps
Now that we’ve got the recipe, let’s jump into the cooking steps to bring those delightful cake pops to life. First, I’ll prepare the cake mixture and then roll it into fun little balls. Once that’s done, we’ll dip them in chocolate and get creative with toppings!
Step 1. Prepare Cake Mixture
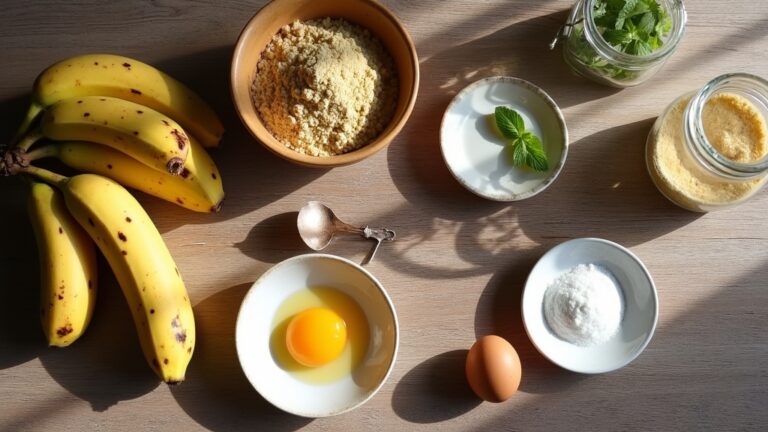
Let’s plunge into preparing the cake mixture, where the magic begins! I love experimenting with various cake flavors, whether it’s rich chocolate, zesty lemon, or classic vanilla. First, I gather my ingredients: flour, sugar, eggs, and butter, ensuring everything’s at room temperature for ideal mixing. Using my trusty stand mixer, I combine the dry ingredients before slowly incorporating the wet ones. This mixing technique is essential; I aim for a smooth, lump-free batter that’s bursting with flavor. I can’t resist tasting the mixture—it’s the perfect preview of what’s to come! Once it’s ready, I’ll pour it into a prepared pan, ready to bake. Trust me, this cake mixture sets the foundation for irresistible cake pops!
Step 2. Form Into Balls
As soon as the cake has cooled to perfection, I plunge into the fun part: forming the cake into balls. I start by crumbling the cake into a large bowl, ensuring it’s broken down to achieve that ideal, moist cake texture. Using my hands, I carefully combine the cake crumbs with a bit of frosting, feeling its consistency as I go. I find that using a light touch helps maintain the cake’s integrity while utilizing various shaping techniques to mold the mixture into perfect, bite-sized spheres. It’s all about balance—too much pressure can lead to dense balls, while too little can make them fall apart. Once I’ve shaped them all, I can’t help but admire my little creations!
Step 3. Dip in Chocolate
Once the cake balls are perfectly shaped and chilled, I melt some high-quality chocolate to create a luscious coating that’ll elevate these treats. I love using a mix of dark, milk, and white chocolate types for an eye-catching contrast. For melting, I prefer the double boiler technique, which gently warms the chocolate until it’s silky smooth. Alternatively, I sometimes use the microwave, ensuring to heat in short bursts and stir frequently to avoid any scorching. Once melted, I dip each cake ball into the chocolate, allowing the excess to drip off. It’s essential to be quick here; the chocolate should coat evenly while keeping that dreamy, glossy finish. This step adds not just flavor, but an irresistible allure to the cake pops!
Step 4. Chill Before Decorating
After dipping the cake balls in chocolate, it’s essential to chill them before decorating. This step not only helps the chocolate set properly but also provides a smoother surface for your creative touches. I usually pop them in the fridge for about 30 minutes, but if I’m pressed for time, a quick 15-minute freeze works wonders too—those are my go-to chilling techniques! Once they’re firm, I’m ready to release my decorating tips. A well-chilled cake pop allows sprinkles or toppings to adhere flawlessly, creating that professional finish we all crave. Plus, it gives you a moment to envision your design. Trust me, this little waiting game is worth every minute for a stunning presentation!
Step 5. Add Sprinkles or Toppings
Now that your cake pops are perfectly chilled, it’s time to get creative with sprinkles and toppings! I love to melt some chocolate or candy coating first, as it acts like glue for our decorations. Dip the top of each cake pop into the coating, letting the excess drip off. This is where the magic happens—grab a handful of colorful sprinkles or festive toppings and sprinkle them over the wet coating. Get creative! You can mix and match textures, from crunchy nuts to fluffy coconut. If you’re feeling adventurous, consider drizzling contrasting chocolate over the sprinkles for an eye-catching effect. Each cake pop can become a unique masterpiece that not only tastes great but looks stunning too!
Nutritional Guide
When it comes to enjoying Starbucks cake pops, understanding their nutritional content can make all the difference in your dessert experience. These delightful treats are not just visually appealing; they also pack some interesting caloric content and ingredient benefits. Let’s take a closer look:
| Nutrient | Amount per Cake Pop |
|---|---|
| Calories | 150 |
| Sugar | 18g |
| Protein | 2g |
| Dietary Fiber | 1g |
Knowing this information helps me indulge mindfully. The combination of moist cake and creamy coating not only satisfies my sweet tooth but also provides a little protein and fiber, making each bite a balanced treat. Enjoying cake pops can be both a pleasure and a thoughtful choice!
Final Thoughts
Although I relish the idea of treating myself to a Starbucks cake pop, it’s essential to appreciate them in moderation. These delightful bites encapsulate the latest cake pop trends and showcase innovative dessert variations that excite the palate. Each pop is a tiny masterpiece, merging flavors and textures into one scrumptious experience. As I explore different recipes, I find inspiration to create my own unique combinations, whether it’s a rich chocolate or a fruity explosion. Embracing the art of making cake pops allows me to indulge creatively while enjoying the satisfaction of crafting a delightful treat. So, why not experiment with flavors and shapes? After all, the joy of dessert is in the discovery!
Frequently Asked Questions
Can I Use Gluten-Free Flour for This Recipe?
I’ve experimented with gluten-free alternatives before, and while the baking texture might change slightly, you’ll still achieve delicious results. Just choose a good blend, and I promise it’ll be a delightful treat!
How Long Do Starbucks Cake Pops Last?
I’ve found that cake pops generally last about a week when stored properly. For ideal shelf life, keep them in an airtight container in the fridge. These storage tips help maintain their deliciousness longer!
What Flavors Can I Make Besides Chocolate and Vanilla?
I’ve discovered that stepping beyond chocolate and vanilla opens a world of flavors! Imagine strawberry flavor bursting with sweetness or a revitalizing hint of lemon zest. These options ignite creativity and delight in every bite!
Can I Freeze Cake Pops for Later Use?
Yes, I freeze cake pops for later enjoyment! I use smart freezing techniques, like wrapping them tightly in plastic wrap. For storage tips, place them in an airtight container to maintain freshness and flavor. Enjoy!
Where Can I Buy Cake Pop Sticks?
If you’re looking for cake pop sticks, I usually find them at online retailers like Amazon or specialty baking shops. They offer a variety of cake pop supplies that inspire creativity in my baking adventures.
Conclusion
As I savor that delightful cake pop, I can’t help but think about how these sweet treats have become a comforting staple for so many. Did you know that Starbucks sells over 1 million cake pops each year? That’s a proof of their irresistible charm! Whether enjoyed during a coffee break or as a special treat, these little bites of joy bring us together, one pop at a time. So, let’s keep baking and sharing this delicious tradition!
