Wedding Cake Recipe
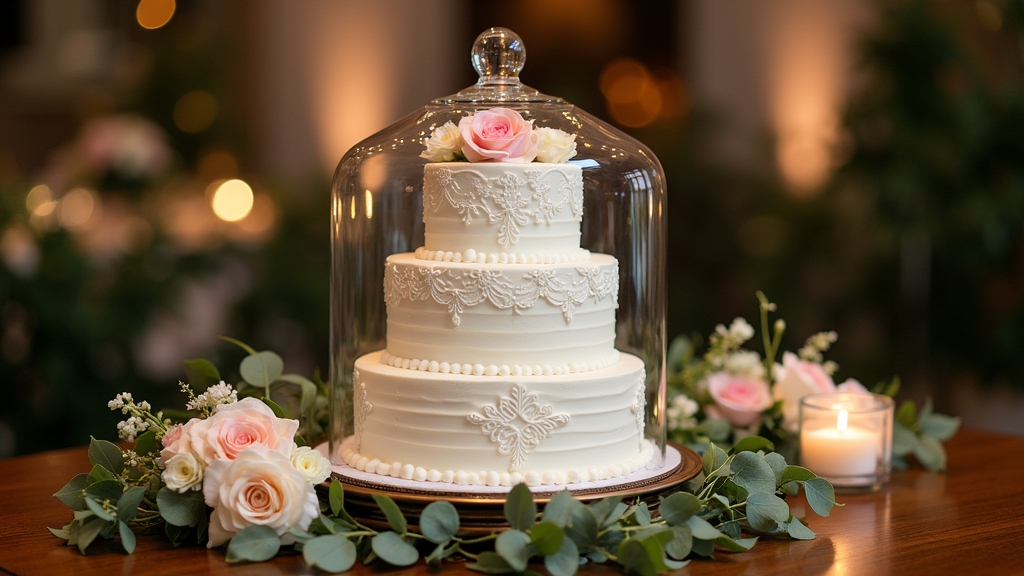
I’m thrilled to share my favorite wedding cake recipe! It combines 4 cups of flour, 2 cups of sugar, and 1 cup of butter, yielding a moist, delicious treat that serves a crowd. After blending your ingredients, bake at 350°F for about 25-30 minutes. Now, let me tell you about the best ways to decorate and personalize your cake to perfectly match your wedding theme and style. You won’t want to miss these creative tips!
Contents
History
When we think about wedding cakes, it’s fascinating to realize how much history they carry. Originating from ancient Roman wedding traditions, cakes were initially made of barley or wheat, symbolizing fertility and prosperity. Over centuries, these humble beginnings evolved into the lavish, multi-tiered confections we see today. Cake symbolism deepened as the layers transformed into a representation of the couple’s journey—each tier reflecting milestones in their relationship. In Victorian England, the white icing signified purity and new beginnings, a stark contrast to the darker cakes of the past. Today, couples innovate by infusing personal flavors and designs, merging tradition with modernity. The wedding cake remains a delicious centerpiece, embodying love, unity, and the sweet promise of the future.
Recipe
Creating the perfect wedding cake is a sweet and cherished task that brings joy to any special occasion. This classic wedding cake recipe is designed to serve a crowd while maintaining a delicate and moist texture that pairs beautifully with a variety of fillings and frostings. Whether you’re baking for your own wedding or helping a friend, this cake is sure to impress guests with its elegant flavor and stunning presentation.
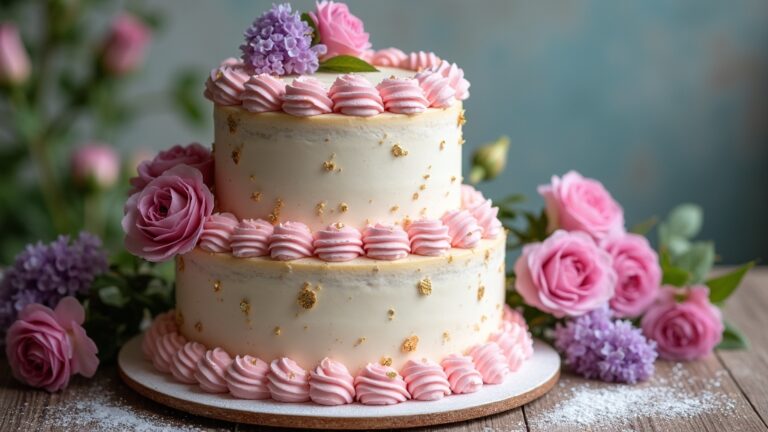
The beauty of this wedding cake lies not only in its taste but also in its versatility. You can customize the flavors to suit the couple’s preferences, such as vanilla, almond, or lemon, and choose from an array of fillings like buttercream, fruit preserves, or ganache. With its tiered design and decorative elements, a wedding cake can be a centerpiece of the celebration, making the effort put into baking and decorating well worth it.
Ingredients:
- 4 cups all-purpose flour
- 2 cups granulated sugar
- 1 cup unsalted butter, softened
- 1 cup whole milk
- 6 large eggs
- 2 tablespoons baking powder
- 1 teaspoon vanilla extract
- 1/2 teaspoon salt
- Optional: food coloring for decoration
Instructions:
Preheat your oven to 350°F (175°C) and grease and flour three 9-inch round cake pans. In a large mixing bowl, cream together the softened butter and granulated sugar until light and fluffy. Add the eggs one at a time, mixing well after each addition. Stir in the vanilla extract. In another bowl, sift together the flour, baking powder, and salt. Gradually add the dry ingredients to the wet mixture, alternating with the milk, and mix until just combined. Pour the batter evenly into the prepared cake pans and bake for 25-30 minutes or until a toothpick inserted in the center comes out clean. Allow the cakes to cool in the pans for 10 minutes before transferring them to wire racks to cool completely.
Extra Tips:
To make your wedding cake even more special, consider using a simple syrup to keep the layers moist. Just combine equal parts water and sugar, heat until dissolved, and brush it onto the cake layers before adding frosting. Additionally, for a professional touch, use a bench scraper to smooth out the frosting, and have fun experimenting with different piping techniques or edible decorations. Finally, remember to allow your cake to rest for a day before the event; this will enhance the flavors and make it easier to handle during assembly.
Cooking Steps
Now that we’ve gathered our ingredients, it’s time to bring them together through a series of precise steps. I always start by preheating the oven to 350°F, creating the perfect environment for our cake to rise beautifully. From mixing the dry ingredients to folding in the batter, each step builds towards that delicious wedding cake we all dream of.
Step 1. Preheat the Oven to 350°F
Preheating the oven to 350°F is an essential first step in baking a perfect wedding cake. This precise oven temperature guarantees that your cake rises beautifully and bakes evenly, a cornerstone of effective baking techniques. As you prepare, take a moment to set the mood in your kitchen.
- Gather your ingredients for a seamless workflow.
- Confirm your baking pans are prepared with grease or parchment paper.
- Double-check your oven’s calibration for accuracy.
Step 2. Mix Dry Ingredients Together
Once you’ve gathered your ingredients, it’s time to combine the dry components that will form the foundation of your wedding cake. Start by measuring your flour, sugar, baking powder, and salt, ensuring you adhere to the precise dry ingredient ratios for ideal texture. I like to whisk them together in a large bowl, using a gentle mixing technique to aerate the flour and evenly distribute the leavening agents. This step is essential, as a well-mixed dry blend sets the stage for a light, fluffy cake. Pay attention to any clumps and break them apart, ensuring a smooth mixture. Once everything’s integrated, your dry ingredients are ready to unite with the wet ones, paving the way for a truly delightful wedding cake.
Step 3. Add Wet Ingredients Gradually
As you prepare to add the wet ingredients, it’s essential to do so gradually to guarantee a smooth, cohesive batter. I’ve found that this mixing technique not only secures even distribution but also allows the ingredient ratios to blend perfectly. Here’s how I approach this step:
- Start by incorporating the wet ingredients in small increments.
- Mix gently after each addition, allowing the batter to absorb the moisture fully.
- Keep an eye on the texture; it should be silky and well-combined.
This deliberate approach brings out the best in your wedding cake, enhancing its flavor and texture. Remember, patience is key here; rushing can lead to lumps and uneven consistency, which we certainly want to avoid for that perfect celebration cake!
Step 4. Fold in the Batter
Now that you’ve mixed the wet ingredients into the dry, it’s time to fold in the batter. This step is essential for achieving that perfect cake texture you’re aiming for. I gently scoop a spatula beneath the mixture, lifting and turning it over, careful not to overmix. The goal is to maintain a light and airy batter consistency, which will result in a beautifully risen cake. As I fold, I can feel the ingredients melding together, creating a harmonious blend without deflating the air I’ve incorporated. I take my time, ensuring every bit of flour is moistened, as this attention to detail is what elevates my wedding cake from good to spectacular. Let’s keep that innovation flowing!
Step 5. Bake for 25 Minutes
With the batter perfectly folded, it’s time to bake the cake for 25 minutes. This step is essential, as it transforms our mixture into a delightful creation with the perfect cake textures. As I preheat the oven, I verify it’s calibrated correctly—precision is key in baking techniques. I carefully place the cake in the center of the oven, allowing the heat to circulate evenly.
- Monitor the baking process; avoid opening the oven door too soon to prevent deflation.
- Use a toothpick to check for doneness; it should come out clean.
- Let the cake rest for a few minutes before removing it from the pan, allowing the structure to set beautifully.
This careful attention guarantees a stunning wedding cake!
Nutritional Guide
When planning a wedding cake, understanding its nutritional aspects can be just as important as selecting the perfect flavor. I always consider the caloric content and how ingredient substitutions can create a healthier yet delicious dessert. Here’s a quick guide that can help you navigate your choices:
| Ingredient | Standard Option | Healthier Substitution |
|---|---|---|
| Sugar | 2 cups | 1 cup honey |
| Butter | 1 cup | 1/2 cup applesauce |
| All-purpose flour | 3 cups | 2 cups almond flour |
| Eggs | 4 large | 1/2 cup flaxseed meal |
Final Thoughts
After considering the nutritional aspects of your wedding cake, it’s time to reflect on the bigger picture. This cake isn’t just a dessert; it symbolizes your love and commitment. Perfecting the cake decoration and exploring unique flavor variations can truly elevate your celebration.
- Choose a design that resonates with your theme.
- Experiment with unexpected flavors to surprise your guests.
- Don’t forget to personalize it with meaningful details.
Frequently Asked Questions
How Far in Advance Can I Bake a Wedding Cake?
I’d recommend baking your wedding cake up to three days in advance. Proper wedding cake storage in an airtight container keeps it fresh, and following this baking timeline guarantees your cake remains delicious and beautiful.
Can I Freeze a Wedding Cake After Baking?
Did you know that around 70% of bakers successfully freeze cakes without compromising flavor? I’ve used various freezing techniques for cake storage, and yes, you can freeze a wedding cake after baking for later enjoyment.
What Type of Frosting Is Best for Wedding Cakes?
When choosing frosting, I prefer buttercream for its creamy texture and flavor, though fondant offers a sleek finish. Cream cheese frosting adds a tangy twist, making it a delightful choice for unique wedding cake experiences.
How Do I Transport a Wedding Cake Safely?
Last time I transported a delicate cake, I secured it on a stable, flat surface. For cake stability, I recommend using non-slip mats and sturdy boxes. Always drive carefully—those bumps can be disastrous! Transport tips matter!
What Decorations Work Well With Wedding Cakes?
When I design cakes, I love using floral arrangements, elegant cake toppers, and shimmering edible glitter. Color themes, ribbon accents, and fresh fruit garnishes elevate the look, creating a memorable visual experience for everyone.
Conclusion
As I reflect on the rich history of wedding cakes, I can’t help but wonder: do these towering confections really bring couples good fortune? Many believe the sweetness of the cake symbolizes the sweetness of married life. Whether you’re baking your first cake or perfecting a family recipe, it’s clear that each layer holds not just flavor, but also love and tradition. So, let’s celebrate with a slice and toast to the delicious journey ahead!
